> Portal Navigation:
>
> - Append `.md` to any URL under `https://dev.wix.com/docs/` to get its markdown version.
> - Pages are either content pages (article or reference text) or menu pages (a list of links to child pages).
> - To get a menu page, truncate any URL to a parent path and append `.md` (e.g. `https://dev.wix.com/docs/sdk.md`, `https://dev.wix.com/docs/sdk/core-modules.md`).
> - Top-level index of all portals: https://dev.wix.com/docs/llms.txt
> - Full concatenated docs: https://dev.wix.com/docs/llms-full.txt
## Resource: Tutorial | Create a Coffee Catalog with Blocks
## Article: Creating a Coffee Catalogue
## Article Link: https://dev.wix.com/docs/build-apps/get-started/tutorials/tutorial-create-a-coffee-catalog-with-blocks.md
## Article Content:
# **Tutorial: Create a Coffee Catalog with Blocks**
**Editor compatibility**
Wix Blocks apps aren't supported in the Wix Harmony editor. Existing Blocks apps remain available for purchase on the Wix App Market for Wix Editor and Wix Studio sites. To learn more, see [About Wix Harmony and Blocks](https://dev.wix.com/docs/build-apps/develop-your-app/frameworks/wix-blocks/about-wix-harmony-and-blocks.md).
Learn how to build a coffee catalog app using **Wix Blocks**. The app includes a widget that presents the products in a repeater, including a nested repeater for various rating options. It also allows users to configure it through dashboard pages.

## Before You Begin
To help you get started quickly, we’ve provided a template of the app. Follow the next steps to get your own copy of the template.
1. Make sure you're logged in to your Wix Studio account. If you don’t already have one, [sign up for a Wix Studio account](https://manage.wix.com/account/custom-apps).
1. Come up with a unique string for your app's namespace. If you do this tutorial more than once under the same Wix account, provide a different string each time.
1. Copy the following URL to your clipboard (but do not paste it in your browser yet).
```ts
https://dev.wix.com/apps-templates/open-blocks-template?templateId=f0dbfb81-0793-4c24-a732-9c5b6dfe4273&namespace=&templateName=coffee-catalog
```
1. Insert your unique string in the designated place, after the term `namespace=`. Make sure to delete the brackets.
1. Go to your browser and paste the link you created. Blocks will open with your own copy of the app.
The app you just created includes the following segments for you to work with:
- **Products widget** – You’ll complete its design and functionality.
- **Taste Notes widget** – You'll add this as a nested widget inside the Products widget.
- **Public utilities** – Ready-to-use functions for implementing your widget’s logic.
- **Dashboard pages** - For users to edit, add and delete products.
## **Step 1 | Add a Nested Widget**
First, complete the **Products widget** by adding the **Taste Notes widget** as a [nested widget](https://dev.wix.com/docs/build-apps/develop-your-app/frameworks/wix-blocks/site-widgets/add-nested-widgets-in-blocks.md).
1. In the **App Interface** menu, select the **Products widget**.
2. Click **+ Add Elements** > **My Widgets**.
3. Click on the **Taste Notes widget** to add it inside the main widget.
See how it looks

## **Step 2 | Adjust the nested widget’s design**
When added, the **Taste Notes widget** appears in a random location inside the **Products widget**. Let’s position it properly.
1. Click on the **Taste Notes widget** to select it.
2. Drag it to the empty space in one of the repeater columns, just above the button.
3. Open the **Inspector**, then select the fourth row to place the widget there.
4. Click the **Stretch**  icon to adjust its size.
Now, the nested widget is neatly placed within the main widget.
See how it looks

## **Step 3 | Explore the Layers panel**
Now is a good time to check the **Layers panel** to understand the structure of widgets and the repeaters in them:
- The **main repeater** is the product catalog, named **productsRepeater**.
- Inside it, there's a **nested list of taste notes**, named **notesRepeater**.
- Inside the **notesRepeater**, there's another repeater displaying **intensity ratings**, named **rating**.
See how it looks

## **Step 4 | Add and manage the Products collection**
Let’s create [a collection](https://dev.wix.com/docs/build-apps/develop-your-app/frameworks/wix-blocks/cms-collections-in-blocks/about-cms-collections-in-blocks.md), which will store data for the coffee catalog. The collection includes the following fields:
- **Origin Country** – Text
- **Price** – Number
- **Coffee Image** – Image URL
- **Taste Notes** – Array
The **Taste Notes** field contains an array of title-value pairs representing flavor intensity, for example:
`["crisp:3","caramel:2","nutty:2"]`
See the Taste Notes design

### Download the data file and create the collection
To save time, we’ve created a data file with five sample items for you.
1. [Download the file](https://8d8f933e-b7b3-441d-8a83-b8f6a97ecedf.filesusr.com/ugd/9580ec_a1e3b672f6bc432099db2bb072494478.csv?dn=Coffee.csv).
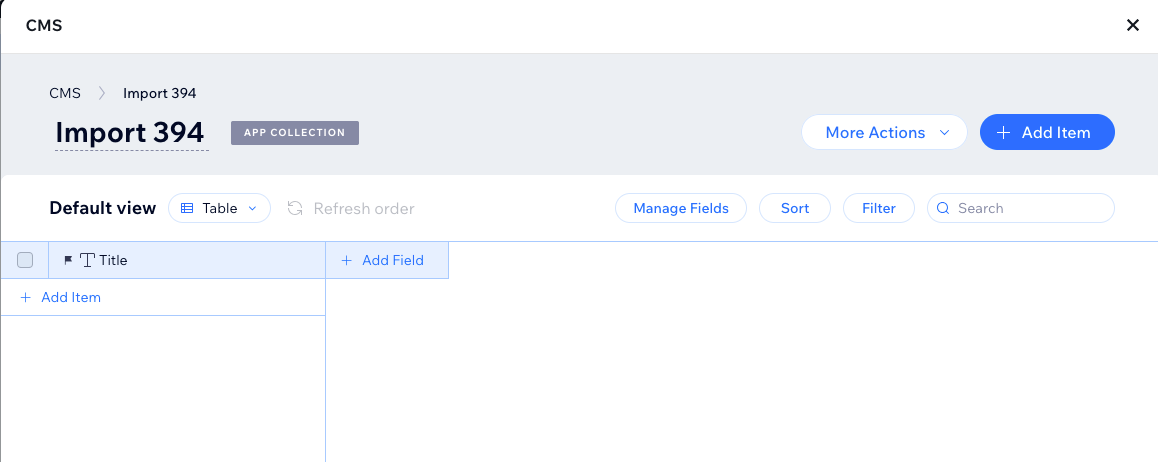
2. Click the **CMS** icon  in the left menu.
3. Click **Create Collection**.
4. Name your app if you haven't, and give it a **namespace** (or use the default).
5. Choose **Import from CSV**, then click **Next**.
See how it looks

### Configure the imported fields
Your new collection is currently empty. Now, let's configure the **Coffee Name** and **Taste Notes** fields to ensure the data imports correctly.
See how it looks
1. Click **More Actions** > **Import Items**, then select the file you downloaded.
2. In the **Configure Column** dropdown for **Coffee Name**, select **Existing Field**.
3. Verify that **Map to Collection Field** is now set to **Title**.
4. Check the box next to **Taste Notes** to include it in the import.
5. In the **Configure Column** dropdown, select **New Field**.
6. Change **Field Type** to **Text**, then click **Next**.
See how it looks

7. The **Created Date**, **Updated Date**, and **Owner** fields won’t be imported—that’s fine. Click **Import** to complete the process.
### Change the type of the Taste Notes field
The **Taste Notes** field was imported as plain text, but it should be an **Array** containing title-value pairs. Let’s update its type.
1. Click the three dots next to **Taste Notes**, then select **Edit**.
See how it looks

2. Click **Change Type** and scroll down to find **Array**. Select it. Accept the notification - about changing the field type.
See how it looks

3. After making these changes, your collection should look like this:
See how it looks

You can close the collection now.
## Step 5 | Update the `collectionUtils.js` file
Since you’re working with a template, update the placeholder collection name in the `collectionUtils.js` file.
1. Open the **Your Collections** tab.
2. Click the three dots next to your collection name.
3. Select **Edit Settings**.
4. Copy your **Collection ID** (e.g., `@user/coffee-catalog/Import360`).
5. Open `collectionUtils.js`.
6. Replace the placeholder text in the `return` statement of the `getCollection()` function with your **Collection ID**. For example:
```ts
export function getCollectionName(){
return '@user/my-new-app-167/Import370';
}
```
See where to find collectionUtils.ja

## Step 6 | Load the main repeater
Let's load the data from the collection to the main repeater, `productsRepeater`.
1. Go to the **Products** widget code panel.
See how it looks

2. Delete the boilerplate code and paste the following code, to load the repeater with the data from the collection.
```ts
import {getCollectionName, queryCollectionData, populateRepeater} from 'public/collectionUtils'
$w.onReady(async function () {
populateRepeater($w('#productsRepeater'), await queryCollectionData(getCollectionName()));
$w('#productsRepeater').onItemReady(($item, data)=>{
$item('#name').text = data.title || '';
$item('#origin').text = data.originCountry || '';
$item('#price').text = data.price ? `$${data.price}` : '';
$item('#image').src = data.coffeeImage || '';
$item('#tasteNotes1').notes = data.tasteNotes || [];
})
});
```
Note:
You have an error in the `notes` property and this is expected. We'll handle it in the following steps.
3. Now click the  icon and preview your widget. Since we didn't connect the **Test Notes** widget yet, the notes aren't shown yet.
## Step 7 | Add a property for the Taste Notes widget
In order to pass data from the **Products** widget to the nested **Taste Notes** widget, we'll create a new [widget API property](https://dev.wix.com/docs/build-apps/develop-your-app/frameworks/wix-blocks/widget-api/blocks-widget-properties.md) in the nested widget. We'll name the property `notes`.
The data from this property will be used to update the `notesRepeater` and the `rating` repeater that's nested in it.
1. Make sure that the **Taste Notes** widget is selected.
2. Click the **Widget API**  icon in the widget's code panel.
3. Click **Add New Property**.
4. Name the property `notes`.
5. Set the display name to `notes`.
6. Set the type to `Text`.
7. Click **Create**.
See how it looks

## Step 8 | Add code to handle the `notes` property
We’ll now add the code to handle the `notes` property in the `onPropsChanged()` function of the **Taste Notes** widget. This code will:
- Transform the incoming `notes` data into a format that the repeater can use.
- Split each note into a title and value.
- Populate the `notesRepeater` with the transformed data.
- Set up the `rating` repeater by creating a list of rating icons based on the note's value.
Delete the boilerplate code in the **Taste Notes** widget and copy the following instead:
```js
$widget.onPropsChanged((oldProps, newProps) => {
const transformedNotes = updateListRepeater(newProps.notes);
$w('#notesRepeater').data = transformedNotes;
$w('#notesRepeater').onItemReady(($item, data) => {
$item('#noteTitle').text = data.note;
const ratingIcons = [];
for (let i = 0; i < data.value; i++) {
ratingIcons.push({ _id: `${data._id}-${i}` });
}
$item('#rating').data = ratingIcons;
});
});
function updateListRepeater(notes) {
return notes.map((item, idx) => {
const [note, value] = item.split(':');
return { note, value: parseInt(value), _id: `${idx}` };
});
}
```
Go to **Preview**  in the **Products** widget, to see that everything is working.
See how it looks

## Step 9 | Copy and paste the Dashboard IDs
Now we'll start managing the Dashboard Pages of the app. [Dashboard pages](https://dev.wix.com/docs/build-apps/develop-your-app/frameworks/wix-blocks/dashboard-pages/about-dashboard-pages-in-blocks.md) are the back-office of your app, enabling users to manage its data. This app includes two dashboard pages, which we have already designed:
- **Manage Products**: Lets users manage all products.
- **Product Form**: Lets users manage individual products.
Every dashboard page has an ID, which is used in the app code. Let's copy these IDs and paste them in our `constants.js` file.
1. Click the **Dashboard Interface**  icon.
2. Select the **Manage Products** dashboard page.
3. Hover over the three dots and click **Page Settings**.
4. Copy the **Page ID**.
See how it looks

5. Click the **Public & Backend** icon **{}** and open the `constants.js` file.
6. Paste the copied Page ID into the appropriate place, replacing the placeholder text in the `constants.js` file.
7. Repeat the process for the **Product Form** dashboard page to copy and paste its Page ID.
See how it looks

## Step 10 | Add code to the Manage Products dashboard page
Let's add the code for the **Manage Products** page.
See how it looks
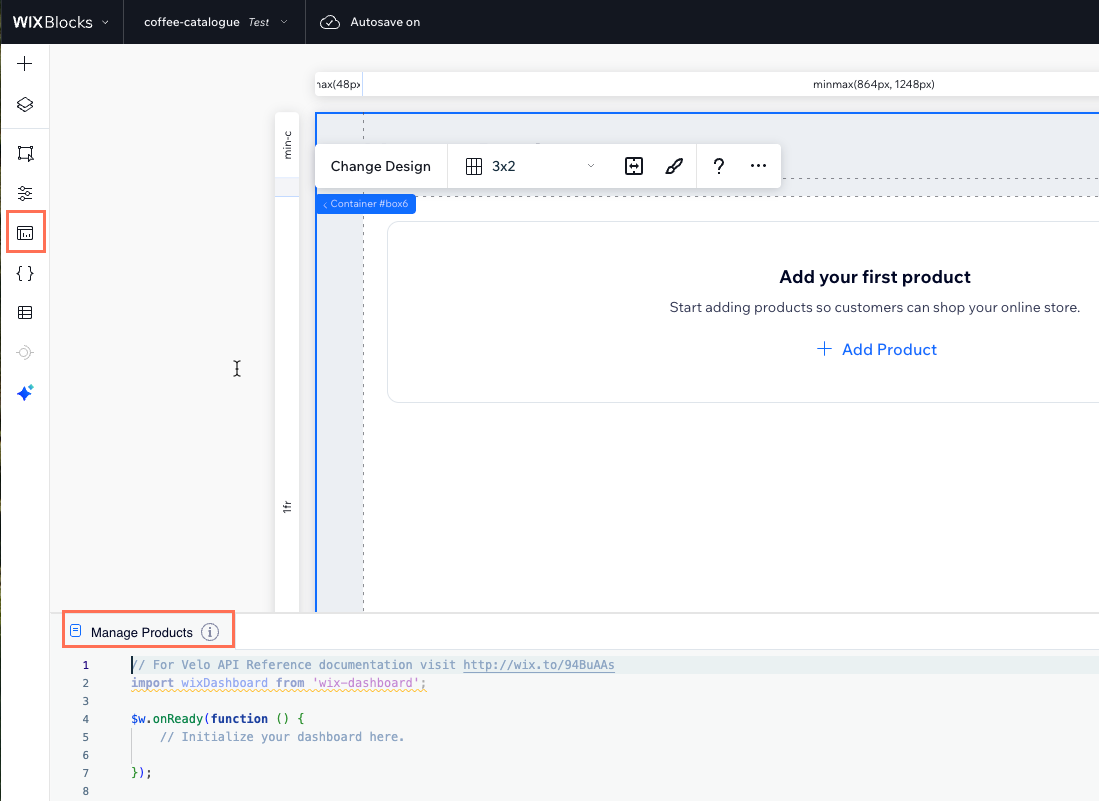
1. Select the **Manage Products** dashboard page and open its code panel.
1. First, import the required libraries and constants. These provide access to Wix's dashboard, data manipulation functions, and constants for page navigation and default settings.
```js
import wixDashboard from 'wix-dashboard';
import wixData from 'wix-data';
import { getCollectionName, queryCollectionData, populateRepeater } from 'public/collectionUtils';
import { DASHBOARDS, defaultImage } from 'public/constants';
```
1. In the `$w.onReady()`, initializes the page by setting up two actions:
- First add an event listener to the **Add Product** button so that when clicked, it navigates the user to the **Product Form** page for adding a new product
- Second, query the product data from the database and populates the `productsRepeater` with the retrieved data.
```js
$w.onReady(async () => {
$w('#addProductBtn').onClick(() => wixDashboard.navigate({ pageId: DASHBOARDS.FORM }));
populateRepeater($w('#productsRepeater'), await queryCollectionData(getCollectionName()));
});
```
1. Still in the `$w.onReady()`, add the `$w('#productsRepeater').onItemReady()` function. This function sets up event handlers for each item in the repeater. The function:
- Updates the product details like name, origin, price, and image based on the data.
- Attaches click event handlers to the **Edit** button, which navigates to the **Product Form** page with a unique product ID, and the **Remove** button, which triggers the removal of the product.
```js
$w('#productsRepeater').onItemReady(($item, data) => {
$item('#productName').text = data.title || '';
$item('#productOrigin').text = data.originCountry || '';
$item('#productPrice').text = data.price ? `$${data.price}` : '';
$item('#productImage').src = data.coffeeImage || defaultImage;
$item('#editProduct').onClick(() => wixDashboard.navigate({ pageId: DASHBOARDS.FORM, relativeUrl: data._id }));
$item('#removeProduct').onClick(() => handleRemove(data._id, data.title));
});
```
1. Let's add the `handleRemove()` function. This function:
- Removes a product from the database using its ID.
- Shows a success toast message.
- Updates the repeater by filtering out the removed product from the displayed data.
```js
async function handleRemove(productId, productName) {
await wixData.remove(getCollectionName(), productId);
wixDashboard.showToast({ message: `Product "${productName}" removed successfully`, type: 'success' });
$w('#productsRepeater').data = $w('#productsRepeater').data.filter(item => item._id !== productId);
}
```
See the full Manage Products code
```js
import wixDashboard from 'wix-dashboard';
import wixData from 'wix-data';
import { getCollectionName, queryCollectionData, populateRepeater } from 'public/collectionUtils';
import { DASHBOARDS, defaultImage } from 'public/constants';
$w.onReady(async () => {
$w('#addProductBtn').onClick(() => wixDashboard.navigate({ pageId: DASHBOARDS.FORM }));
populateRepeater($w('#productsRepeater'), await queryCollectionData(getCollectionName()));
$w('#productsRepeater').onItemReady(($item, data) => {
$item('#productName').text = data.title || '';
$item('#productOrigin').text = data.originCountry || '';
$item('#productPrice').text = data.price ? `$${data.price}` : '';
$item('#productImage').src = data.coffeeImage || defaultImage;
$item('#editProduct').onClick(() => wixDashboard.navigate({ pageId: DASHBOARDS.FORM, relativeUrl: data._id }));
$item('#removeProduct').onClick(() => handleRemove(data._id, data.title));
})
});
async function handleRemove(productId, productName) {
await wixData.remove(getCollectionName(), productId);
wixDashboard.showToast({ message: `Product "${productName}" removed successfully`, type: 'success' });
$w('#productsRepeater').data = $w('#productsRepeater').data.filter(item => item._id !== productId);
}
```
## Step 11 | Add Code to the Product Form dashboard page
Let's add the code for the **Product Form** dashboard page. This form displays an empty form for adding a new product, or a form with the product details for editing an existing product.
1. Select the **Product Form** dashboard page and go to its code panel.
1. First, import some necessary modules and define two global variables, `productId` and `repeaterData`, which will be used later.
```js
import wixData from 'wix-data';
import wixDashboard from 'wix-dashboard';
import { getCollectionName } from 'public/collectionUtils';
import { DASHBOARDS, defaultImage} from 'public/constants';
let productId, repeaterData = [];
```
### Add the `$w.onReady()` function
The `onReady()` function initializes the page with the following actions:
* The [`observeState`](https://dev.wix.com/docs/velo/apis/wix-dashboard/observe-state.md) function listens for state changes and determines whether to load an existing product or reset the form.
When the **Manage Products** page navigates to this form, it either includes a product ID or not.
* **If a product ID exists**, the form loads the product data for editing.
* **If no product ID exists**, the form remains empty, allowing the user to add a new product.
The `onReady()` function handles the button actions according to this logic.
Add this code as your `onReady()` function:
```js
$w.onReady(() => {
wixDashboard.observeState((_, env) => {
productId = env.pageLocation.pathname.replace('/', '');
productId ? loadProduct(productId) : resetForm();
});
$w('#cancelBtn').onClick(() => {
resetForm();
wixDashboard.navigate({ pageId: DASHBOARDS.MANAGE_ITEMS });
});
$w('#saveBtn').onClick(async () => {
await saveProduct();
wixDashboard.navigate({ pageId: DASHBOARDS.MANAGE_ITEMS });
});
$w('#uploadButton').onChange(async () => {
handleImageUpload();
});
});
```
### Add the `loadProduct()` function
Add a `loadProduct()` function, which populates the form's inputs fields with product data.
```js
async function loadProduct(id) {
const product = await wixData.get(getCollectionName(), id);
$w('#productName').value = product.title || '';
$w('#productOrigin').value = product.originCountry || '';
$w('#productPrice').value = product.price || '';
$w('#productImage').src = product.image;
setNotesRepeaterData(product.tasteNotes || []);
}
```
### Populate the Notes Repeater
Add a `setNotesRepeaterData()` function, which formats and assigns taste notes data to the repeater. The function:
- Splits each taste note into note and rating.
- Ensures at least three note slots are always available.
- Updates the repeater with structured data.
```js
function setNotesRepeaterData(tasteNotes) {
let parsedNotes = [];
if (Array.isArray(tasteNotes)) {
parsedNotes = tasteNotes.slice(0, 3).map(noteString => {
const [note, rating] = noteString.split(':');
return { note: note || "", rating: parseInt(rating, 10) || 0 };
});
}
while (parsedNotes.length < 3) {
parsedNotes.push({ note: "", rating: 0 });
}
repeaterData = parsedNotes.map((item, i) => ({
_id: String(i),
note: item.note || "",
rating: item.rating || 0
}));
$w('#notesRepeater').data = repeaterData;
$w('#notesRepeater').onItemReady(($item, itemData) => {
$item('#noteTitle').value = itemData.note;
$item('#noteRating').value = itemData.rating;
});
}
```
### Reset the form
Add a `resetForm()` function, which clears all form fields and sets a default image.
```js
function resetForm() {
$w('#productName, #productOrigin, #productPrice').value = '';
$w('#productImage').src = defaultImage;
setNotesRepeaterData([]);
}
```
### Save product data
Add a `saveProduct()` function. When the **Save** button is clicked, the function:
- Gathers all input values from the form.
- Converts taste notes into a formatted array ("note:rating").
- If the product already exists (`productId` is set), it updates the record.
- If no ID exists, it creates a new product.
- Displays a toast notification when the save is successful.
```js
async function saveProduct() {
const updatedNotes = [];
$w('#notesRepeater').forEachItem(($item) => {
const note = $item('#noteTitle').value;
const rating = $item('#noteRating').value;
updatedNotes.push(`${note}:${rating || 1}`);
});
const productData = {
title: $w('#productName').value,
originCountry: $w('#productOrigin').value,
price: parseFloat($w('#productPrice').value) || 0,
image: $w('#productImage').src || defaultImage,
tasteNotes: updatedNotes
};
if (productId) {
await wixData.update(getCollectionName(), { ...productData, _id: productId });
} else {
await wixData.insert(getCollectionName(), productData);
}
wixDashboard.showToast({ message: 'Product "${productData.title}" saved successfully', type: 'success' });
}
```
### Handle image upload
Add a `handleImageUpload()` function, which uploads the selected file and updates the product image field. If the upload fails, it resets to the default image and shows an error toast.
```js
async function handleImageUpload() {
if ($w('#uploadButton').value.length === 0) {
return;
}
try {
const uploadedFiles = await $w('#uploadButton').uploadFiles();
if (uploadedFiles && uploadedFiles.length > 0) {
$w('#productImage').src = uploadedFiles[0].fileUrl;
}
} catch (error) {
console.error('File upload failed:', error);
$w('#productImage').src = defaultImage;
wixDashboard.showToast({
message: 'Failed to upload image',
type: 'error'
});
}
}
```
See the full Product Form code
```js
import wixData from 'wix-data';
import wixDashboard from 'wix-dashboard';
import { getCollectionName } from 'public/collectionUtils';
import { DASHBOARDS, defaultImage} from 'public/constants';
let productId, repeaterData = [];
$w.onReady(() => {
wixDashboard.observeState((_, env) => {
productId = env.pageLocation.pathname.replace('/', '');
productId ? loadProduct(productId) : resetForm();
});
$w('#cancelBtn').onClick(() => {
resetForm();
wixDashboard.navigate({ pageId: DASHBOARDS.MANAGE_ITEMS });
});
$w('#saveBtn').onClick(async () => {
await saveProduct();
wixDashboard.navigate({ pageId: DASHBOARDS.MANAGE_ITEMS });
});
$w('#uploadButton').onChange(async () => {
handleImageUpload();
});
});
});
async function loadProduct(id) {
const product = await wixData.get(getCollectionName(), id);
$w('#productName').value = product.title || '';
$w('#productOrigin').value = product.originCountry || '';
$w('#productPrice').value = product.price || '';
$w('#productImage').src = product.image;
setNotesRepeaterData(product.tasteNotes || []);
}
function setNotesRepeaterData(tasteNotes) {
let parsedNotes = [];
if (Array.isArray(tasteNotes)) {
parsedNotes = tasteNotes.slice(0, 3).map(noteString => {
const [note, rating] = noteString.split(':');
return { note: note || "", rating: parseInt(rating, 10) || 0 };
});
}
while (parsedNotes.length < 3) {
parsedNotes.push({ note: "", rating: 0 });
}
repeaterData = parsedNotes.map((item, i) => ({
_id: String(i),
note: item.note || "",
rating: item.rating || 0
}));
$w('#notesRepeater').data = repeaterData;
$w('#notesRepeater').onItemReady(($item, itemData) => {
$item('#noteTitle').value = itemData.note;
$item('#noteRating').value = itemData.rating;
});
}
function resetForm() {
$w('#productName, #productOrigin, #productPrice').value = '';
$w('#productImage').src = defaultImage;
setNotesRepeaterData([]);
}
async function saveProduct() {
const updatedNotes = [];
$w('#notesRepeater').forEachItem(($item) => {
const note = $item('#noteTitle').value;
const rating = $item('#noteRating').value;
updatedNotes.push(`${note}:${rating || 1}`);
});
const productData = {
title: $w('#productName').value,
originCountry: $w('#productOrigin').value,
price: parseFloat($w('#productPrice').value) || 0,
image: $w('#productImage').src || defaultImage,
tasteNotes: updatedNotes
};
if (productId) {
await wixData.update(getCollectionName(), { ...productData, _id: productId });
} else {
await wixData.insert(getCollectionName(), productData);
}
wixDashboard.showToast({ message: 'Product "${productData.title}" saved successfully', type: 'success' });
}
async function handleImageUpload() {
if ($w('#uploadButton').value.length === 0) {
return;
}
try {
const uploadedFiles = await $w('#uploadButton').uploadFiles();
if (uploadedFiles && uploadedFiles.length > 0) {
$w('#productImage').src = uploadedFiles[0].fileUrl;
}
} catch (error) {
console.error('File upload failed:', error);
$w('#productImage').src = defaultImage;
wixDashboard.showToast({
message: 'Failed to upload image',
type: 'error'
});
}
}
```
## Step 12 | Manage Installation Settings
Blocks [installation settings](https://dev.wix.com/docs/build-apps/develop-your-app/frameworks/wix-blocks/deploy-and-manage-blocks-apps/configure-blocks-installation-settings.md) determine how your app behaves when installed on a site.
Let's remove the **Taste Notes** widget from the **+ Add Elements** panel of a user's editor, since it’s a nested widget.
1. Click on the **Taste Notes** widget name.
2. Hover over the three dots and select **Editor Experience** > **Edit Installation Settings**.
See how it looks

3. Uncheck the box under **Show in Add panel** to prevent the widget from appearing in the **+ Add Elements** panel.
See how it looks

## Step 13 | Hide the Product Form Dashboard Page
Another step we'd like to configure for better usability is removing the **Product Form** dashboard page from the user's site menu. This form should only be reachable from the **Manage Products** page. To remove the page from the menu:
1. Click on the **Product Form** dashboard page.
2. Hover over the three dots and click **Hide from dashboard menu**.
See how it looks

## Step 14 | Test Your App
Congratulations! Your app is now ready to be tested in the editor or installed on a site.
1. To test your app on a site, click **Test** and select a site to install your app.
1. Add your widget to the canvas.
1. To test the dashboard pages, go to your site's dashboard. It should have a folder with your app's name under **Apps**. Go to the **Manage Products** page and try adding, deleting and editing products.
If you want to install the app on other sites or manage its versions, go back to Blocks. Click **Release** to create a major version, then follow the steps to [install it on a site](https://dev.wix.com/docs/build-apps/develop-your-app/frameworks/wix-blocks/deploy-and-manage-blocks-apps/install-a-blocks-app-on-a-site.md).