> Portal Navigation:
>
> - Append `.md` to any URL under `https://dev.wix.com/docs/` to get its markdown version.
> - Pages are either content pages (article or reference text) or menu pages (a list of links to child pages).
> - To get a menu page, truncate any URL to a parent path and append `.md` (e.g. `https://dev.wix.com/docs/sdk.md`, `https://dev.wix.com/docs/sdk/core-modules.md`).
> - Top-level index of all portals: https://dev.wix.com/docs/llms.txt
> - Full concatenated docs: https://dev.wix.com/docs/llms-full.txt
## Resource: Tutorial | Use the Upload Button with Code
## Article: Tutorial | Use the Upload Button with Code
## Article Link: https://dev.wix.com/docs/develop-websites-sdk/get-started/tutorials/user-interface/tutorial-use-the-upload-button-with-code.md
## Article Content:
# Tutorial | Use the Upload Button with Code
In this tutorial, we demonstrate how to create a file upload form that allows site visitors to upload files to your site's Media Manager using the JavaScript SDK.
Site visitors click the upload button to choose a file and then click the regular button to perform the upload.
**Tip:**
For more complex file upload scenarios, you can use the [Media API](https://dev.wix.com/docs/sdk/backend-modules/media/introduction.md).
We'll use the following steps to build the file upload functionality:
1. Add page elements.
2. Add code to handle file selection and upload.
## Step 1 | Add elements to your page
Add the following elements to your page:
- An [upload button](https://dev.wix.com/docs/velo/velo-only-apis/$w/upload-button/introduction.md) for choosing a file. Set the upload button ID to `uploadButton`.
- A regular [button](https://dev.wix.com/docs/velo/velo-only-apis/$w/button/introduction.md) to trigger the upload code. Set the button ID to `button`.
- A [text](https://dev.wix.com/docs/velo/velo-only-apis/$w/text/introduction.md) element to display messages to site visitors. Set the text ID to `text`.
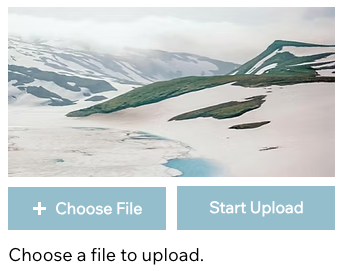
- An [image](https://dev.wix.com/docs/velo/velo-only-apis/$w/image/introduction.md) element. Any image is fine. We're only using it as a placeholder for the uploaded image. Set the image ID to `image`.
The form should look like this:
## Step 2 | Add frontend code
The upload button handles site visitors choosing the file. We'll add an `onClick()` function to make the regular button perform the actual upload.
To create the `onClick()` function:
1. In the page code panel, add an `onClick()` event handler for the button:
```javascript
$w("#button").onClick(async () => {
// Code in the next steps goes here.
});
```
2. Start the handler function with a check to see if the visitor has chosen a file with the upload button. If not, prompt the visitor to choose a file:
```javascript
if ($w("#uploadButton").value.length > 0) {
// Code in the next steps goes here.
} else {
$w("#text").text = "Choose a file to upload.";
}
```
3. Continue the handler function code for when a file is selected. Display feedback text, upload the selected file by calling the `uploadFiles()` async method, and then display the uploaded image and an appropriate message:
```javascript
$w("#text").text = "Uploading " + $w("#uploadButton").value[0].name;
try {
const uploadedFiles = await $w("#uploadButton").uploadFiles();
$w("#text").text = "File uploaded successfully";
$w("#image").src = uploadedFiles[0].fileUrl;
} // Code in the next step goes here.
```
4. Handle failed uploads by displaying an appropriate message:
```javascript
catch {
$w("#text").text = "Upload failed. Try again or choose a different file.";
}
```
## Complete code example
Here's the complete code for your page:
```javascript
$w("#button").onClick(async () => {
if ($w("#uploadButton").value.length > 0) {
$w("#text").text = "Uploading " + $w("#uploadButton").value[0].name;
try {
const uploadedFiles = await $w("#uploadButton").uploadFiles();
$w("#text").text = "File uploaded successfully";
$w("#image").src = uploadedFiles[0].fileUrl;
} catch {
$w("#text").text = "Upload failed. Try again or choose a different file.";
}
} else {
$w("#text").text = "Choose a file to upload.";
}
});
```
## See also
- [Upload button](https://dev.wix.com/docs/velo/velo-only-apis/$w/upload-button/introduction.md)
- [Supported media files](https://support.wix.com/en/article/supported-media-file-types-and-file-sizes)