Add a Backend Events Extension in Studio Two
A Backend Events extension provides custom server-side logic that runs when a Wix platform event fires. For what it is, see About Backend Events.
Follow the instructions below to:
- Add a Backend Events extension to your site project.
- Customize the event handler.
- Check the event handler.
- Publish your site with the extension.
Note: You can also ask Aria, Wix's AI assistant, to create and customize the extension.
Step 1 | Add a Backend Events extension
To add a Backend Events extension:
-
In the Studio Two editor, open the Code tab.
-
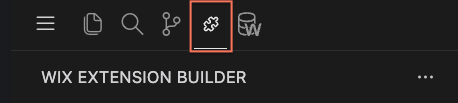
In the VS Code sidebar, open the Wix Extension Builder.
-
Under Create an Extension, choose Backend, then Backend Events.
-
Fill in the form:
- Event folder: Lowercase alphanumeric and hyphens only.
-
Click Generate.
You can find the new files under src/extensions/backend/events/<event-folder>/. The extension is registered in your project's extensions.ts and listed under My Extensions. For what each file is for, see Event Extension Files and Code.
Step 2 | Customize your Backend Events extension
You can edit the generated files to match the event handling you need. Change the code yourself, or ask the AI in the Code tab to help. When you're happy with the handler, move on to the next step.
For example, to write a log entry when a contact is created:
The generated handler imports contacts from @wix/crm. A new Studio Two project doesn't include that package. In the Code tab terminal, run npm install @wix/crm. For the install steps, see Work with npm Packages.
The event also needs a permission before Wix calls the handler. The generated file's header links that permission on the Contact Created event. Add the permission before you check the handler.
-
Open
<event-folder>.ts. -
At the top of the file, import the monitoring client from
@wix/essentials:Copy -
Inside the event handler, replace the placeholder comment with your logic:
Copy -
Save the file.
The finished file looks like this:
For other events, and for the details of the handler, see Build a Backend Events Extension in Studio Two.
Step 3 | Check the event handler
To check the event handler:
- Trigger the event your handler listens for. For the Contact Created example, create a contact in the dashboard's Customers & Leads > Contacts page, or submit a form on the live site.
- In the site dashboard, open Developer Tools > Logs.
Your handler's log entry appears on the Logs page. For other event types, see the API Reference for how to trigger them.
Step 4 | Publish your site
When you're ready, click Publish in the Studio Two editor to ship the extension with your site.
See also
Last updated: 2 November 2026