Add a Dashboard Menu Plugin Extension in Studio Two
A dashboard menu plugin is an item that appears in a predefined menu slot on a dashboard page built by Wix, typically a More Actions menu. When clicked, it navigates to a dashboard page or opens a dashboard modal.
Follow the instructions below to:
- Add a dashboard menu plugin extension to your site project.
- Customize the menu plugin.
- Check the menu plugin in the dashboard.
- Publish your site with the menu plugin.
Note: You can also ask Aria, Wix's AI assistant, to create and customize the extension.
Step 1 | Add a dashboard menu plugin
A menu plugin opens a dashboard page or modal, so have the ID of that page or modal ready. For a page or modal in your project, copy the id from its .extension.ts file. For a dashboard page built by Wix, find its ID in Page IDs.
To add a dashboard menu plugin:
-
In the Studio Two editor, open the Code tab.
-
In the VS Code sidebar, open the Wix Extension Builder.
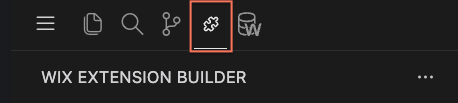
-
Under Create an Extension, choose Dashboard, then Dashboard Menu Plugin.
-
Fill in the form:
- What would you like to extend?: Choose the menu slot from the dropdown, for example
Contact main more actions menu. The dropdown lists menu slots from Wix business solutions regardless of whether they're installed on your site. For the pages that have slots and where each slot appears, see About Dashboard Page Slots. - Choose what happens when the menu item is clicked: Choose Navigate to Page or Open Modal.
- Target id: The ID of the dashboard page or modal to open.
- Menu item title: The label shown in the menu.
- What would you like to extend?: Choose the menu slot from the dropdown, for example
-
Click Generate.
Generate names the menu plugin folder after the title, in lowercase with hyphens.
You can find the new file under src/extensions/dashboard/menu-plugins/<plugin-folder>/. The extension is registered in your project's extensions.ts and listed under My Extensions. For the file's fields, see Dashboard Menu Plugin Extension Files and Code.
Check that extends in <plugin-folder>.extension.ts is the ID of the menu slot you chose. The dropdown's labels can differ from the slot names in the docs, so compare extends with the slot ID in the page's introduction.
Step 2 | Customize your dashboard menu plugin
You can edit the generated file to change the label, icon, slot, or click action. When you're happy with the menu plugin, move on to the next step.
For the full workflow, from building the target modal to reading the data the slot passes, see Build a Dashboard Menu Plugin in Studio Two.
For example, to update the menu label:
- Open
<plugin-folder>.extension.ts. - Change the
titlevalue to"Hello world!". - Save the file.
When you open the menu in its dashboard slot, the item's label shows Hello world!.
Step 3 | Check the menu plugin
A dashboard menu plugin appears in a menu that belongs to a specific Wix business solution's dashboard page, so that business solution must be on the site. Contacts are on every site, so Contact main more actions menu is a quick slot to check with. You don't need to publish the site to check the menu plugin.
To check a menu plugin in Contact main more actions menu:
- In the site dashboard, go to Customers & Leads > Contacts.
- Hover over a contact and click View to open the contact's full page. Clicking the row instead opens a side panel with a different menu.
- Refresh the page so the dashboard loads the menu item.
- At the top of the contact's page, open the More Actions menu.
- Click the menu item. It navigates to the target page or opens the target modal.
If the menu item doesn't appear, wait a moment and refresh the page again.
Step 4 | Publish your site
When you're ready, click Publish in the Studio Two editor to ship the extension with your site.
See also
Last updated: 2 November 2026