Add a Data Source Extension in Studio Two
A Data Source shares state and behavior with Editor React Components (ERCs) through editor binding. The Studio Two editor and the Wix Extension Builder call this extension a Data Source, and its generated code uses context provider APIs and React Context.
Follow the instructions below to:
- Add a Data Source extension to a site project.
- Customize the generated context provider.
- Check the Data Source.
- Publish the site with the Data Source.
Step 1 | Add a Data Source extension
To add a Data Source extension:
-
In the Studio Two editor, open the Code tab.
-
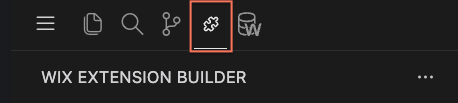
In the VS Code sidebar, open the Wix Extension Builder.
-
Under Create an Extension, select Site > Data Source.
-
In Name, enter a name for the Data Source. The Wix Extension Builder derives the folder name and the manifest
typefrom it. For example,Team Filterbecomes the folderteam-filterand the typecompanionApp.teamFilter. -
Click Generate.
You can find the new files under src/extensions/site/contexts/<provider-folder>/. The Data Source is registered in the project's extensions.ts and listed under My Extensions. For what each file is for, see Context Provider Extension Files and Code.
Step 2 | Customize the Data Source
You can edit the generated context provider to match the state and behavior you need. Change the code yourself, or ask the AI in the Code tab to help. When you're happy with the Data Source, move on to the next step. For the full workflow, see Build a Data Source in Studio Two.
The generated Data Source is a counter. For example, to change how much it increments:
-
Open
<provider-folder>.tsx. -
In the
incrementfunction, changecurrent + 1tocurrent + 2:Copy -
To save the file, press
Control+S(orCommand+Son macOS).
The counter's increment function now adds 2 to the shared count.
Step 3 | Check the Data Source
To check the Data Source:
- Switch to the Design tab.
- In the Layers panel, select the page, container, or section that should have access to the Data Source. Then select More Actions > Connect to Data. The element's Settings panel opens to its Data sources section.
- Click Connect Source, then select your Data Source under Custom code.
- Add or select an element inside the area you selected in step 2. Open its Settings panel, and click the connect icon next to a property whose data type matches
count. - In the Connect to Data panel, select the same Data Source under Source, then select
countunder Field. - Click Apply.
The connected element shows the counter's current value. To find the page, container, or section in the Layers panel, see Studio Two Editor: Working with Layers. For the Connect Source panel, see Connect to Source.
Step 4 | Publish the site
When you're ready, click Publish in the Studio Two editor. The Data Source ships with the published site.
See also
Last updated: 2 November 2026