Implement a custom action in Velo
The Velo Action SPI lets you develop your custom action directly in your site dashboard. Once you create a new automation, you can write your own action code using the Run Velo Code feature.
Working directly in the automation allows you to:
- Easily verify you are working with the correct trigger.
- View the full trigger payload.
- Edit sample data provided by Wix and test your code with it.
To write your action code, use the Velo APIs just like you would in your site's public or backend files.
Before you start
- Make sure you're familiar with Wix Automations and how they work on Wix.
- The custom extensions feature currently can’t be added to a site when using Git integration and Wix CLI. You need to have permission to publish the site and the site must be published.
- This custom extension is intended for site owners who want to create custom actions on a single site. If you're a 3rd-party app developer interested in becoming an automation provider, see our documentation here.
Create a custom action
To use a custom action as part of an automation, start by creating a new automation in your site dashboard.
-
Go to the Automations page in your dashboard.
-
Click New Automation, then Start from Scratch to open the automation builder.
-
Select and configure a trigger.
Important: The code file you create for your custom action is associated with the original trigger you selected. If you change the trigger, a new code file will be created and you'll have to write new code. The initial file you create is still saved, and if you restore the trigger it is associated with, you'll be able to access it again in the automation.
-
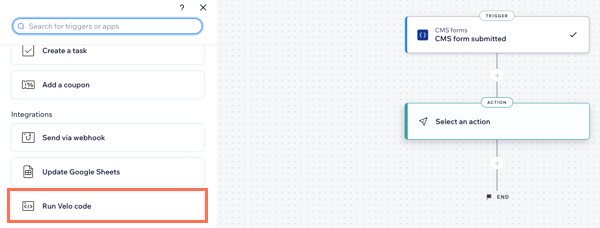
Click the + to add a step and choose Action. In the menu on the left, select Run Velo code.
-
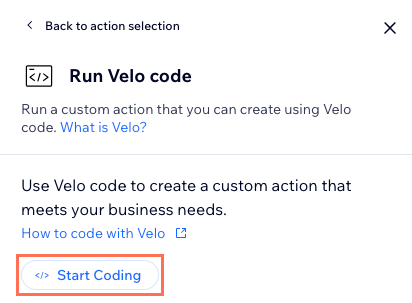
Click Start Coding to add your code. You'll be prompted to create a new code file.
-
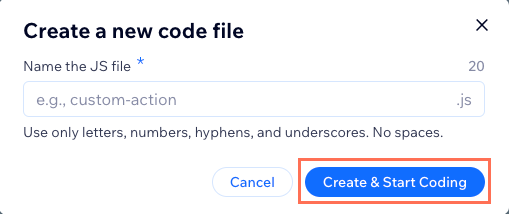
Give the file a name and click Create & Start Coding.
Note: A file is created with the name you give under the Custom Extensions tab in your site's backend code. Though you can add or edit code in this file, we recommend working only in the file that appears in your automation. This allows you to verify you're working with the correct trigger, as well as take advantage of features like testing and the payload viewer.
You should now see something like this:
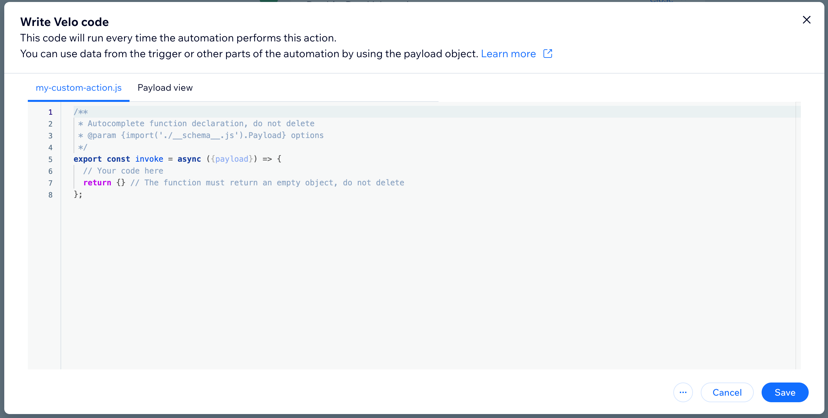
The Write Velo Code modal contains two tabs. The first is the .js file where you write your code. This is a backend file that contains a single function,
invoke(). Write any code that you want the action to execute insideinvoke(). Do not delete thereturnstatement.The second tab, which appears under Payload view, lets you view the expected structure of the trigger payload. This changes depending on the trigger you select. The displayed payload is read-only.
-
When you finish writing your code, click Save.
Now that you have set up and coded your custom action, you can activate the automation immediately. However, we recommend testing the action code first.
-
To test your code, follow the instructions under Run your code to test this action, then click Run Code.
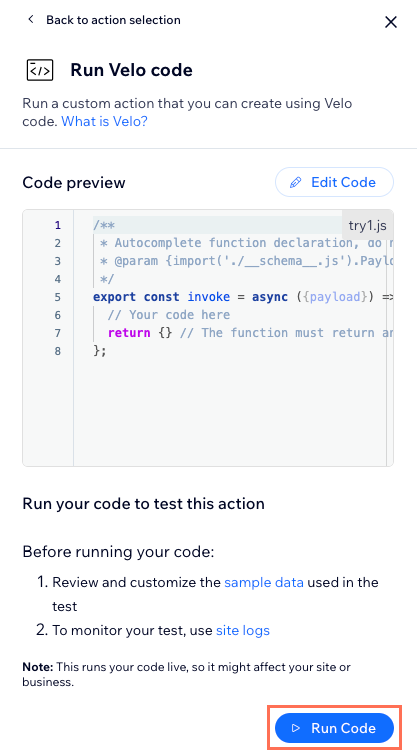
Wix provides sample data that matches the structure of your trigger payload. You can edit any of the fields in the sample payload to test your action.
Be aware that testing the action runs the code live on your site, and may change cause changes in the site or dashboard.
Once you test your code and are sure your action works, activate your automation.
Edit your custom action
To edit your action code, edit your automation and select the Run Velo code action, then click on Edit Code. Make the changes you want, save the code, and test.