Create a WordPress Plugin
WordPress is a common web content management platform that allows users to build, maintain, and publish web pages. Wix Headless allows you to integrate many of Wix's business solutions into your WordPress site.
This tutorial shows you how to create a WordPress plugin that integrates your Wix headless project with your WordPress site. It includes implementing a "Buy Now" flow that allows your visitor to purchase a product from a list.
You can find the full source code here.
In this tutorial, you will:
- Set up a Wix headless project and a WordPress environment.
- Create a script to rebuild your plugin whenever you update it.
- Create a full authorization flow that allows your WordPress site to make requests to your headless project and Wix APIs.
- Query and display a dynamic list of products on your WordPress site using the Wix Stores API.
- Implement a secured checkout functionality using the Wix eCommerce API.
- Implement the necessary routing functionality using the Wix Redirect Session API.
Step 1: Set up the Wix headless project
First, set the Wix headless project to act as your site's dashboard. Here you can install apps to add Wix functionality to your WordPress site.
To set up the Wix headless project, follow these steps:
-
If you haven't already, create a Wix headless project. When prompted to add functionalities to your new project, select eCommerce.
-
Set up authorization by creating and configuring an OAuth app on your headless project. Name the app
wix_example_client_id. Note your client ID. You will need it later to integrate your WordPress site with the Wix headless project.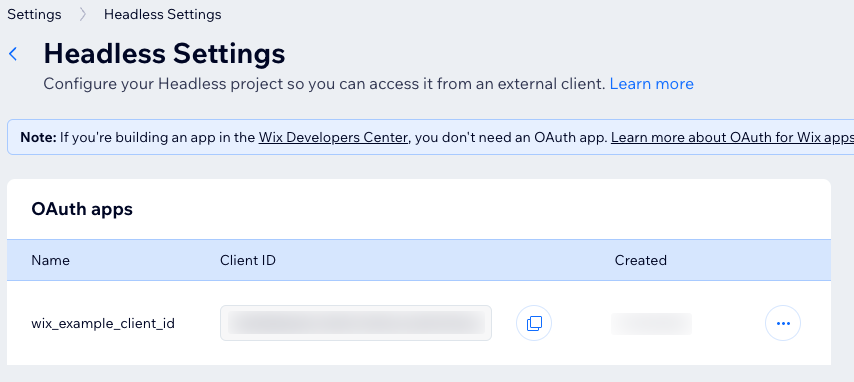
-
Finally, make sure that the Wix Stores app is installed: In your headless project dashboard, click Apps. If the Wix Stores app is not installed, install it. This Wix Stores app allows your WordPress site to access the Wix Stores API.

Step 2: Set up a WordPress plugin
A WordPress plugin is a zip file that contains one or more PHP files. These files contain the functionality you want to add to your site with some metadata. This step describes how to write a script that automatically creates a zip file with your updated plugin files.
Create a script to automatically build your plugin file
This script builds your code as a zip file. The script is written in JavaScript in a node.js environment. However, you can use any build tool and runtime environment you prefer.
Create the plugin zip file:
-
Create a new folder named
headless-wordpress-tutorial. This folder will contain all the plugin files, including the build script and the finalizedzipplugin file. -
In this folder, create a new file named
wix-headless-example.php. In it, add the following code:CopyThis serves as the basis for the plugin's functionality.
-
In the same
headless-wordpress-tutorialfolder, create two new folders:- A folder named
build, to contain the automated build script. - A folder named
plugin, to contain the plugin's functionality.
- A folder named
-
In
build, create a new file namedzip-plugin.js, and write the following code:CopyThis code removes any existing
zipfiles, and generates a Wordpress-readyplugin.zipfile, with all your plugin's functionality, in thedistfolder. Whenever you add functionality to your plugin, you need to run the build script again, and upload the updatedplugin.zipfile to your Wordpress site.
Optional: Test your plugin on your WordPress site
To test whether the plugin is recognized and rendered correctly on your WordPress site, include a test shortcode:
-
Update
wix-headless-example.phpwith the following code:Copy -
From the
headless-wordpress-tutorialroot directory, typenode build/zip-plugin.jsto run the build script. -
On your site's WP Admin panel, click
Plugins->Add New->Upload Plugin, and uploaddist/zip-plugin.jsto the site. -
Activate the plugin.
-
Launch one of your site's pages and add a shortcode block with the content
[initial_shortcode]. -
Save and view the page to see the result.
-
Once you've confirmed the plugin is rendered on your site, remove the code you added in Step 1.
Create a plugin settings page on your WordPress site
Once you have installed the OAuth app on your Wix headless project dashboard, your headless project is configured to provide services only to clients that carry the correct client ID.
To enable communication between your WordPress site and your headless project, configure your site with the correct client ID as provided by the OAuth app in Step 1. However, since the WP Admin panel does not have a built-in settings page to enable it to integrate with Wix Headless, you need to manually create a plugin settings page.
To create a plugin settings page and configure it with the client ID:
-
In the
pluginfolder, create a new folder namedtemplates. -
In
plugin/templates, create a new file namedsettings.phpwith the following code:CopyThis file creates the structure of the plugin's settings page.
-
Add the plugin's settings page to your site's Admin panel. In
wix-headless-example.php, add the following code:CopyThis code creates, registers, and renders your plugin's settings page on your WordPress site's Admin panel.
Lastly, on your WordPress site's Admin panel, set the client ID from your project's Headless Settings.
-
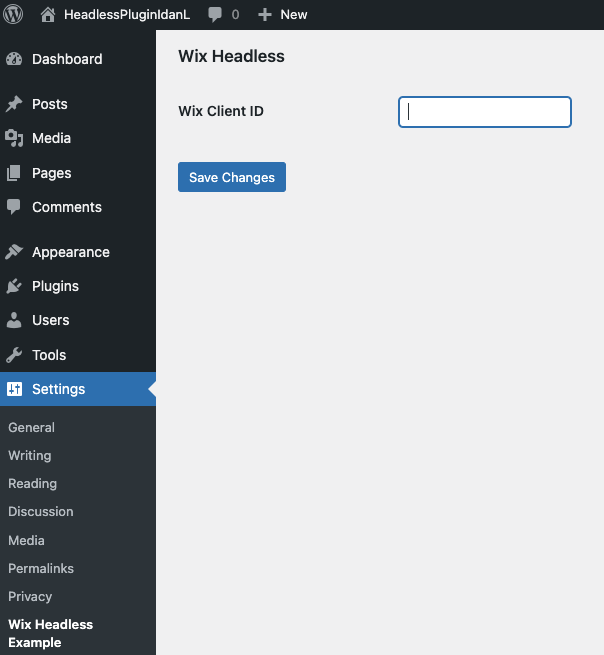
On your WordPress site's Admin panel, click Settings > Wix Headless Example.
-
In the Wix Client ID input field, paste the client ID as it appears on your headless project's Headless Settings.
Your WordPress site is now configured as the valid client of your Wix headless project.
Step 3: Generate authorization tokens
To access Wix APIs, a client needs to carry valid access tokens. These include the client ID as defined in the previous step, and can be found in your project's Headless Settings. Access tokens are only valid for several hours. When they expire, they must be refreshed. Without a valid authorization token, a client cannot make requests to a headless project.
This step shows how to add a simple authorization service to your plugin. The service retrieves and checks for valid access tokens, refreshes them if necessary, and saves, or persists, them locally to your browser as cookies.
Note: For additional information about creating and using access tokens, see the Making API Calls with OAuth in the Wix REST API reference.
Important: To keep this tutorial simple and easy to understand, this authorization service applies to all devices. You might want to handle access tokens separately for each type of device.
To create the authorization service:
-
In your
pluginfolder, create a new folder namedservices. In it, create a new file namedwix-auth.phpand add to it the following code:CopyThis creates the basic structural outline of the authorization service.
-
Add the functionality to retrieve, or get, any tokens that might already be locally saved in the form of a browser cookie:
CopyThis function checks and decodes any tokens that already exist in a user's browser. If no cookies are found, the function returns null.
-
Add the functionality to persist tokens in the user's browser as cookies:
CopyThis function saves a token to a user's browser in the form of a cookie. Each token is valid for 30 days, and can be used to access all parts of the site.
-
Add the functionality to check whether an access token has expired:
Copy -
Use the Wix API to get and refresh tokens:
CopyThis code defines two types of tokens, one for site visitors and one for logged-in site members. Then, the
generateVisitorTokens()function creates and processes visitor tokens using the Wix RESTTokenendpoint.These tokens are required to make calls to Wix APIs on behalf of your visitor. Without them, your calls will not be authorized. You can read more about visitor tokens in the Wix Headless REST API documentation.
-
Finally, now that tokens have been set up, set the authorization service to initialize as soon as your WordPress site initializes the plugin.
-
Still in
services/wix-auth.php, add the service initialization function:CopyThis function checks for existing visitor tokens, and if none are found, creates and persists new ones. It makes sure that your site has valid tokens when making calls to Wix APIs.
-
Back in
wix-headless-example.php, bring the authorization service into the scope of the file:CopyThese
useandrequire_oncestatements allow the functions in this file to access the functions defined in the authorization service. -
Finally, register and call the authorization service's initialization method:
CopyThe
add_filter()function registers theinit()function for theinitWordPress hook. This means that, whenever theinitWordPress hook fires, the localinit()function runs and initializes the authorization service.
Step 4: Get Wix Request ID Returned by Wix APIs
Whenever a Wix API responds to a client request, a unique request ID is included in the response. This can be helpful if you need to contact Wix support for help. In this step, you will add a service to retrieve the request ID as returned by the Wix API.
To get the Wix request ID:
-
In the
pluginfolder, create a new folder namedutils. This folder will contain various utility services. -
In
plugin/utils, create a new file namedwix-request-id.phpand add to it the following code:CopyWhen called, this function extracts the Wix request ID from the given response, and returns it to the caller.
-
Back in
services/wix-auth.php, call theget_wix_request_id()method whenever an error is logged by thegenerateVisitorTokens()function:CopyAdding a call to
get_wix_request_id()whenever tokens have failed to generate makes it easier to debug, resolve errors, and request additional help from Wix's support teams.
Step 5: Get products using the Wix Stores API
Now that you can make authorized calls to Wix APIs, you can integrate any of Wix Headless's business solutions into your site. In this tutorial, you will implement two eCommerce functionalities—a product list, and a checkout.
Important: A complete eCommerce user flow is usually comprised of a product list, a single-product page, a cart, and a checkout. However, this tutorial only covers creating a product list and a checkout. This is because this tutorial focuses on a pure server-side implementation, while implementing a product page and a cart requires client-side code using the Wix eCommerce SDK.
Query the existing products
The first Wix eCommerce functionality to implement is the product list. Use the Wix Stores API to create a service that queries and lists the products in your Wix headless project's CMS.
First, create the service:
-
In the
plugin/servicesfolder, create a new file namedwix-products.php. -
In
wix-products.php, add the following code:CopyThe
getProducts()function makes an authorized call to the Wix Stores API. It queries all products that exist in your headless project's CMS.
Create a template to display your products
Next, create a WordPress template file to display your product list:
-
In
plugin/templates, create a new file namedproduct-list.php. -
In
product-list.php, add the following code:CopyThis code creates the template for displaying a dynamic list of products.
Render the list of products on your WordPress site
Now that the products have been queried, and a template exists for displaying them, all that is left is to display them on your site.
-
In
plugin/wix-headless-example.php, add the following code:CopyThis
wix_headless_render_product_list()function queries the existing products and uses theproduct-listtemplate file to render the products on the screen. It also registers this function for thewixwp_productsshortcode.Note: The
locate_template()function allows the theme to override the existing template. -
Finally, on your WordPress site, add a shortcode block with the
[wixwp_products]shortcode. View your page to see the list of products.
Step 6: Add a secured checkout functionality
The second Wix eCommerce functionality you will implement is the Wix secured checkout. This involves implementing a dynamic "Buy Now" route for each product. When clicked, the route takes your visitor to a secured checkout page where they can complete their purchase.
Note: As its name suggests, the "Buy Now" functionality takes your visitor directly to a checkout page, without taking them through a product page and a shopping cart first. This means that product variants or options are not supported in this implementation. For a full eCommerce implementation, see the Wix Headless eCommerce tutorial.
Add URL slugs for the queried products
To create a dynamic checkout page for each product, queried each product must first be identified with a unique, dynamic URL. In plugin/services/wix-products.php, update the value of the request body to include a dynamic slug:
Now, when making a call to the Wix Stores API, the request body includes a unique URL slug for each product.
Create the checkout service using Wix eCommerce API
Wix Headless offers a secured checkout service that can be dynamically populated with each product's details.
Use the Wix eCommerce API to create a secured checkout service:
-
In
plugin/services, create a new file namedwix-checkout.php. -
Add to it the following code:
CopyThe
createCheckout()function makes a call to the Wix eCommerce API with the details of the product that was clicked. The function returns a new checkout object used to render the Wix Checkout page on your WordPress site.
Create the redirect session
Now, whenever a product is clicked, a checkout page dynamically loads with that product's details. However, the checkout page itself is a Wix page, which means it isn't hosted on your WordPress site, but rather on Wix's servers. Therefore, your visitor still needs to be redirected there to complete their purchase, and back to your WordPress site once they are done.
To redirect your visitor from your WordPress site to the Wix checkout page, and then return them to your site once they have completed their purchase, you need to use the Wix Redirect Session API.
Create a redirection service to handle redirecting your visitor to, and back from, the Wix checkout page:
-
Still in
plugin/services/wix-checkout.php, add the following code:CopyThe
createCheckoutRedirectSession()function makes an authorized call to the Wix Redirect Sessions API. ThepostFlowUrlvalue included in the call specifies where your visitor returns upon completing their purchase. The function then returns the processed redirect session to the calling router.
Create a router to handle the "Buy Now" flow
The redirection functionality is now configured, but it is not integrated into your page. You now need to create a routing service that manages the entire "Buy Now" redirection and checkout flow.
Create the routing service:
-
In
plugin/utils, create a new file namedroutes.php. -
In
routes.php, write the following code:CopyThe
wix_headless_buy_now_endpoint()specifies which Wix REST endpoint must be called whenever a product is clicked. Its callback function,wix_headless_buy_now_callback(), creates both the dynamic checkout page with the clicked product's details, and the necessary redirection functionality.
Make the business services accessible to your plugin
The product list, checkout, and redirect services have been set up. You now need to let your main plugin logic know that they are available and where it can find them. Your WordPress site also needs to be aware of the Wix REST endpoints used by these services.
-
Bring the router into the scope of your plugin. In
plugin/wix-headless-example.php, add the following lines:CopyThe
use .../WixStoresProductsstatement makes the product list, checkout, and redirection functionalities available to the functions in the current file. The variousrequire_oncestatements act as safeguards to make sure that files already brought into scope won't be brought in again. -
Finally, register the "Buy Now" endpoint to your WordPress site. In
plugin/wix-headless-example.php, add the following line:CopyThe
add_action()WordPress function registerswix_headless_buy_now_endpoint()as the callback function to be called whenever therest_api_inithook fires. Whenever your WordPress site initializes its REST API functionality, thewix_headless_buy_now_endpoint()function runs and begins the "Buy Now" flow.
Add the "Buy Now" option to products
Finally, embed the "Buy Now" option in the list of products on your WordPress site. In templates/product-list.php, add the following line to your code:
When a visitor clicks a product, they are redirected to the checkout page to complete their purchase, and redirected back to your site once they have completed their purchase.
Conclusion
Well done! In this tutorial you created from scratch a WordPress plugin that integrates a limited Wix Headless eCommerce user flow with your WordPress site. It was done using server-side code only.
You can find the full source code here.
However, You can expand the existing implementation to include other business services, such as product pages and a cart, by adding client-side code. For a sample implementation, see the Wix Headless eCommerce tutorial.
Last updated: 4 June 2026