Add a Custom Element Extension with the Wix CLI
Deprecation notice:
installation.autoAdd is deprecated. If your code still uses this property, update it to installation.staticContainer.
Learn more about custom element installation in the CLI.
The Wix CLI makes it easy to add and develop custom element extensions in your app project. These are considered app extensions and appear on the Extensions page in your app's dashboard.
Custom element extensions are built with the web components standard. You define a new HTML tag, which is made available in the Wix editors as a widget.
The Wix CLI creates the necessary files with template code so you can easily start developing your custom element. It also calls define() for you, so you don't need to explicitly call it in your code.
Follow the instructions below to:
- Add a custom element extension to your app project.
- Test the custom element on a site.
- Deploy your app with the custom element.
Step 1 | Add a custom element to your app project
In the terminal:
-
Navigate to your project repo.
-
Run the generate command.
The CLI will display a menu of extensions to generate. Select Site Widget and hit enter.
-
When prompted, choose Custom Element as your framework.
The CLI will then prompt you for the following items:
- Element name: The name of the element that appears in the
element.jsonconfiguration file. Only you will see this. - Element folder: The name of the folder in the project repo that contains the custom element code that the site widget is built on. Only you will see this.
- Element name: The name of the element that appears in the
Upon completion, the extension files will be created in your project directory with the following structure:
Note: This is the default folder structure created by the CLI. You can move these files to any location within the src/ folder and update the references in your extensions.ts file. Learn more about the flexible file system.
Learn more about the custom element extension files.
Step 2 | Test your custom element
You can test your custom element while you're developing by running the dev command. Select the option in the CLI menu to view your custom element in the editor. This will open your test site editor, where you can view and try it out.
Why do I get a placeholder when previewing my site widget?
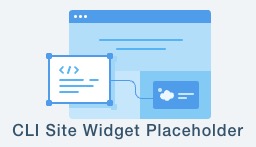
In some cases, your custom element doesn't display when previewed, but does display as expected when viewed on a published site. We are currently working to fix this issue, but in the meantime, we display a placeholder.
This can happen if:
Tip: Access to site environment data and interact with other Wix Apps, such as Wix Stores and Wix Bookings, using the Site API.
Step 3 | Build and deploy your project
Once your app project is ready for production, you can build it and release a version in the app dashboard.
An app version allows you to publish an app to the Wix App Market or install it on a site with a direct install URL. You can view your app versions in the app dashboard.
For more information about building and deploying your app, see Build and Deploy an App with the Wix CLI.
You can control whether your custom element is added to a site automatically when a Wix user installs your app. Set installation.staticContainer to "HOMEPAGE" in your widget's extension file (element.extension.ts) to add the widget to the home page on install. If you omit the field, the widget isn't added on install. Wix users can add it manually from the editor's Add panel. In the CLI, automatic installation applies only to the home page, not to master pages like the header or footer. For details, configuration examples, and best practices, see About custom element installation with the CLI.
Delete a custom element extension
To delete an existing custom element extension from your app:
- Delete the folder that contains your custom element's files.
- Remove the import and
.use()statements for the extension from theextensions.tsfile.
Note: If you've already created a version of your app, deleting the extension files from your project doesn't remove the custom element from your app's latest version in the app dashboard. To remove it, create a new version after deleting the extension files.
Last updated: 19 July 2026