Build with a Vibe Coding Platform
Build your frontend in a vibe coding platform such as Base44 or Lovable, and use Wix Headless as your backend. Wix provisions a headless project and dashboard for you, and the vibe coding platform wires your frontend to Wix business APIs.
This is a self-managed headless setup: the vibe coding platform hosts your frontend, and you manage your business from the Wix dashboard.
Before you begin
Make sure you have:
- A Wix account. Sign up for a Wix account if you don't have an account yet.
- Access to a supported vibe coding platform, such as Base44, Lovable, Bolt, or v0.
Step 1 | Create your project on Wix
-
Go to the Wix Headless homepage.
-
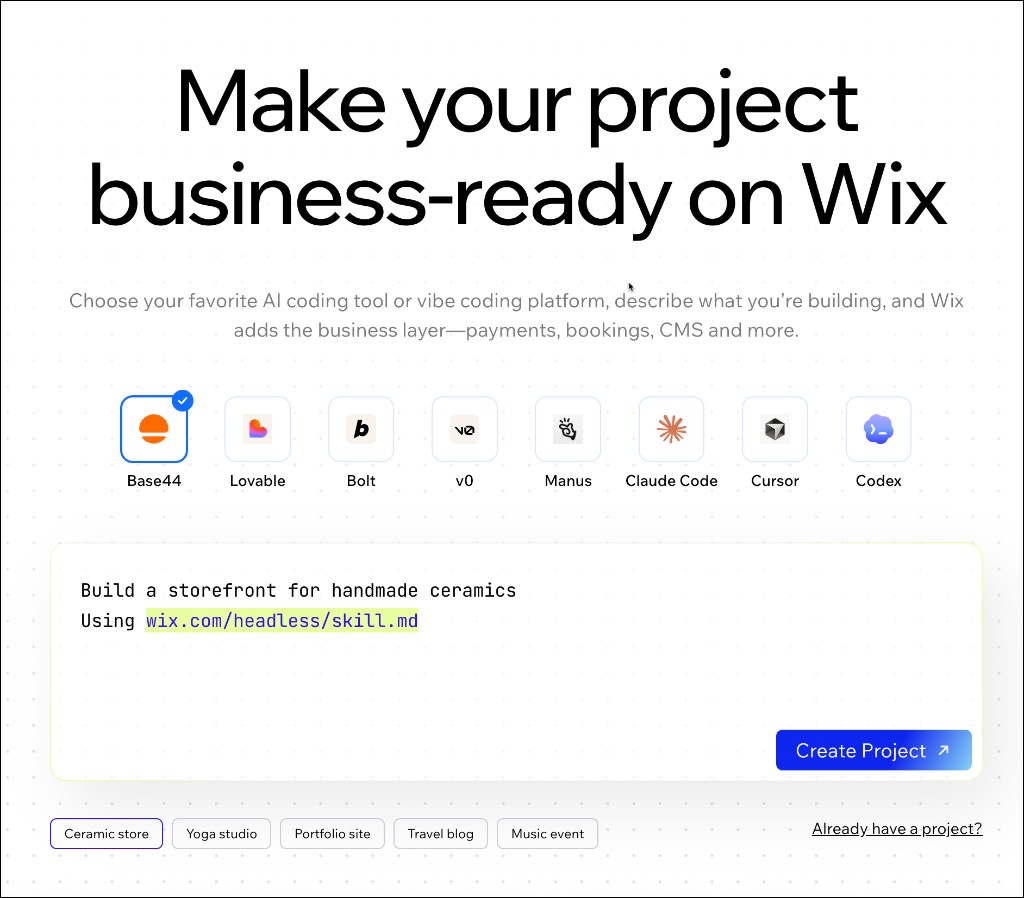
Select your vibe coding platform.
-
Describe what you want to build in the prompt box, or choose one of the preset prompts. Your prompt automatically includes the Wix Headless skill, which tells the vibe coding platform how to connect your frontend to Wix. You can describe a frontend connected to Wix business solutions such as:
- A storefront with a product catalog and checkout (Wix Stores)
- A booking site with class schedules and online payments (Wix Bookings)
- An events page that sells tickets (Wix Events)
- A portfolio or blog backed by the CMS (Wix CMS)
For example:
CopyFor more information, see featured business solutions for Wix Headless.
-
Click Create Project.
Wix provisions a headless project and opens your vibe coding platform with the prompt pasted into the prompt window or already running.
Step 2 | Wait for your frontend to build
Your vibe coding platform fetches the Wix Headless integration instructions and builds your frontend. Follow along in the platform's chat as it works.
When the build finishes, your frontend preview loads, wired to your Wix project.
Step 3 | Open your Wix dashboard
When the build completes, the vibe coding platform's chat includes a link to your Wix dashboard. Open it to set up your headless project.
From the dashboard, add and manage your business content and settings. For example:
- Add products to your store, set up bookings, or create CMS content.
- Connect payment methods.
- Invite collaborators.
Step 4 | Refine your project
With your frontend and Wix backend connected, keep refining your project in 2 places:
- In your vibe coding platform: Use the chat to change the design, add pages, or extend functionality. For example, ask to add a customer reviews section or update the homepage layout.
- In your Wix dashboard: Continue updating business content and settings as your site grows.
Note: If you add a new business solution in the dashboard, prompt your vibe coding platform to integrate it into your frontend.
Changes you make in the dashboard, such as adding store products, appear in your frontend preview.
Step 5 | Publish your frontend and connect it to Wix
When you're ready to go live, publish your frontend from the vibe coding platform and connect it to your Wix project.
-
In your vibe coding platform, click Publish and copy your live frontend URL.
-
In your Wix dashboard, add your frontend link. Click Add Link in the dashboard header.
-
In the Update Frontend Link window, paste your published frontend URL and click Update Link.
Wix uses this URL to send visitors back to your site, for example after checkout, for links in marketing emails, and notifications. Adding the frontend link also adds its domain to your allowed redirect domains, so checkout redirects should work without extra setup.
If you publish a new version of your frontend on a different URL, update the frontend link in your dashboard to match.
-
Optionally, if your project contains Wix-hosted pages, you can connect a custom domain so processes like checkout and login provide a more seamless visitor experience.
See also
Last updated: 3 August 2026