Tutorial | Create a Site Plugin for the Wix Bookings Service Page
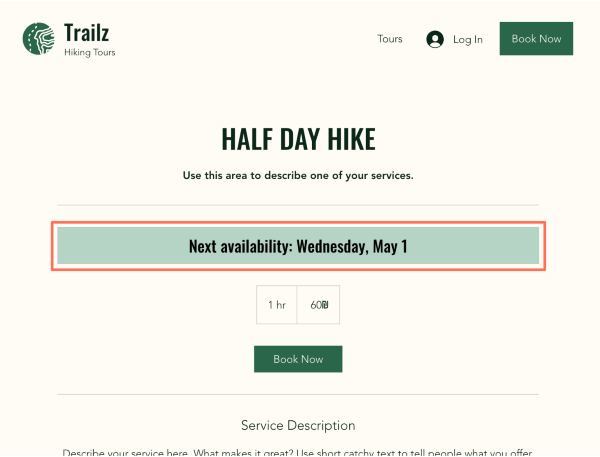
In this tutorial, we demonstrate how to create the Next Booking Availability site plugin for the Wix Bookings Service page. This site plugin displays the next available date for a site visitor to book a particular service. It is meant to be embedded in the Wix Bookings Service page slot.
The end result will look something like this:
We use the following steps to build the Next Booking Availability site plugin:
- Create an app in the Wix Dev Center.
- Design your plugin in Wix Blocks.
- Code your plugin in Wix Blocks.
- Configure your plugin in the Dev Center.
Note: You can clone a complete version of this app to explore how it's built, and play around with its design and code.
Before you begin
Make sure you're logged into your Wix account, or create an account if you don't have one yet.
Step 1 | Create an app and open it in Wix Blocks
-
In the Dev Center, go to My Apps, and then click Create New App.
-
In the left sidebar, select Extensions, and then click Create Extension.
A panel opens, showing the available extension types. -
Find the Widget (Wix Blocks) extension and click Create on Blocks.
See how it looks

Your newly-created app opens in Wix Blocks. This is where you'll build the widget component that encapsulates the UI and business logic for your plugin.
Wix Blocks is an editor for building responsive Wix apps. It lets you design widgets, write code, and use APIs – giving you all the tools you need to create a fully-functional app.
Step 2 | Design your plugin’s UI
We now design our plugin in Wix Blocks:
-
To get started, select Blank canvas.
The Wix Blocks editor opens with a default widget. -
Let's add a text element to the widget.
Click Add Elements on the left side of the editor, and then click Title.
 -
Next, we want to make sure that the text stretches across the entire width of the widget. When the plugin is added to a site, we want the text to stretch across the entire width of the Wix Service page slot.
Select the text element. In the Inspector panel on the right, click the Layout tab, and set the element's width to 100%.See how it looks

-
Still in the Inspector panel, click the Design tab, and set the text alignment to Center align.
Step 3 | Code your plugin
We now write the code for our plugin. The code checks the availability of a specific service for the upcoming year, and updates the text element with the next available date for a site visitor to book the service.
-
Before coding our plugin, we need to connect our plugin to the host widget (in our case, the Wix Bookings Service page) by implementing the
BOOKINGS_SERVICEAPI.
To do so, add thebookingsServiceIdproperty to your widget's public API.
In the code panel, click the Widget Public API icon, and then click Add New Property.
See how it looks

-
In the New Property panel, name the property
bookingsServiceId, and then click Create. -
In the code editor, add the following import statement at the beginning of your code to use Wix Bookings APIs:
import wixBookingsFrontend from 'wix-bookings-frontend'; -
Make the
$widget.onPropsChanged()function asynchronous by adding theasynckeyword:
$widget.onPropsChanged(async (oldProps, newProps) => { -
Inside the
$widget.onPropsChanged()code block, add the following line to get the current service ID from the host widget:
const serviceId = newProps.bookingsServiceId;This ID identifies the service for which the availability will be checked.
-
Set up the date range for our availability query, with a
startRangeand anendRangethat spans one year from the current date:Copy1let startRange = new Date();2let endRange = new Date();3endRange.setDate(startRange.getDate() + 365); -
Use the Wix Bookings
getServiceAvailability()API to query the availability for the specified service (serviceId) within the defined date range (rangeOptions):Copy1const rangeOptions = {2startDateTime: startRange,3endDateTime: endRange4};5const availability = await wixBookingsFrontend.getServiceAvailability(serviceId, rangeOptions); -
Extract the available slots from the returned object and get the first available slot's date:
Copy1const slots = availability.slots;2const options = { weekday: 'long', day: 'numeric', month: 'short' };3const firstSlotDate = slots[0].startDateTime.toLocaleDateString('en-US', options); -
Change our text element to display the message "Next availability:" followed by the formatted date of the first available slot:
Copy1$w('#text1').text = "Next availability: " + firstSlotDate;Here's the complete code:
Copy1import wixBookingsFrontend from 'wix-bookings-frontend';23$widget.onPropsChanged(async (oldProps, newProps) => {4const serviceId = newProps.bookingsServiceId;56let startRange = new Date();7let endRange = new Date();8endRange.setDate(startRange.getDate() + 365); // one year from now910// get the service availability for the upcoming year11const rangeOptions = {12startDateTime: startRange,13endDateTime: endRange14};15const availability = await wixBookingsFrontend.getServiceAvailability(serviceId, rangeOptions);16const slots = availability.slots;1718// get the date of the first available slot19const options = { weekday: 'long', day: 'numeric', month: 'short' };20const firstSlotDate = slots[0].startDateTime.toLocaleDateString('en-US', options);2122$w('#text1').text = "Next availability: " + firstSlotDate; // set the text element's content23}); -
In the top-right corner, click Build. When prompted to provide an app name, enter "Booking Availability" and then click Save & Continue.
-
When prompted to select the type of version to build, select Test version.
Our widget is now ready for use, and we have one final step before adding it to a site.
Step 4 | Configure the plugin in the Dev Center
To make our plugin available for site builders to add in slots, you need to set up a Widget Plugin extension in the Dev Center. This extension holds metadata about the plugin and is linked to the widget we built in Wix Blocks.
-
Before we begin, we first need to copy our widget's ID from Wix Blocks. We'll need this ID when configuring the Widget Plugin extension in the Dev Center.
In the Widgets and Design panel in the left sidebar, hover over your widget's name and click the Show More icon, and then click Copy Widget ID.
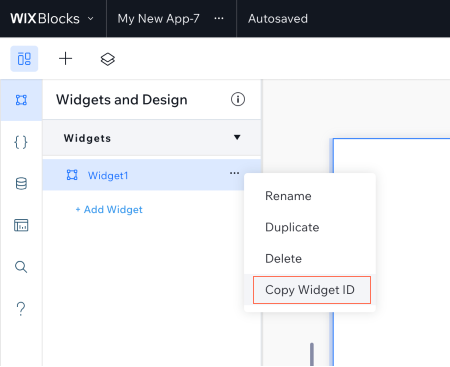
-
Go to the Dev Center, and make sure that you're in the app you created earlier.
-
In the left sidebar, select Extensions, and then click Create Extension.
A panel opens, showing the available extension types. -
Find the Widget Plugin extension and click Create.
See how it looks

This takes you to the JSON editor, for configuring the extension.
-
Copy the following JSON, and paste it into the JSON editor.
Replace<YOUR_WIDGET_ID>with the ID you copied from Blocks.Copy1{2"referenceComponentId": "<YOUR_WIDGET_ID>",3"marketData": {4"name": "Next Availability",5"description": "Show the next available date to book the service."6},7"placements": [8{9"appDefinitionId": "13d21c63-b5ec-5912-8397-c3a5ddb27a97",10"widgetId": "a91a0543-d4bd-4e6b-b315-9410aa27bcde",11"slotId": "slot1"12}13]14} -
Click Save.
-
Go back to Wix Blocks and build your app again.
We've now created a plugin. In the next step, we add our plugin to a site to see it in action.
Step 5 | See your plugin in action
Plugins that you develop are immediately available for installation on your own sites, using the plugin explorer in the editors.
Go ahead and create a new site, and then install Wix Bookings. Alternatively, use this site template, which already has Wix Bookings installed.
-
Open your editor. In the left sidebar, click Pages
 , and go to Booking Pages > Service Page.
 -
On the Service page, click the page's widget, and then click the Plugins
 icon.
icon.See how it looks

Your plugin should appear in the plugin explorer.
-
Hover over your plugin, and then click Add.
When prompted for consent, select the checkbox and click Agree & Add.
Once you install your plugin on a site, you can preview or publish the site to test the plugin's functionality and make sure it's working properly.
Note: The Service page lets you reposition the plugin within the page's layout by reordering the Service page sections.