Guide for Dropshipping Apps
Got an app that'll help Wix business owners expand their e-commerce offerings with dropshipping functionality? This guide tells you how to get your app ready for the Wix App Market.
Step 1: Set up your app in the Wix Developers Center
- Go to the Wix Developers Center and click Get Started.
- Click Create New App.
- Go through each tab under Build Your App in the side nav and fill out the required info:
Extensions
There are two main types of extension: website and dashboard. All apps must have at least one extension, but you can have two or more. You'll most likely need at least a dashboard page.
OAuth
To get access to user data – like a purchase made on the user's site – users must first grant your app permission to do so. For more information, see Use OAuth for Authenticating Your App.
Permissions
The following permissions are relevant to most dropshipping apps:
- Wix Developers > Manage Your App (this is added automatically)
- Wix Stores > Manage Orders
- Wix Stores > Manage Products
Webhooks
The following webhooks are relevant to most dropshipping apps:
App Management:
Note:
There are also several Paid Plan webhooks available, if your app will have paid plans.
Wix Stores:
Step 2: Set up a free Premium Wix test website
It's essential that you test your app thoroughly before submitting it for review. To make this easier we provide a pre-made Premium development site that's free to use.
- Log in to the Wix Developers Center.
- Click Test Your App in the top right corner of your dashboard (if you already have one or more test sites, hover over Test Your App and click Create Development Site instead).
- Select Wix Stores. You can always add more later in the site Editor.
- Click Create Site. It takes around 20-30 seconds to create the site, so please don't refresh the page. You'll receive an email inviting you to join the site, but you should ignore this.
- Hover over Test Your App again to select a starting point for your app: App Market, Editor, or Dashboard. A starting point is the location from which a user first installs / interacts with your app.
- You'll be prompted to select the development site from your list of sites which will be named 'Dev Site'.
- You can create multiple development sites. To do this, hover over Test Your App and click Create another development site.
Tip:
You can use the App Instance ID to check that Wix Stores (or any other business solution) is installed on a site by checking the installedWixApps key in the Get App Instance API. If it isn't installed on a user's site, you should display a clear error message letting them know.
Step 3: Test your app
Install the app on your test site and confirm that you get the App Installed Webhook.
Trigger a product creation on your site
- Call the Create Product API with the product parameters to create a new product for the store owner.
- A Product Created Webhook is triggered with the product data.
- Add the product to a specific collection with the Add Products To Collection API, get the collection ID from Query Collections.
- Use the Update Product API once the user makes changes to the product.
- Product Deleted Webhook is triggered once the user deletes it from their store.
- If you choose to enable changes to the product within the Wix dashboard, test and make sure you receive the Variants Changed Webhook.
Trigger and fulfill a store order on your site
- Visit your test site as a site visitor, and add a product in the store to your cart.
- During checkout, enter test shipping details and select a delivery method. For payment, select Manual Payment (unless you've enabled other payment options).
- Place the order.
- Confirm that you get the Order Created Webhook.
- Collect the relevant data for a shipping label and/or packing slip:
- Order #:
number - Order date:
dateCreated - Order ID:
orderId(for the next step)
- Call the Get Order endpoint with the orderId from the webhook to collect product data not provided in the webhook:
- Billing address:
order>billingInfo>address AND order>billingInfo>buyerInfo - Line item name, sku, quantity, media:
order>lineItems - Shipping address:
order>shippingInfo>shipmentDetails>address
- After you fulfill the order, call the Create Fulfillment endpoint with the order ID and line items from the webhook and include the tracking code.
- Confirm that you get the Fulfillment Created Webhook.
- Remove the app from your test site and confirm that you get the App Removed Webhook.
Step 4: Set up your app's market listing
- In the Wix Developers Center, open your app and complete all the info required under Publish Your App > Market Listing. If you need help with this, follow our market listing guidelines.
- Add 'Wix Stores' in Publish Your App > Market Listing > App Audience > Installation Requirements.
Step 5: Set up Dynamic Pricing
For dropshipping and fulfillment apps, you'll need to set up Dynamic Pricing in the Wix Developers Center. Here's how:
- Go to Market Listing > Pricing under Publish Your App
- Select Dynamic Pricing under Business Model.
- Toggle Offer In-App Purchases on if you want to offer additional things (like packages of images) to users from within your free app.
- Toggle Offer a Free Trial and type in the amount of days you want to offer it for.
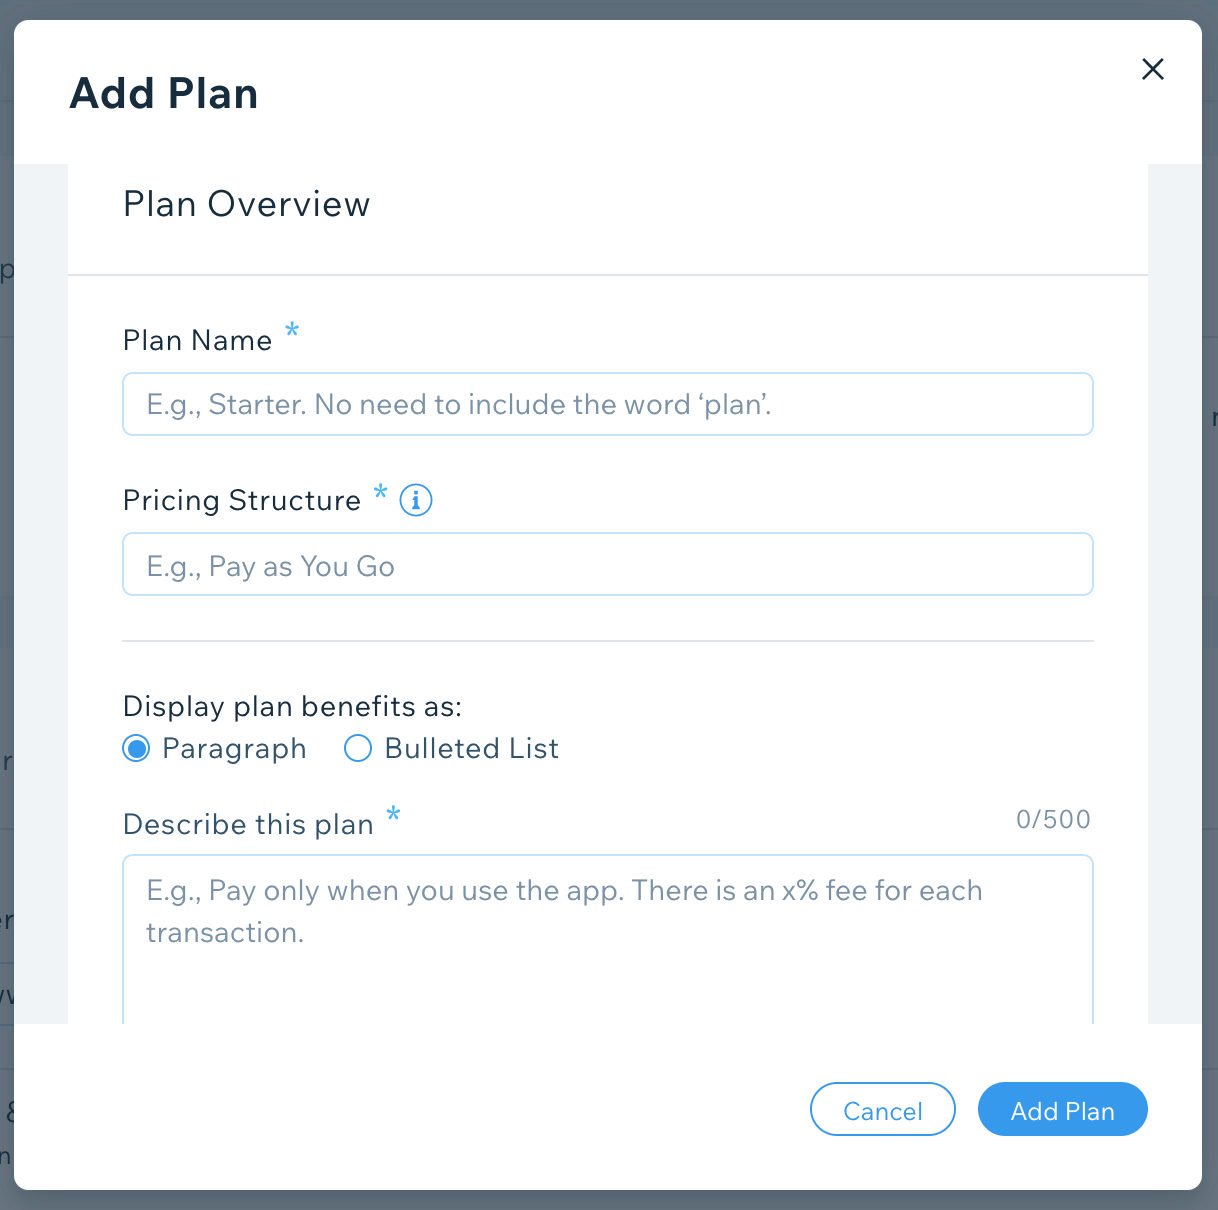
- Start adding Pricing Plans by clicking Add Plan.
- Add a Plan Name and describe your pricing in Pricing Structure.
- Write a quick description of your plan either as a Paragraph or Bulleted List – use this to explain clearly how your pricing works.
- Click Add Plan, then click Save on the Pricing page.

Important:
Any plans with Dynamic Pricing that take payments outside of the Wix system need to have a Partner Billed App addendum added to the Partner Agreement. If you'd like to know more about this, get in touch.
Step 6: Submit your app for review
When you're ready, you can submit your app for review. If you haven't already done so, here are some important guidelines and tutorials to check out before you submit your app:
- Read through our guidelines and our partner agreement.
- Review our app extension types and how they work.
- Make sure you're using the instanceId parameter to identify users.
- Look through our API documentation.
- Test your app thoroughly.
Step 7: Register as a fulfiller on Wix
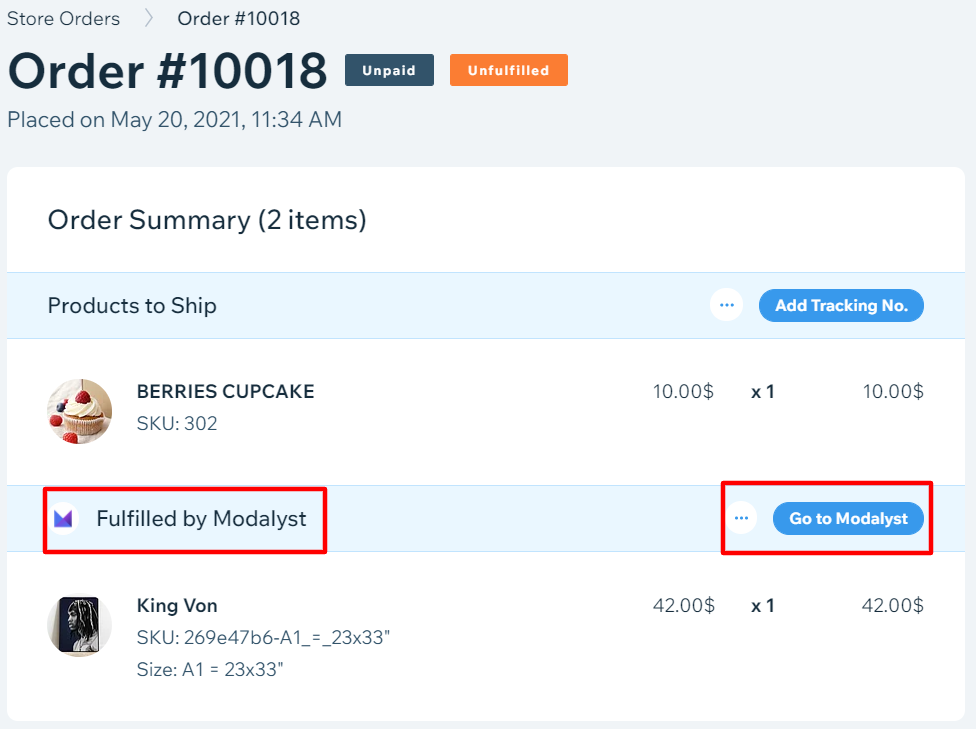
Dropshipping and fulfillment apps will appear as fulfillers in the store manager within Wix. That means that your app will appear automatically as a fulfiller inside an Order in the site owner dashboard.

In order for us to register you in the system, we'll ask you the following questions as part of the review process:
- Do you allow users to modify product prices via Wix Stores and not your own platform?
- Do you allow users to modify inventory via Wix Stores and not your own platform?
- Do you allow users to manage options/variants via Wix Stores and not your own platform?