Velo Tutorial: Payment Provider Service Plugin
Before getting started
In this tutorial, you'll learn how to write the code to integrate a new payment provider with your site. If you're not a developer, check out these helpful links:
Wix service plugins (formerly SPIs and custom extensions) allow you to expand what your site can do by integrating with 3rd-party services not currently supported by Wix. They also allow you to implement custom logic to change how your site displays and behaves using Velo. Learn more about service plugins. You can manage service plugins from your site's dashboard, and they behave just like the ones Wix already supports.
With the payment provider service plugin, you can integrate your site with payment providers that aren't currently supported by Wix. You can also customize the transaction and refund flows to match your site's specific needs.
This guide explains how to set up a payment provider service plugin on your site using Velo.
The process has 3 steps:
- Create a new payment provider plugin on your site.
- Implement your plugin with custom code.
- Deploy the plugin.
Note:
You can only use this service plugin to integrate payment providers with your own sites. You can't publish the plugin you create on the Wix App Market. If you are a payment service provider who wants to make your services available on Wix sites, use the REST Payment Service Provider service plugin.
Step 1: Create a new payment provider plugin
The first step in setting up your new plugin is to add it to your site. This process creates a new folder in the Service Plugins section of the Code sidebar that contains the files for your code.
-
With Wix developer mode enabled, click Public & Backend
 on the Code sidebar.
 -
Scroll down to Service Plugins.

-
Hover over Service Plugins and click
 .
. -
Select Payment.

-
Enter a name for your plugin and click Add & Edit Code.
The name can't contain spaces or special characters.
Step 2: Implement the plugin
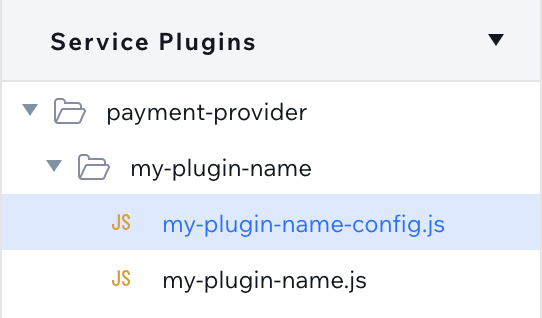
The procedure in the previous section creates a folder in the Service Plugins section of the Code sidebar called payment-provider. Inside this is another folder with the name of the plugin you set up. This folder contains 2 files,
To implement your plugin, you need to:
- Add custom code in these files to integrate with a payment provider.
- Expose HTTP endpoints on your site that the payment provider can use to send your site updates about transactions and refunds.
Here are some guidelines for writing your code:
<my-plugin-name>-config.js
The code in this file defines a function named getConfig() that returns an object containing the values used to display information about your plugin in 3 different locations on your site:
-
The Connect
page where you connect a payment provider to your site. 
-
The Accept Payments page where you see the payment methods you've connected to your site.

-
The Checkout page where your site visitors finalize their shipping and payment details and place orders.

The object returned by getConfig() includes the following properties:
-
title: (required) The name of the payment service provider as a string. This name is displayed when selecting payment providers to connect to on your site's dashboard. -
paymentMethods: (required) An array ofpaymentMethodobjects defining the different payment methods supported by this provider. Each payment method object has a key whose value is the name of payment method. For now, only'hostedPage'is supported. The value of this key is an object that can include the following properties:-
title: (required) The payment method title as a string. This title is used to display the payment method on your site's dashboard. -
logos: An object containing URLs to the payment method's logo as strings. These logos are displayed on the site's dashboard and the checkout cart. You can provide different logos for white and colored backgrounds. See the example return object below for details. -
billingAddressMandatoryFields: An array of strings representing the billing address fields that buyers must include in order to use this payment method.Options:
'ZIPCODE','CITY','STATE','ADDRESS','COUNTRY_CODE','EMAIL','PHONE','FIRST_NAME','LAST_NAME','STREET','HOUSE_NUMBER','TAX_IDENTIFIER'
-
-
credentialsFields: (at least 1 credentials object is required) An array of objects representing the credentials required to connect an account for the payment provider. The credentials fields are displayed on the Connectpage in your site's dashboard. The following credentials objects are supported: -
simpleField: An object representing a text field.name: The key to use for the field in your code as a string.label: The label of the field to display on the dashboard as a string.
-
checkboxField: An object representing a checkbox field.name: The key to use for the field in your code as a string.label: The label of the field to display on the dashboard as a string.tooltip: Tooltip text to display when the user hovers over the field as a string.
-
dropdownField: An object representing a dropdown field.-
name: The key to use for the field in your code as a string. -
label: The label of the field to display on the dashboard as a string. -
options: An array of objects representing the options to display in the dropdown field. Each options object contains the following properties:-
key: The name of the option to use in your code as a string. -
value: The label of the option to display on the dashboard as a string.
-
-
-
Example return object:
<my-plugin-name>.js
The code in this file defines the connectAccount(), createTransaction() and refundTransaction() functions. These functions are called by Wix at different points in the payment processing flow. The following sections describe the usage, parameters, and return values of these functions.
connectAccount()
This function is called when you click the Connect button on the Connect
options: An object containing the credentials you entered on the Connect
Example options object:
Note:
This function has a second parameter called context. This parameter is for internal Wix use only. You don't need to use it in your code.
The createAccount() function must return an object containing the account information and credentials for the payment provider you're connecting to. Wix uses the return values from this function to set up the payment provider on your site. The account credentials returned by this function are also passed to your plugin's createTransaction() and refundTransaction() functions. This way, you can use them to make requests to the payment provider's API. If the payment provider fails to create an account, return an error object instead of the account details. For more details, see the service plugin reference.
Example return value:
createTransaction()
This function is called when a site visitor clicks the Place Order button on your site's Checkout page. Use it to send a request to a payment provider to create a new transaction. The function accepts the following parameters:
options: An object containing information about your site, the site visitor's order, and redirect URLs for payment processing. For more details, see the service plugin reference.
Example options object:
Note:
This function has a second parameter called context. This parameter is for internal Wix use only. You don't need to use it in your code.
The createTransaction() function must return an object with a pluginTransactionId property that represents payment provider's ID for the created transaction. Other properties may be included depending on the type of transaction you're creating and the results of the request. For more details, see the service plugin reference.
Example return value:
To receive updates from the payment provider about the success or failure or the transaction, expose an HTTP endpoint for this purpose. Provide the URL to the payment provider as part of the request to create the transaction. Use the submitEvent() function to in the logic for your endpoint to mark the transaction as completed. Once this happens, the order associated with the transaction appears in the Orders tab in your site's dashboard.
refundTransaction()
This function is called when you initiate the refund of a transaction from your connected payment provider on the Orders tab in your site's dashboard. Use this function to send a request to the payment provider to create a refund for the transaction. The function accepts the following parameters:
options: An object containing information about the transaction being refunded and the refund amount. For more details, see the service plugin reference.
Example options object:
Note:
This function has a second parameter called context. This parameter is for internal Wix use only. You don't need to use it in your code.
The refundTransaction() function must return an object with a pluginRefundId property that represents the ID of the refund created by the payment provider. If the request to the payment provider isn't approved, the return object should include information about why this happened. For more details, see the service plugin reference.
Example return value for a successful refund:
Example return value for a failed refund:
To receive updates from the payment provider about the refund, expose an HTTP endpoint for this purpose. Provide the URL to the payment provider as part of the request to create the refund. Use the submitEvent() function in the logic for your endpoint to mark the refund as completed. Once this happens, the order associated with the refund is marked as refunded on you site's dashboard.
HTTP Endpoints
When you create a transaction or refund with your payment provider, you need to supply a URL for an HTTP endpoint that the provider can use to send your site updates for the statuses of transactions and refunds. To expose these endpoints on your site, use the Wix HTTP Functions API. In the code for these endpoints, use the submitEvent() function to update the statuses of transactions and refunds on your site.
Example endpoint code. This code must be saved in a backend file called http-functions.js:
Add files to the plugin
If you don't want to keep all of your code in the main plugin files, you can add files to the plugin's folder and import functions and objects into the main files.
- Hover over the plugin folder's name and click More Actions
 .
. - Select New .js file.
- To import from these files to the main plugin files, use the following syntax:
Test the plugin
You can test your plugin before publishing your site using functional testing like you would with any backend Velo code. Make sure your createAccount(), createTransaction(), and refundTransaction() functions' return values are properly formatted. To test your plugin after deploying, add console logs to your code. The results appear in Wix Logs.
Step 3: Deploy the plugin
Once your code files are ready, you need to deploy your plugin and enable it on your site's dashboard.
-
Publish your site.
-
Go to the Accept Payments settings on your site's dashboard.
-
Click See More Payment Options.

-
Find the payment provider from your service plugin in the list and click Connect.

-
Enter the account credential information for the payment provider and click Connect.

-
Once your service plugin is deployed, the new payment provider appears on your site's Checkout page.

Example Integration
The payment provider service plugin allows you to implement a variety of different transaction flows. We created a sample site that demonstrates a basic transaction and refund integration with Tazapay.
Note:
Clicking the link to the sample site opens a copy of the site. Publishing the copy adds it to your Wix account.
In order to get your copy of the sample site working, you need to create and save a Tazapay API key, and make some small changes to the site's code.
Create and save a Tazapay API key
Do the following to generate a Tazapay API key and use it to connect Tazapay as a payment provider on your copy of the sample site:
-
Publish a copy of the template site to save it to your Wix account.
-
Sign up for a free Tazapay sandbox account and log in.
-
On your Tazapay dashboard, click API keys.

An API key and API secret are generated. Copy these values.

-
Open the Tazapay API Reference.
-
Under Authentication, enter your API key for username and your API secret for password. Your API authorization token, starting with
Basic, is displayed in the sample request panel. Copy the token.
-
Open the Accept Payments page for your copy of the sample site.
-
Click See More Payment Options.
-
Find the Tazapay payment provider and click Connect.
-
Enter your API authorization token in the API Auth Token field.
-
Click Connect.
Code setup
Make the following 2 changes to your sample site's code to get it working:
-
On the Code sidebar, click Public & Backend
.
-
Under Service Plugins, select payment-provider > Tazapay > Tazapay.js.
-
In the
createCheckoutSessionfunction, change the value ofcallbackUrlto reflect the details of your site. Change<my-account>to your Wix account name and<my-site-name>to the name of your copy of the sample site.
-
Make the same changes to the
callbackUrlvalue in thecreateRefundfunction. -
Publish your site.
Last updated: 21 September 2025