Tutorial | Create a Custom Registration Form
When a site adds a Members Area, it includes a default registration form that allows site visitors to sign up as members. Sometimes the standard form doesn't meet the specific needs of a site. In this tutorial, we build a custom registration form that can be designed to match a site's branding, and use it to collect specific information from site visitors in the registration process. Here we create an example custom registration form that includes confirmation fields for email address and password.
In this tutorial, you'll learn how to:
- Enable a custom site registration form.
- Build a custom form with custom input and design elements.
- Write page code to validate confirmation fields.
- Write page code to register a new member
Before you begin
It's important to note the following points before doing this tutorial:
- Your site must have a Members Area.
The code in this tutorial was written using the following module versions:
- @wix/sdk (v1.12.0)
- @wix/members (v1.0.0)
Learn how to install npm packages in the editor or using the CLI.
Step 1 | Enable custom site registration
To get started, follow the steps below to enable custom site registration using custom forms.
-
Add a popup to a site. In our example, we name our popup Custom Registration Form.
-
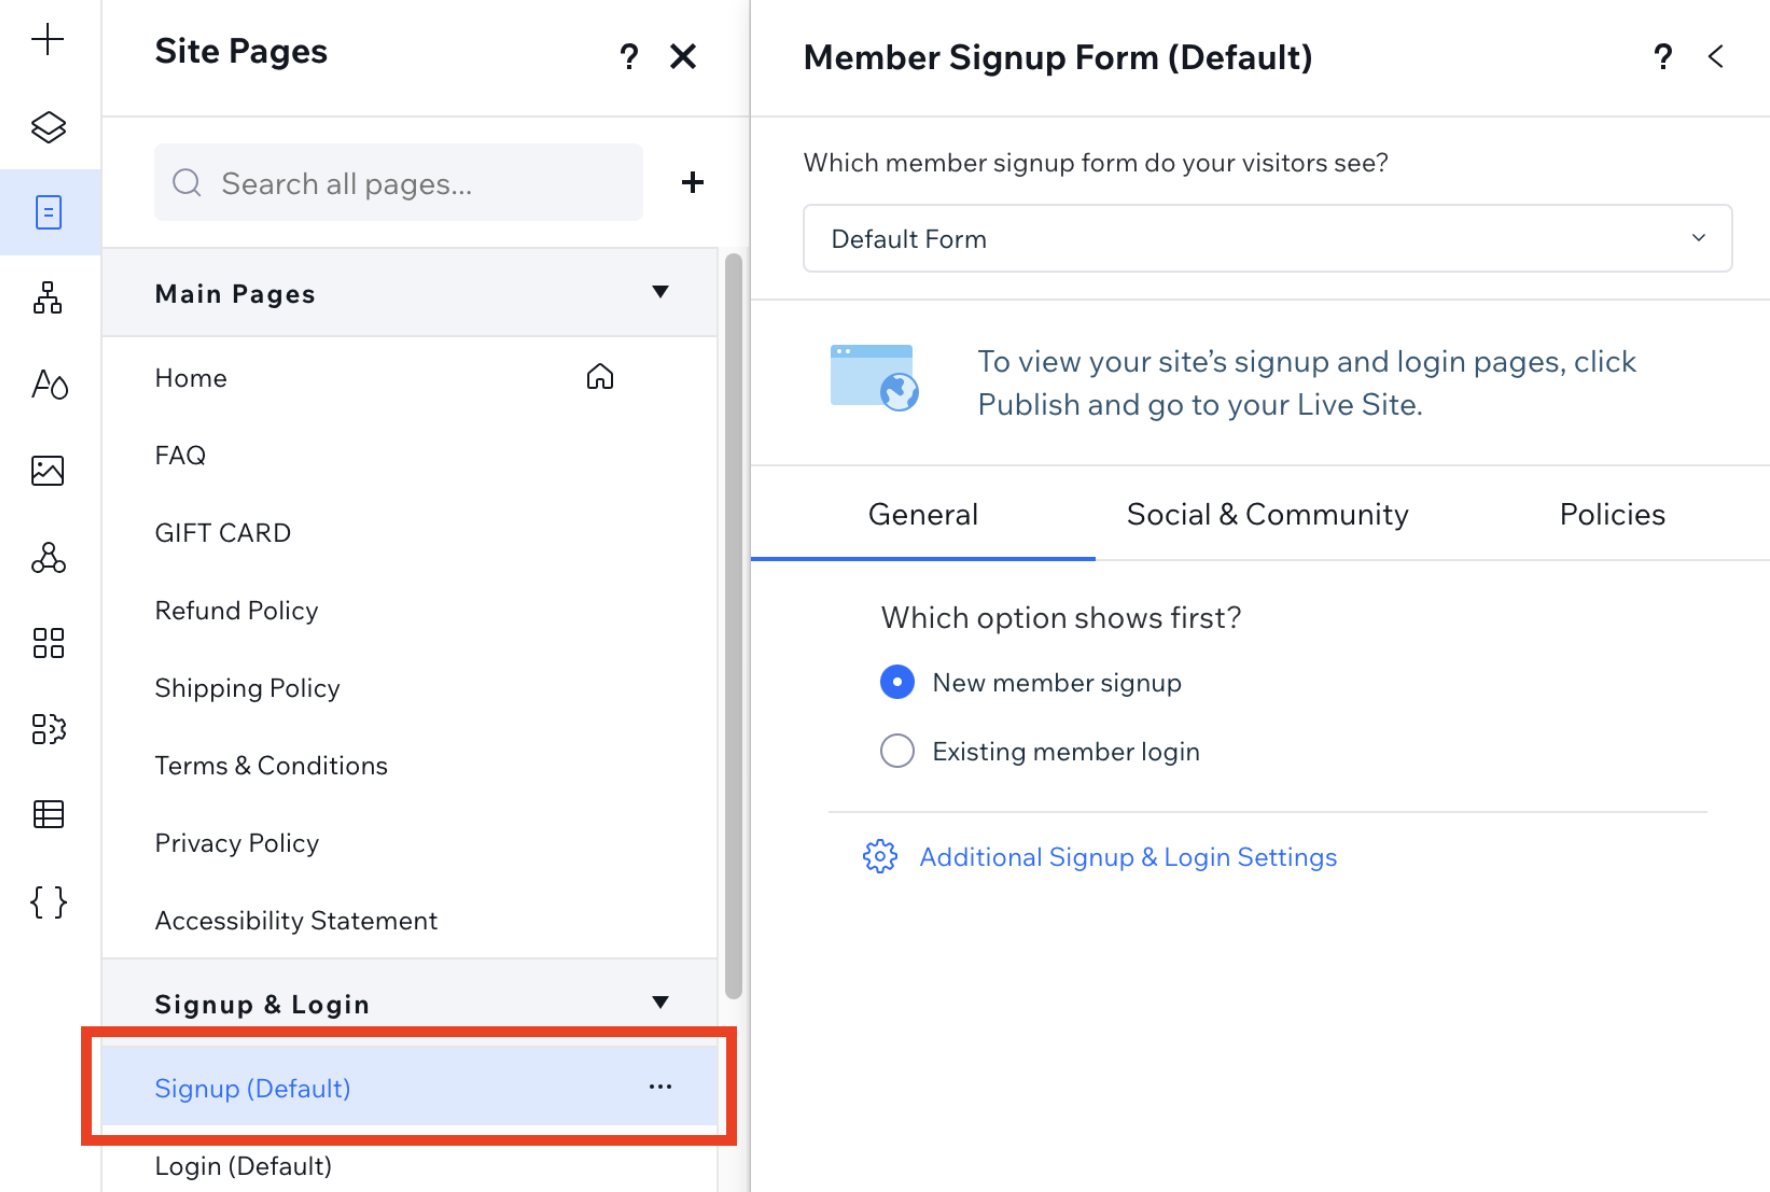
Navigate to Pages on the left side of your editor. Under Signup & Login, click Signup (Default).
-
In the dropdown menu, change the default form to Velo Form, and link it to the Custom Registration Form popup created earlier. This step changes the default member signup form to the custom registration form.
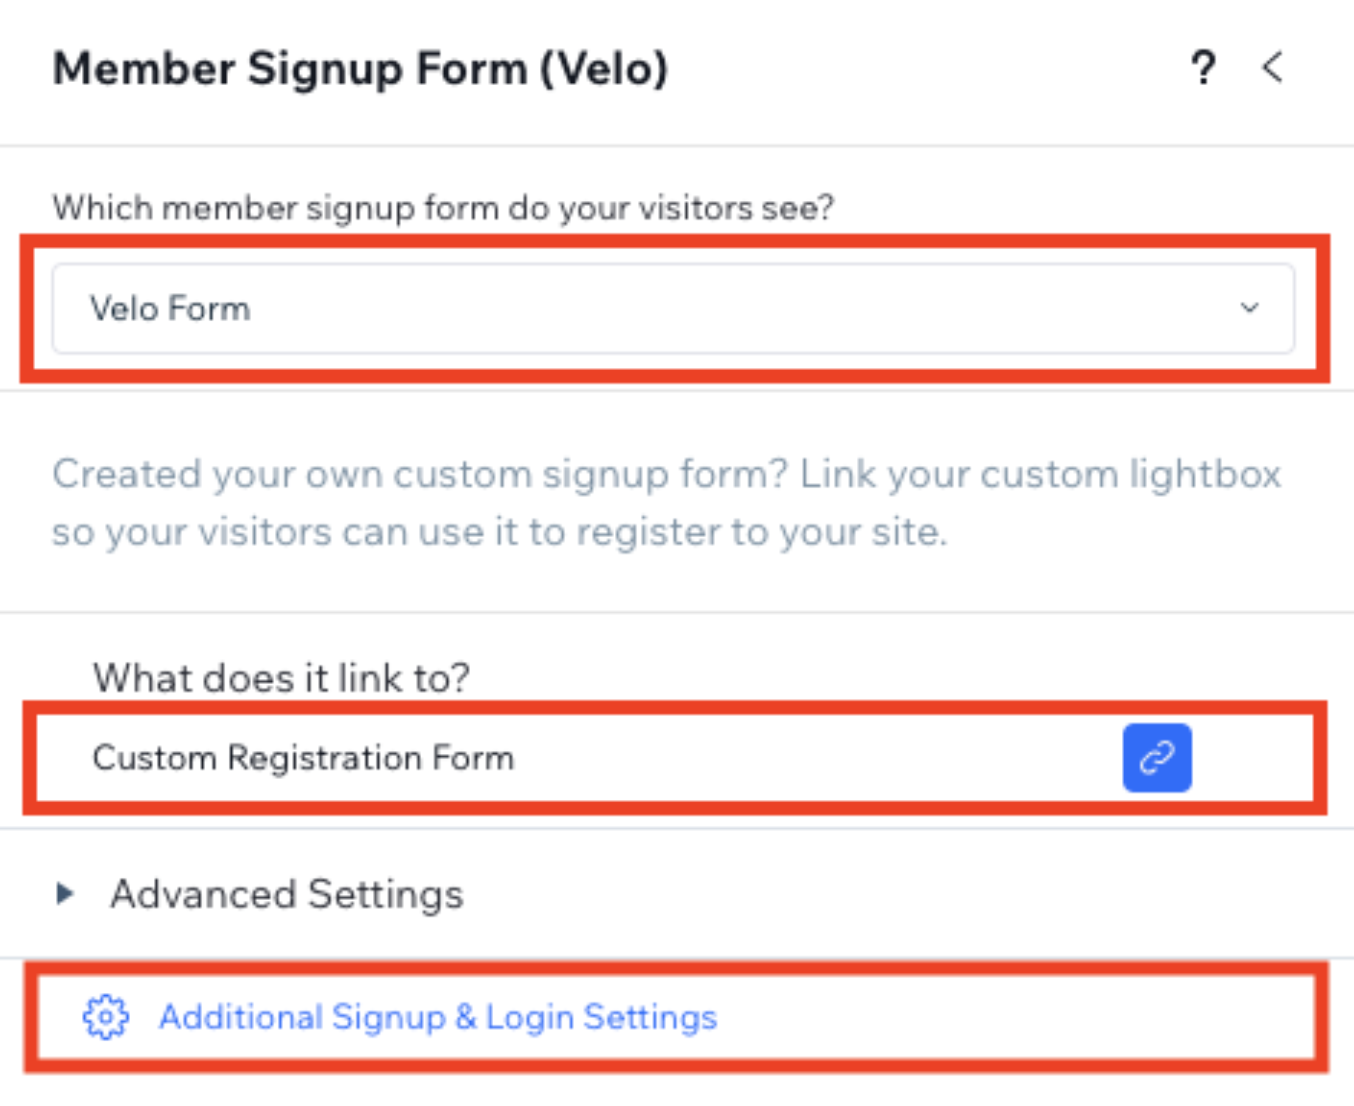
Note: When a site visitor signs up using a Velo custom registration form, they automatically become a site member, as the member signup settings default to automatic approval for Everyone who signs up. To require manual approval before becoming a member, adjust the settings in Additional Signup & Login Settings.
You can now go to the popup page to start building the form.
Step 2 | Build a custom form
To add fields to a custom registration form:
-
Click on Signup (Custom), under Signup & Login.
This opens the popup.
-
To add fields to the popup, click Add Elements
 on the left side of the editor. Then, drag and drop the relevant element.
 -
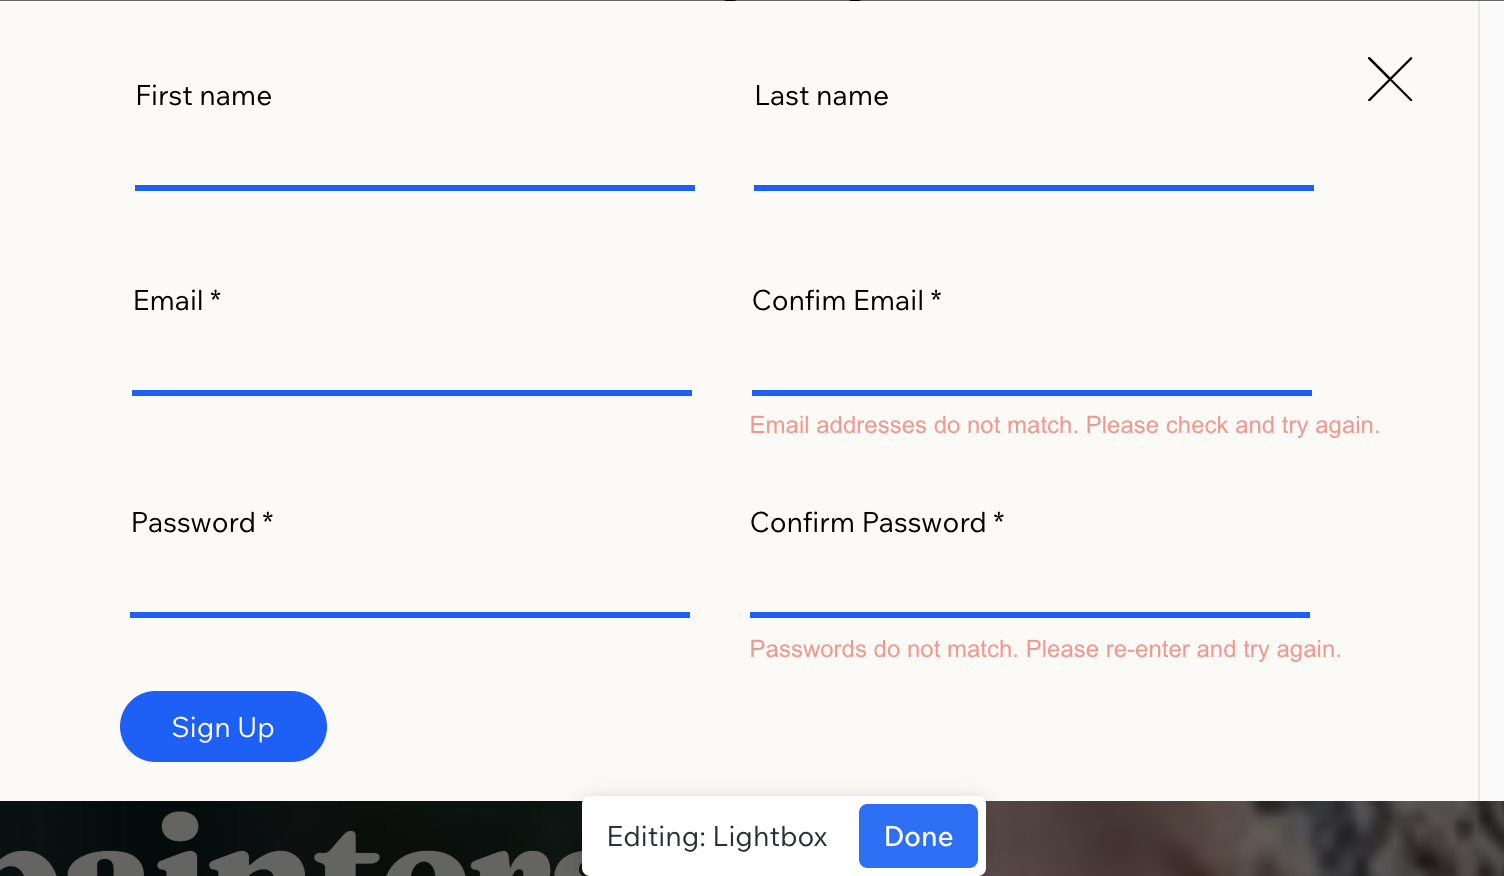
Add the following fields:
- A text input for entering a first name. Set the text ID to
firstName. - A text input for entering a last name. Set the text ID to
lastName. - An email input for entering an email address. Set the email ID to
email. - An email input for confirming an email address. Set the email ID to
confirmEmail. - A password input for entering a password. Set the password ID to
password. - A password input for confirming a password. Set the password ID to
confirmPassword.
- A text input for entering a first name. Set the text ID to
-
Add text elements below the confirmation fields to display error messages if a site visitor's entries don't match. Set the default values for these text elements as "Hidden" in the Properties & Events panel.
- A text element for noting the 2 email fields don't match. Set the text ID to
emailMismatchText. - A text element for noting the 2 password fields don't match. Set the text ID to
passwordMismatchText.
- A text element for noting the 2 email fields don't match. Set the text ID to
-
Add a register button to submit the form and register the site visitor as a new member. Set the button ID to
register.
The form should look like this:
Note: A registration form must include input elements to collect a site visitor's email and password. This data is required for adding a new contact entry for a site visitor in a site's Contact List, and for registering them as a site member.
If you want to collect additional data from site visitors aside from the default fields in a site's Contact List, you'll need to add custom fields to the site's Contact List.
Step 3 | Add frontend code
In this step, you'll add code to validate the confirmation fields in your popup.
-
Import the required module at the top of your page code.
Copy -
In the
onReady()method, add anonClick()event handler to the register button, and retrieve the values from all input fields, including the confirmation fields.Copy -
Reset and hide any error messages when they're no longer needed.
Copy -
When a site visitor finishes entering their information and clicks Sign Up, first validate that the email and password confirmation fields match their respective original fields. If either validation fails, display the appropriate error message and stop the registration process.
Copy
Step 4 | Add registration logic
If the validation above passes, continue registering the new member.
-
Set the new member's contact info.
Note: The API requires that this is passed as an array. So even in our example, where new members only have 1 email address, this is passed as an array.
Copy -
Register the site visitor.
Copy -
Check the registration status.
Copy
Complete code example
Here is the complete code for this example:
Last updated: 30 December 2025