Tutorial | Create a Custom Bookings Experience for Appointment Services
Using the JavaScript SDK Bookings APIs, you can create a custom booking experience for the appointment-based services you offer on your site. This tutorial demonstrates how to build a complete booking flow that integrates with Wix eCommerce for payment processing.
This tutorial covers appointment-based services only. For class and course services, the availability checking and booking processes are different and require separate implementation approaches.
What you'll build
By the end of this tutorial, you'll have a fully functional booking flow that allows site visitors to:
- Browse available appointment services.
- Select an appointment time slot.
- Enter their contact information.
- Complete payment through Wix eCommerce.
To build the custom bookings experience, follow these steps:
- Set up the page elements and structure.
- Build the backend logic to fetch available time slots.
- Build the backend logic to create bookings and process payments.
- Create the basic booking flow framework.
- Enable customers to browse and select services.
- Display available appointment times to customers.
- Allow customers to choose their preferred time slot.
- Process the booking and redirect to Wix eCommerce checkout.
The code in this article was written using the following module versions:
- @wix/site-ecom (v1.10.0)
- @wix/bookings (v1.0.944)
- @wix/ecom (v1.0.1243)
- @wix/web-methods (v1.0.0)
Learn how to install npm packages in the editor or using the CLI.
Before you begin
It's important to note the following points before doing this tutorial:
- Set up your services using the Bookings app.
- This tutorial covers appointment-based services only. Class and course services have different availability patterns and booking flows that aren't covered in this tutorial.
- For paid bookings, set up payment processing before using the Bookings APIs.
Step 1 | Add elements to your page
This step sets up the page elements needed for the booking flow. At the end of this step, you'll have a complete page structure ready for implementing the booking functionality.
To set up the page structure:
-
Add a dataset and connect it to the Bookings/Services collection. Learn more about Adding a Dataset.
-
Add the following elements to your page for services display and connect the repeater elements to their respective fields from the Bookings/Services collection through the dataset:
Type ID Connected to collection/field Section serviceSection - Repeater serviceRepeater Bookings/Services Text titleText Service Name (Text) Image serviceImage Service Image (Image) Text descriptionText Service Description (Text) Text priceText Price Summary (Text) Button bookButton -
The layout should look like this:

-
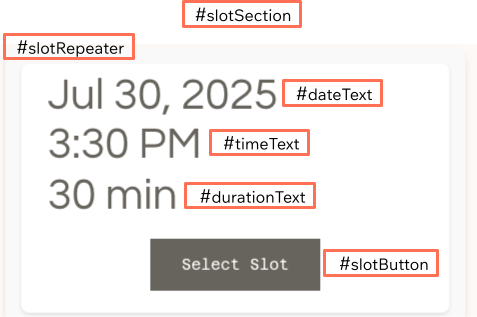
Add the following page elements for time slots display.
Type ID Purpose Section slotSection Contains slot selection UI Repeater slotRepeater Display available time slots Text dateText Show slot date Text timeText Show slot time Text durationText Show slot duration Button slotButton Select time slot
The layout should look like this:
-
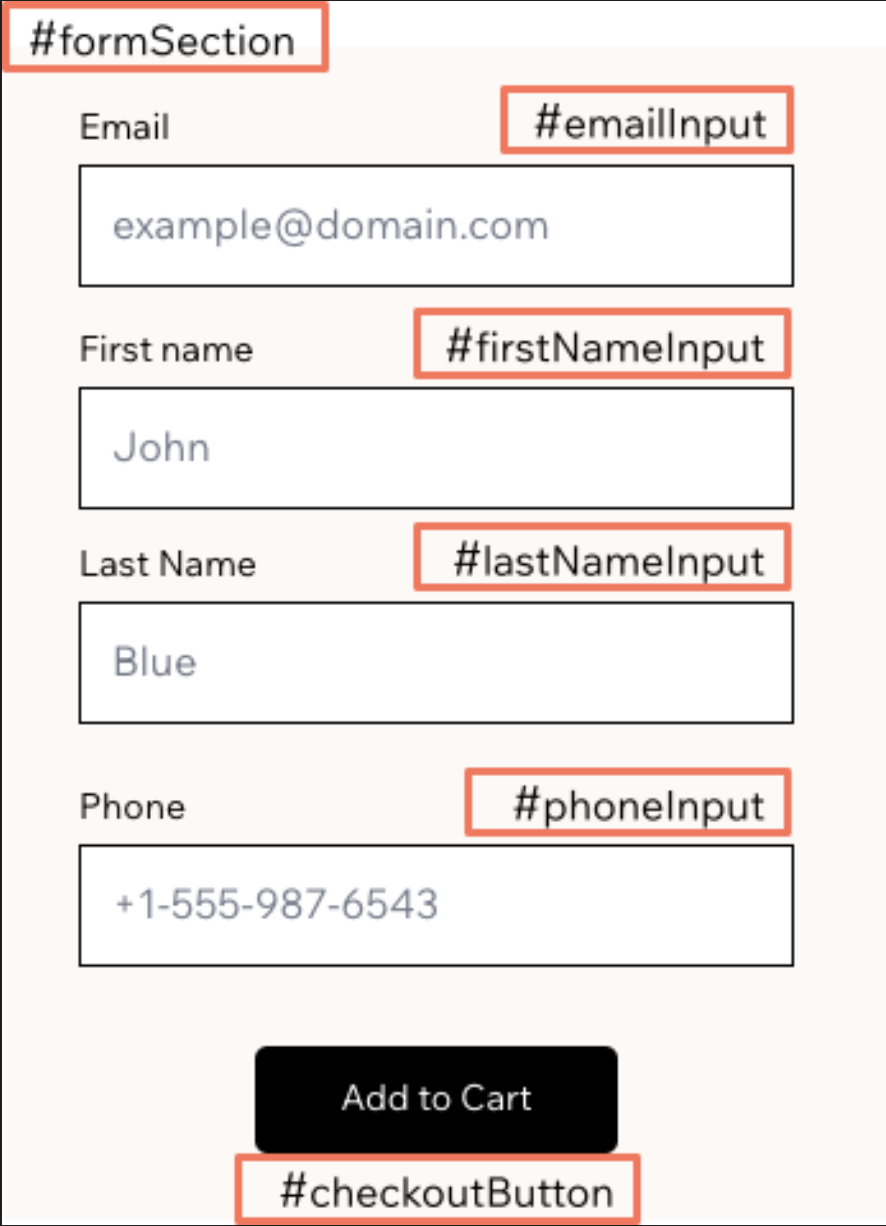
Add the following page elements for the booking form.
Type ID Purpose Section formSection Contains customer input fields Input firstNameInput Customer first name Input lastNameInput Customer last name Input emailInput Customer email Input phoneInput Customer phone number Button checkoutButton Add booking to cart
The layout should look like this:
Step 2 | Add backend code
This step creates the backend web module for checking slot availability. At the end of this step, you'll have a backend web module that handles slot availability: fetching a list of available slots and verifying that a specific slot is still bookable right before creating a booking.
The availability checking methods in this step work with appointment-based services. Class and course services use different availability patterns and require different API methods.
-
Create a new backend file called
bookings-availability.web.jsin your backend folder. -
Add the required imports.
Copy -
Add a web method to list available slots.
It calls
listAvailabilityTimeSlots()to retrieve available booking slots for a service. The frontend code passes the required parameters:serviceId,fromDate,toDate,timeSlotsPerDay, andtimeZone:Copy -
Add the second method to verify slot availability.
This prevents double-booking by checking if a slot is still available right before creating the booking. It calls
getAvailabilityTimeSlot()to verify a specific time slot is still bookable. The method checks the slot'sbookableproperty to determine if it can still accept bookings. The frontend code passes the required parameters:serviceId,localStartDate,localEndDate,timeZone, andlocation.Copy
Step 3 | Build booking and payment logic
This step creates the backend web module for booking creation and cart integration. The backend web module handles a 2-step process: first creating a booking and then adding it to the eCommerce cart for payment processing.
-
Create a new backend file called
bookings-checkout.web.jsin your backend folder. -
Add the required imports.
Copy -
Add a helper function to prepare booking data.
Copy -
Add a helper function to create the booking.
This function calls
createBooking()and handles any errors that occur during booking creation.Copy -
Add a helper function to add the booking to the cart.
This function uses
addToCurrentCart()to add the created booking to the eCommerce cart by specifying the Wix Bookings app ID and the booking ID.Copy -
Implement the main web method that coordinates the helper functions.
Copy
Step 4 | Add frontend code
This step sets up the frontend code structure for the booking flow. You'll create the imports, utility functions, and basic UI setup needed for the booking functionality.
At the end of this step, you'll have a page with form validation and checkout button handling, ready to integrate with the service and slot selection features.
To set up the booking infrastructure:
-
Add the imports and global variables at the top of your page code.
Copy -
Add utility and helper functions.
Copy -
Set up the
$w.onReady()function with complete functionality.Copy
Step 5 | Enable customers to browse and select services
This step implements the service selection user interface. At the end of this step, clicking a service's book button shows the slot selection section though slots don't load yet.
To set up service selection:
-
Add the service repeater item ready function.
This function handles when a service item is displayed in the repeater and sets up the book button click handler.
Copy -
Add the service repeater registration to your
$w.onReady()function.Copy
Step 6 | Display available appointment times to customers
This step implements the actual slot loading functionality by replacing the stub function with a real implementation. At the end of this step, site visitors can view available time slots for their selected service.
To load and display available slots:
-
Add the
loadAvailableSlotsfunction to your page code.When a site visitor selects a service by clicking the book button, this function fetches available time slots for that service. This example queries availability for the next 7 days and limits results to 1 slot per day. You can adjust the time range and slots per day to better suit your business needs and user experience requirements.
Copy
Step 7 | Allow customers to choose their preferred time slot
This step implements the slot selection functionality with helper functions for cleaner, more maintainable code. At the end of this step, site visitors can choose from available appointment times.
To display and interact with time slots:
-
Add the
populateSlotRepeaterfunction to your page code.Repeaters require each data item to have an
_idfield that doesn't contain underscores within its value. The raw slot data from thelistAvailabilityTimeSlots()doesn't include anidfield, so you must transform the data. For example, by using themap()method. Without this transformation, the repeater won't display any items while no error is logged.Copy -
Add a helper function to format slot display data.
Copy -
Add a helper function to handle slot selection.
Copy -
Implement the main slot repeater item ready method that uses the helper functions.
Copy -
Add the slot repeater registration to your
$w.onReady()function.Copy
Step 8 | Process the booking and redirect to Wix eCommerce checkout
This step implements the booking creation functionality with a comprehensive set of helper functions for better code organization.
The frontend processBooking() function calls the backend web module addBookingToCart() (created in step 3) that handles both creating the booking and adding it to the eCommerce cart.
At the end of this step, you create the booking and automatically redirect customers to the cart page to complete their purchase.
To implement the booking process:
-
Add helper functions to collect form data and validate slot selection.
Copy -
Add a helper function to transform slot data for booking creation.
You must transform the
slotobject returned fromlistAvailabilityTimeSlots()before specifying it increateBooking(). The required transformations are:- Rename date fields:
localStartDate/localEndDate→startDate/endDate. - Select a resource: Choose 1 resource from the
availableResourcesarray. - Map location type: Convert between different enum values.
From listAvailabilityTimeSlots()To createBooking()CUSTOMEROWNER_CUSTOMCUSTOMCUSTOMBUSINESSOWNER_BUSINESSCopy - Rename date fields:
-
Add a helper function to verify slot availability.
Copy -
Implement the main
processBookingfunction that coordinates the helper functions.This function orchestrates the entire booking process using the helper functions in a clear 6-step workflow.
Copy
What happens next
After the booking is added to the cart and the customer is redirected, they continue through the standard Wix eCommerce checkout flow:
- Cart page: Site visitors review their booking details and continue to checkout.
- Checkout page: Site visitors enter payment information and billing details.
- Confirmation: Site visitors receive booking confirmation after successful payment.
Congratulations. You've successfully created a custom bookings experience that integrates with Wix eCommerce for payment processing.
You can continue building upon this example by adding features like booking confirmations, customer notifications, or apply what you learned in this tutorial to create entirely new booking workflows.
Complete implementation code
Page code (frontend)
bookings-availability.web.js
bookings-checkout.web.js
See also
Last updated: 11 December 2025