Tutorial | Use the Upload Button with Code
In this tutorial, we demonstrate how to create a file upload form that allows site visitors to upload files to your site's Media Manager using the JavaScript SDK. Site visitors click the upload button to choose a file and then click the regular button to perform the upload.
Tip: For more complex file upload scenarios, you can use the Media API.
We'll use the following steps to build the file upload functionality:
- Add page elements.
- Add code to handle file selection and upload.
Step 1 | Add elements to your page
Add the following elements to your page:
- An upload button for choosing a file. Set the upload button ID to
uploadButton. - A regular button to trigger the upload code. Set the button ID to
button. - A text element to display messages to site visitors. Set the text ID to
text. - An image element. Any image is fine. We're only using it as a placeholder for the uploaded image. Set the image ID to
image.
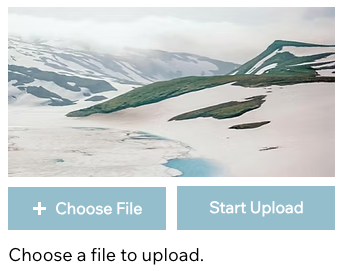
The form should look like this:
Step 2 | Add frontend code
The upload button handles site visitors choosing the file. We'll add an onClick() function to make the regular button perform the actual upload.
To create the onClick() function:
- In the page code panel, add an
onClick()event handler for the button:
Copy
- Start the handler function with a check to see if the visitor has chosen a file with the upload button. If not, prompt the visitor to choose a file:
Copy
- Continue the handler function code for when a file is selected. Display feedback text, upload the selected file by calling the
uploadFiles()async method, and then display the uploaded image and an appropriate message:
Copy
- Handle failed uploads by displaying an appropriate message:
Copy
Complete code example
Here's the complete code for your page:
Copy
See also
Last updated: 7 December 2025
Did this help?