Connect Your Blocks Widget Colors to Site Themes
Editor compatibility
Wix Blocks apps aren't supported in the Wix Harmony editor. Existing Blocks apps remain available for purchase on the Wix App Market for Wix Editor and Wix Studio sites. To learn more, see About Wix Harmony and Blocks.
When you create a widget with Blocks, it can be installed on many different Wix sites. To ensure that your widget's colors look great on all of these sites, Blocks automatically connects it to a theme. When you change colors in your widget, we recommend keeping them connected to the theme.
Select colors that are connected to a theme
- Open your widget in Blocks.
- Select a widget element (such as a container or a text input).
- Click the Design icon
 in the Inspector menu
  on the right.
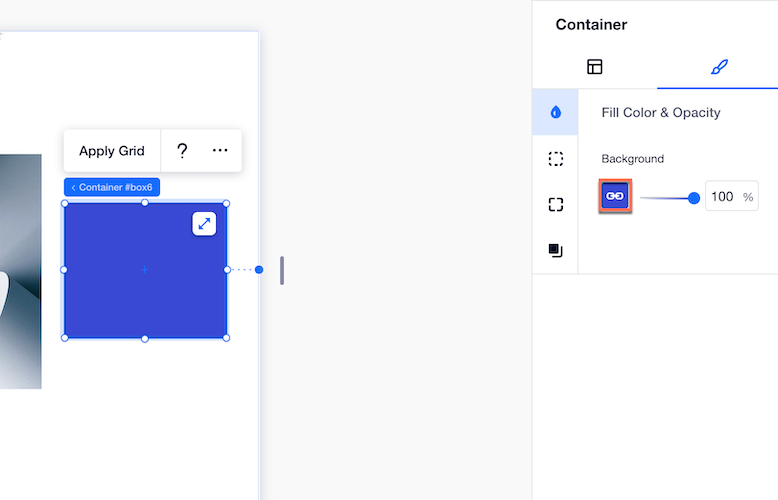
 - Click the color options related to your elements, to change its colors. A box, for example, has colors for Fill Color & Opacity, Border, Corners or Text.
- Select a color from the Theme Palette.
Blocks uses a default palette that cannot be changed - this represents the Wix site themes. If you want to change the color, we recommend that you select the appropriate color from the five default colors presented.
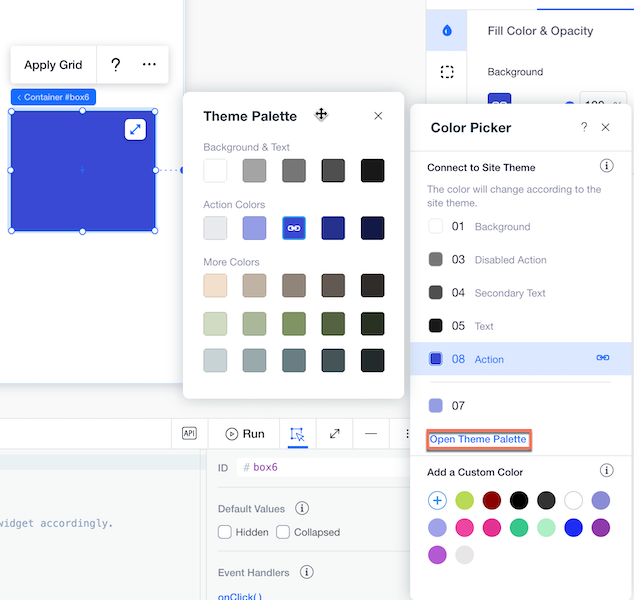
When a color is connected to a theme, it shows the link  indication in the color picker. .
If you choose a color from the Add a Custom Color section of the color picker and not from the Theme Palette, the color remains fixed and disconnects from site themes. You might choose to use this option in special cases, such as success and error buttons that you want to keep green and red.
Note: If you a user selects a color through a custom panel color input, the color won't connect to a site theme, even if they select one of the 5 recommended colors. This is because panel elements behave differently.
Test your colors
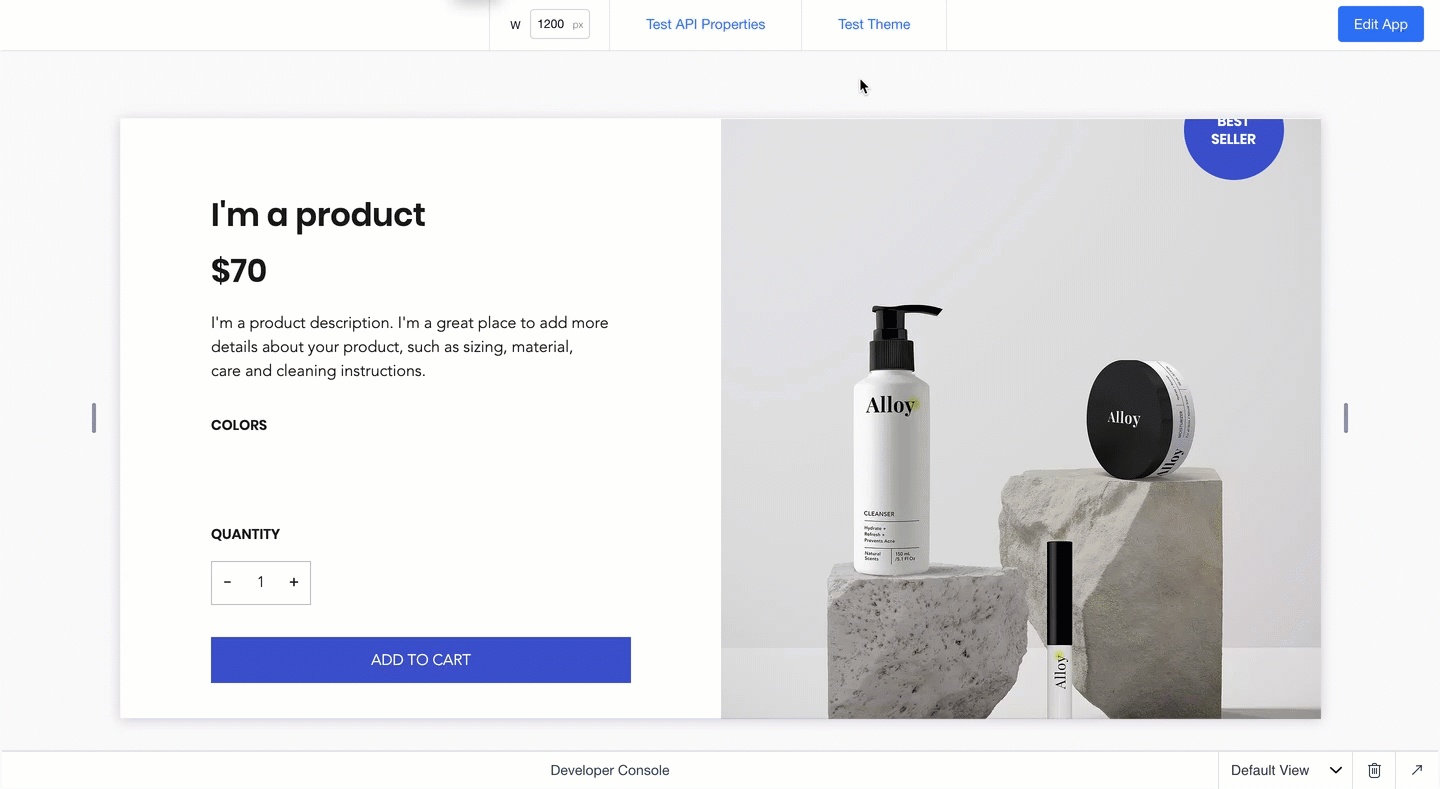
Click Test Theme in Preview  mode to see how your widget looks across various sites with different themes. This helps you check that all your elements are connected correctly and your widget looks great with different themes.