Tutorial | Create a Counter Widget Using Blocks
Editor compatibility
Wix Blocks apps aren't supported in the Wix Harmony editor. Existing Blocks apps remain available for purchase on the Wix App Market for Wix Editor and Wix Studio sites. To learn more, see About Wix Harmony and Blocks.
This tutorial shows you how to build a counter widget, where you can increment and decrement a number. Through this simple widget we will walk through everything that you can do with Wix Blocks.

We recommend that you build this widget from scratch, but if you get stuck, you can view a template of the widget in Blocks and edit it under your Wix account.
Step 1 | Create a new Widget in Blocks
Create an empty Blocks app. Start with a blank canvas.
Step 2 | Add a Flexbox
A flexbox is a container that allows responsiveness. It will keep the other elements organized. To add a flexbox:
- Click the Add Elements + button in the top menu.
- Click Layout -> Flexboxes
- Click the vertical 3-section flexbox.
Show screenshot

Step 3 | Add Widget Elements
Adding the buttons
- Click the Add Elements + button on the top menu.
- Click Buttons.
- Drag and drop a Primary Button onto the right section of the flexbox.
Show screenshot

Changing the text
1. Click Settings.
2. Select Text only from the drop down list.
3. Change the button's text or icon to "+".
4. Click the Design  icon in the Inspector panel
  and select Text.
5. Click Themes and select Heading 6 from the drop down list.
6. Drag and drop another square button to the left section.
7. Change the text to "-".
Show screenshot

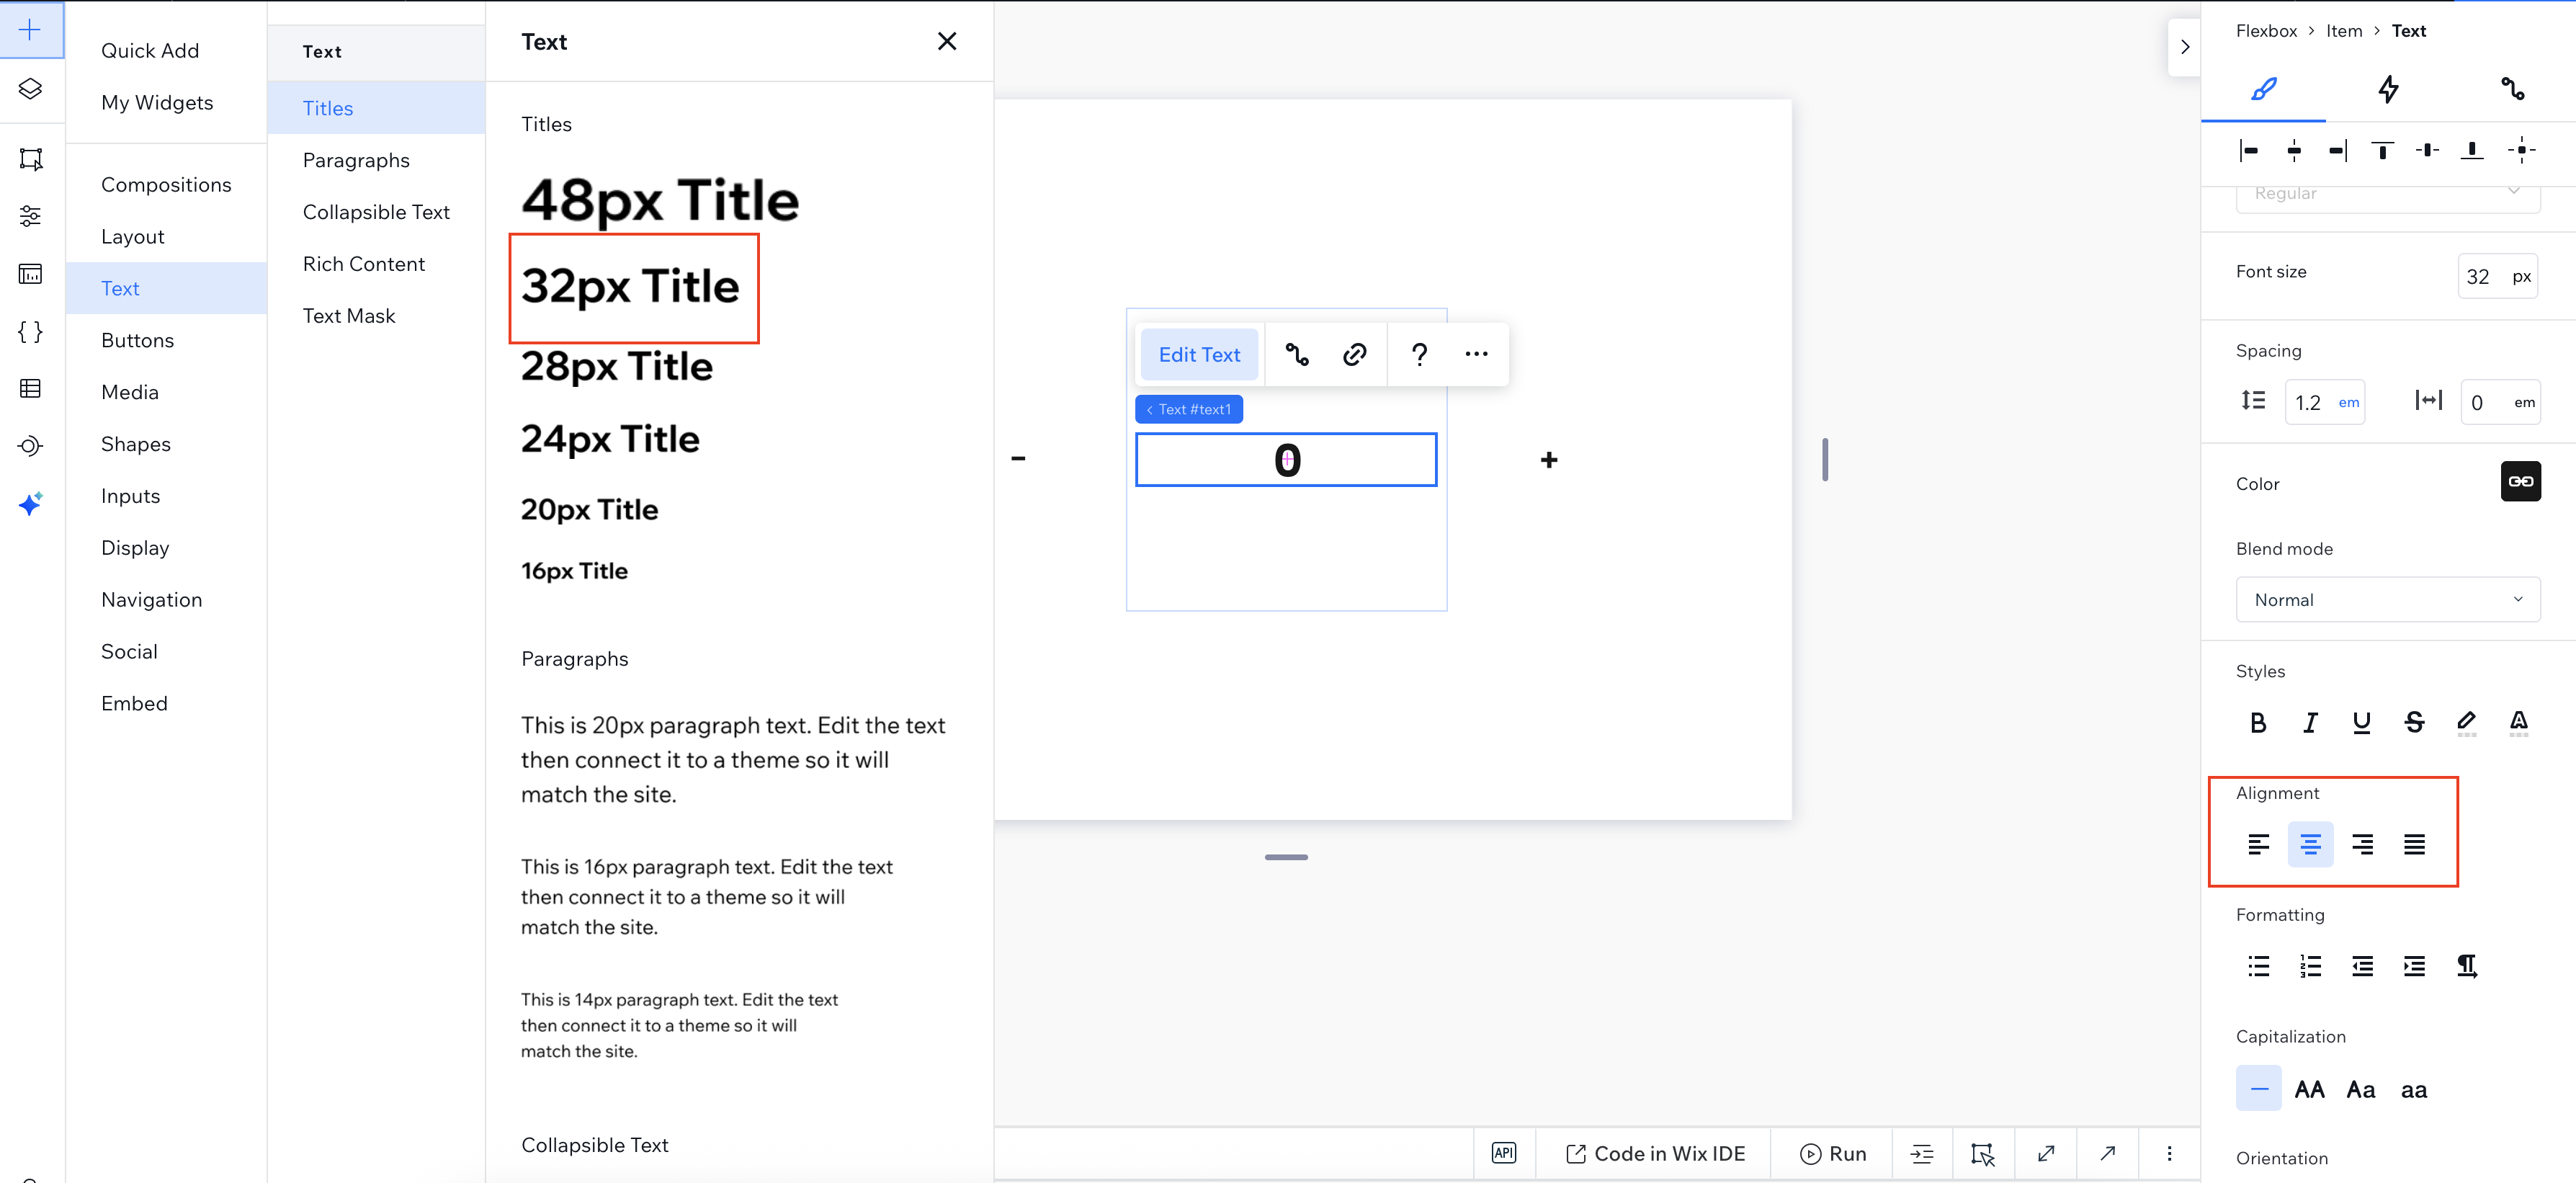
Adding the middle number
- Click the Add Elements + button and select Text.
- Drag and drop an 32px Title element to the central section of the flexbox.
- Edit the text to "0" and align it to the center.
Show screenshot
Changing the IDs
- Click the increment button.
- Click the Properties and Events
 icon in the bottom right of the screen.
 - Change the ID of your increment button to incBtn.
- Change the ID of your decrement button to decBtn.
- Change the ID of your text element to countTxt.
Show screenshot

Step 4 | Add Code to Your Elements
Now it's time to make the widget do what it's supposed to do: count up and down when the buttons are clicked.
1. Go to the bottom part of your screen to add code to your widget.
Show screenshot

2. Add the following code before your onReady() function.
3. Add the following code in your onReady() function.
4. Click the Preview button to see your widget in action.
Step 5 | Make Your Widget Customizable with Widget API
Blocks lets you define an API for your widget, so that the user (a site owner who installs the widget) can customize it to their needs. The API can contain properties, events and exported functions.
Let's say that you want a user to be able to decide what the "step" of the count is. Perhaps they want the step to be 2, so that the count is 0,2,4,6 etc.
To do that, let's define a property in the widget API named step.
Define the step Property
- Click the Widget API
 icon to open the Widget API panel.
 - Click Add New Property in the Properties section (or hover over the section and click the
 icon that appears).
Show screenshot

Configure the property
- Name your property "step".
- Give it the type Number.
- Give it a default value of 1.
Show screenshot

Change Your Code to Consider Your New Property
Change your code so that when the buttons are clicked, addToCount is called with the step from the properties rather than with the default value of 1.
Use $widget.props to access your properties (notice the autocomplete Velo suggestions).
Test Your Property in Preview Mode
- Click Preview to move to preview mode.
- Click Test API Properties.
Show screenshot

3. Change the step to a different number and see how your widget works.
Show screenshot

Add a Public Event to Your Widget API
The widget API allows you to add an event that is fired whenever you decide.
Add an event that is fired when the "count" variable changes:
- Click the Widget API icon to open the Widget API panel.
- Click Add New Public Event in the Events section (or hover over the section and click the
 icon that appears).
 - Name your event and describe it
Show screenshot

4. Add this line to your addToCount() function, to fire the event when the count changes.
5. Now, your addToCount() function should look like this:
You'll need to catch your event in the site editor once you have installed your widget in your website (this will be describe in Step 8).
Add a Public Function to Your Widget API
Create and export a reset() function, so that site owners can easily set the count to 0.
- Click the Widget API icon to open the Widget API panel.
- Click Add New Public Function in the Functions section (or hover over the section and click the icon that appears).
- A new empty function by the default name myPublicFunction() is created, with a designated JSDoc (the comments block) that can be read by anyone who will use your function on a site.
Show screenshot
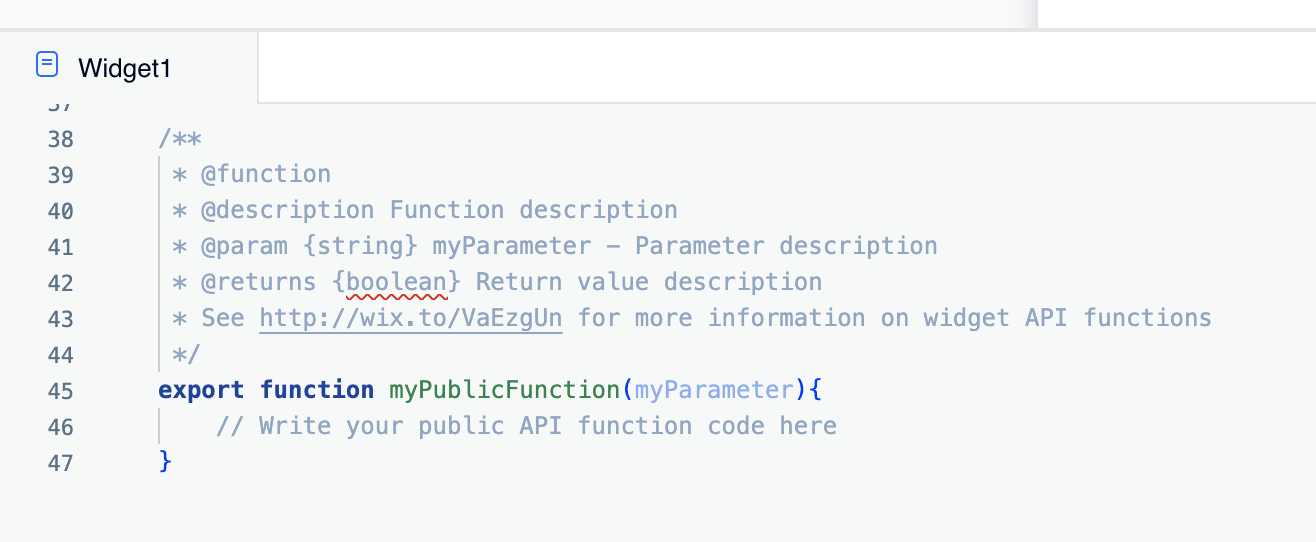
4. Paste the following code instead of the function default code:
5. Update the JSDoc. You must keep the function's annotation in this format.
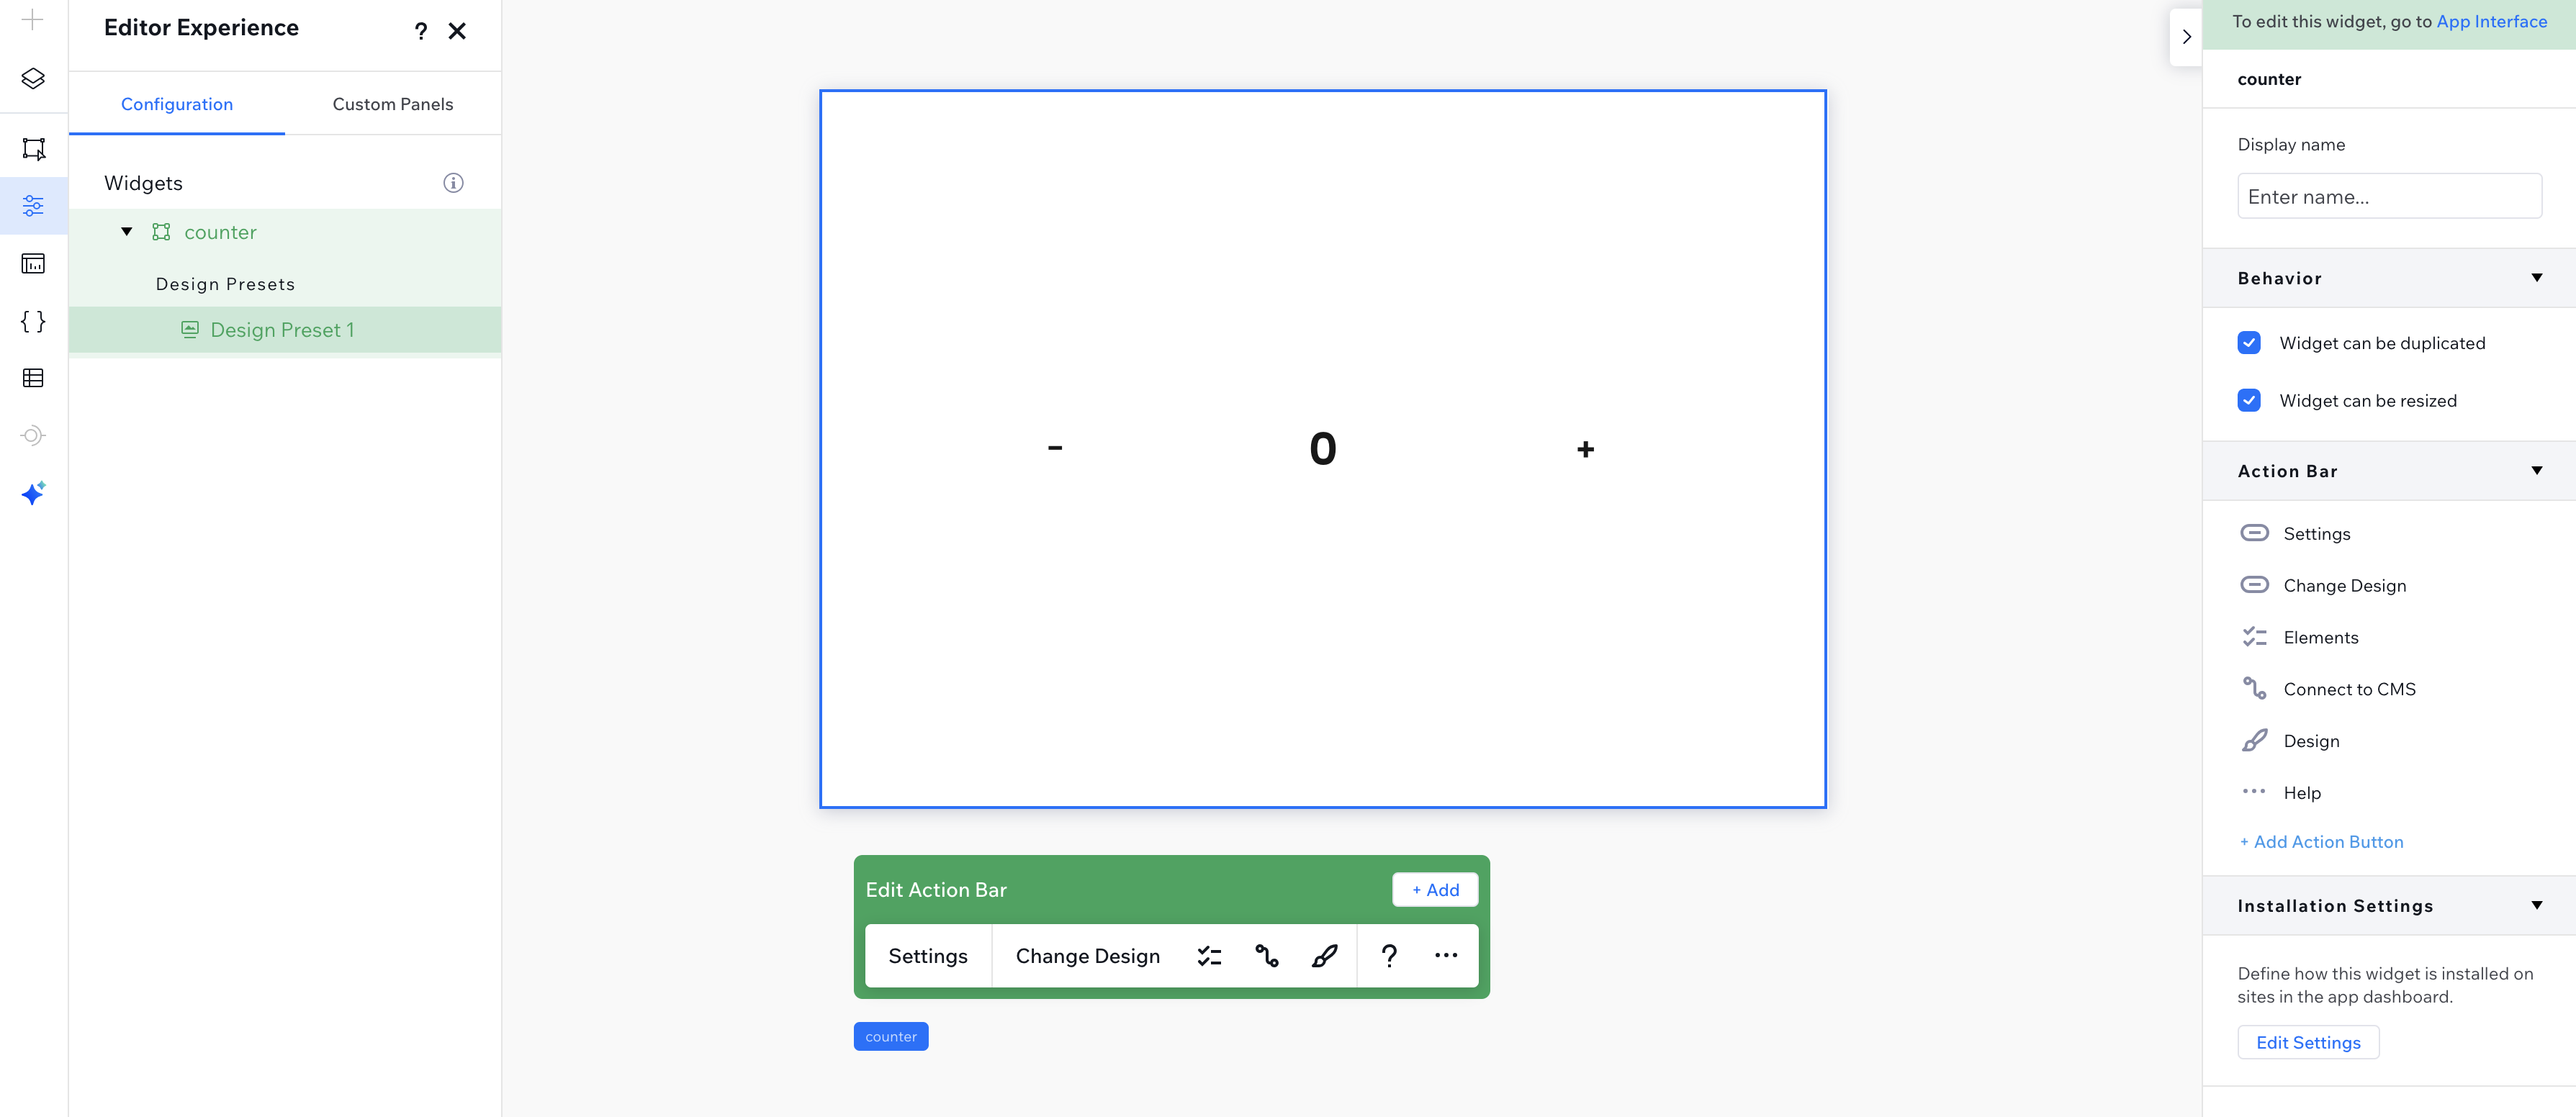
Step 6 | (Optional) Configure Your Widget's Edit-Time Behavior
The Configuration tab within the Editor Experience Panel  allows you to determine the behavior of the widget and its elements when a site owner edits it in the editor. Try out a few options in the Configuration tab.
Show screenshot
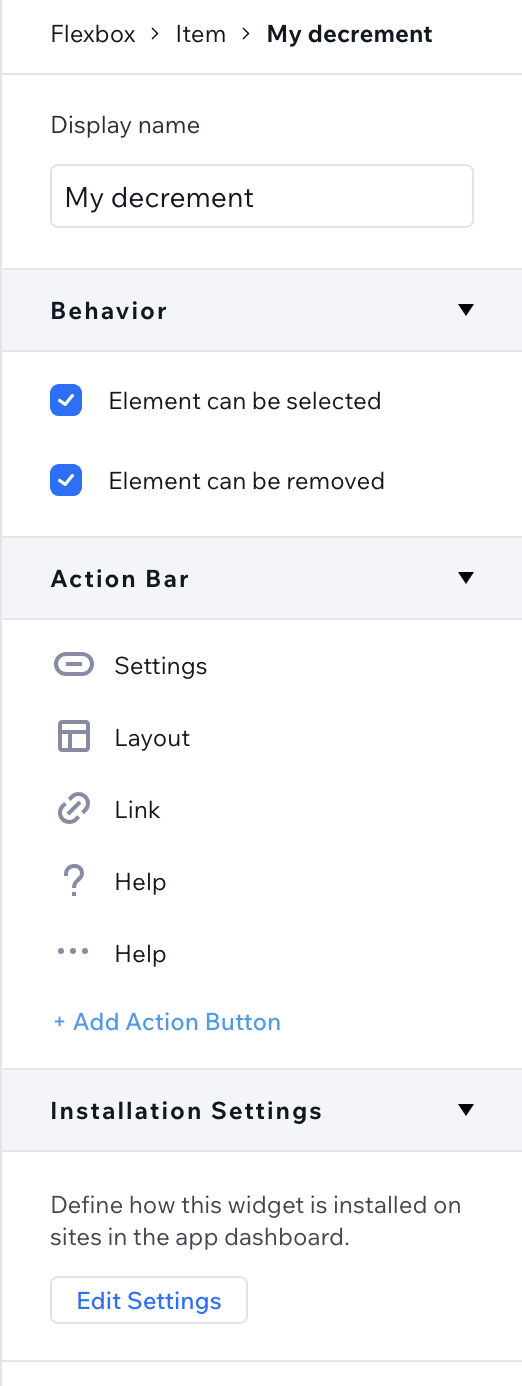
Set a display name for your widget elements:
- Select the decrement button.
- Change its display name under Component Name to "My Decrement" in the Inspector
 panel.
Show screenshot
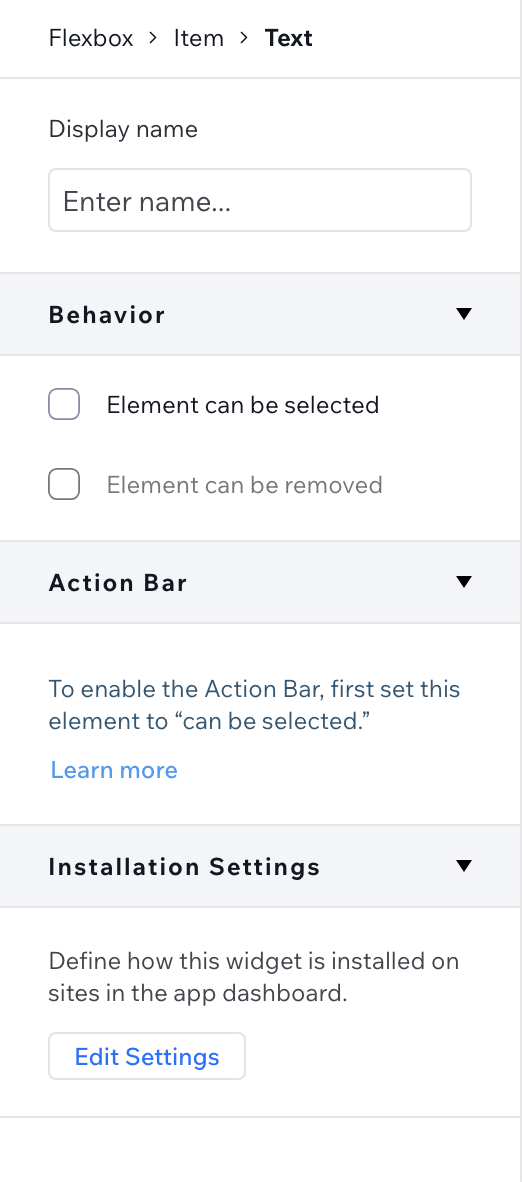
Prevent the text element from being selectable in the editor:
- Select the text element that represents your count.
- Click the Can be selected option in the Behavior section of the Inspector
 panel to remove the blue checkmark.
Show screenshot
Step 7 | (Optional) Create More Design Presets
Blocks allows you to create various variations for your widget's design and layout, through design presets. To create another design preset:
- Click the App Interface
 panel .
 - Go to the Design Presets section.
- Click .
- Click the ֿMore Actions icon
 to rename your preset (you can also duplicate or delete it).
Show screenshot

4. Make some visible changes in your widget, like changing the color of the middle section.
Show screenshot

Move back and forth between presets to see the differences.
Note that some design and layout changes impact only your current preset, while others impact all (learn more).
Step 8 | Catch Your Event in the site editor
Go to your site editor to catch the event from your app. First you need to register an Event Handler for the change event:
- Install your app on a site and add the widget to the site.
- Enable Dev Mode on the site.
- Click on your widget and then click the Properties and Events icon.
- Change the ID of your widget, for example, to "counter1".
- Click onChange( ) under Event Handlers.
- Select counter1_change in the box.
Show screenshot

Now write the function. It gets the `count` as a parameter and resets the count when it gets to whatever number you decide (in our example: 30). Your function should look like this:
Preview or publish to see your site in action.
Last updated: 19 July 2026