Tutorial | Build a Locations App Using the Wix CLI
This tutorial demonstrates how to use the Wix CLI to build a Locations app on the Wix Platform. The app contains a dashboard page that lists a Wix site's business locations, providing a foundation you can build on with per-location actions like editing hours.
By following this tutorial, you'll learn how to:
- Build a dashboard page using the Wix Design System.
- Read business locations from a site using the Wix Locations SDK.
- Navigate to a built-in Wix dashboard page from within your app, using the Wix Dashboard SDK.
The end result will look like this:
We'll use the following steps to build the Locations app:
- Initialize the app.
- Create the dashboard page.
- Run a local development server.
- Develop the app.
- Test the app.
- Build and deploy the app.
Before you begin
Before getting started, make sure that:
- You install Node.js (v20.11.0 or higher).
- You install npm or yarn.
- You’re logged into your Wix Studio account. If you don’t already have one, sign up for a Wix Studio account.
Step 1 | Initialize the app
We use the Wix CLI to initialize our Locations app. In the process of initializing our app, the Wix CLI automatically:
- Creates a new app in the Custom Apps page of your Wix Studio workspace.
- Sets up a new folder for your app in your local file system. The folder includes:
- A
srcfolder containing initial boilerplate code for an app with a dashboard page. - A
package.jsonfile containing your app dependencies.
- A
- Creates a local Git repository for your app.
To initialize the app:
-
Open a terminal and navigate to the folder where you want to create your app.
-
Run the following command:
CopyIf prompted to install the
@wix/create-newpackage, pressy. -
Select Create a new Wix App.
-
Select Create a basic app.
-
Enter a name for your app. Let’s name our app
My Locations App. -
Press
Enterto accept the default folder name (my-locations-app). -
When asked to configure Wix MCP for your IDE, select your preferred MCP.
A green Success message confirms that your app has been registered in the Custom Apps page.
-
Press
Enterto accept the default namespace (my-locations-app). -
Press
Enterto accept the default code identifier (my_locations_app).
You now have a new app in the Custom Apps page, a new folder in your local file system, and a local Git repository for developing and testing your app.
Step 2 | Create the dashboard page
We use the CLI's generate command to create a dashboard page for our app.
To create the dashboard page:
-
Navigate to your newly created folder for your app.
Copy -
Run the following command and follow the prompts:
Copy -
When prompted for the kind of extension, select Dashboard Page.
-
When prompted for a page title, enter Locations.
-
When prompted for the page route, press
Enterto accept the default (locations).
Upon completion, the extension files are created at src/extensions/dashboard/pages/locations/:
For more information about these files, see Dashboard Page Extension Files and Code.
Tip: The CLI's default scaffold also created a my-page extension at src/extensions/dashboard/pages/my-page/. You can leave it (it won't interfere with this tutorial) or delete the my-page/ folder to keep the dashboard sidebar showing only the Locations page.
Step 3 | Run a local development server
Now that you’ve initialized your app, you can run a local development server to see the app in action, and view local changes as you develop your app.
To run a local development server for your app:
-
In the terminal, from your app's folder, run the following command:
Copy -
The CLI prompts you to choose a development site (test site), which you’ll use throughout this tutorial to run and test your app. You can choose an existing Wix site as your development site, or create a new one. Let’s Create a new Development Site. The newly created development site is automatically named Dev Sitex followed by a number (for example, Dev Sitex 12345), and can be found in your Wix account’s list of sites.
-
Follow the prompt to open the app installation page in your default browser. If the browser doesn’t open, install your app on your test site manually and skip the next step.
-
Click Agree & Add to install your app on your development site.
-
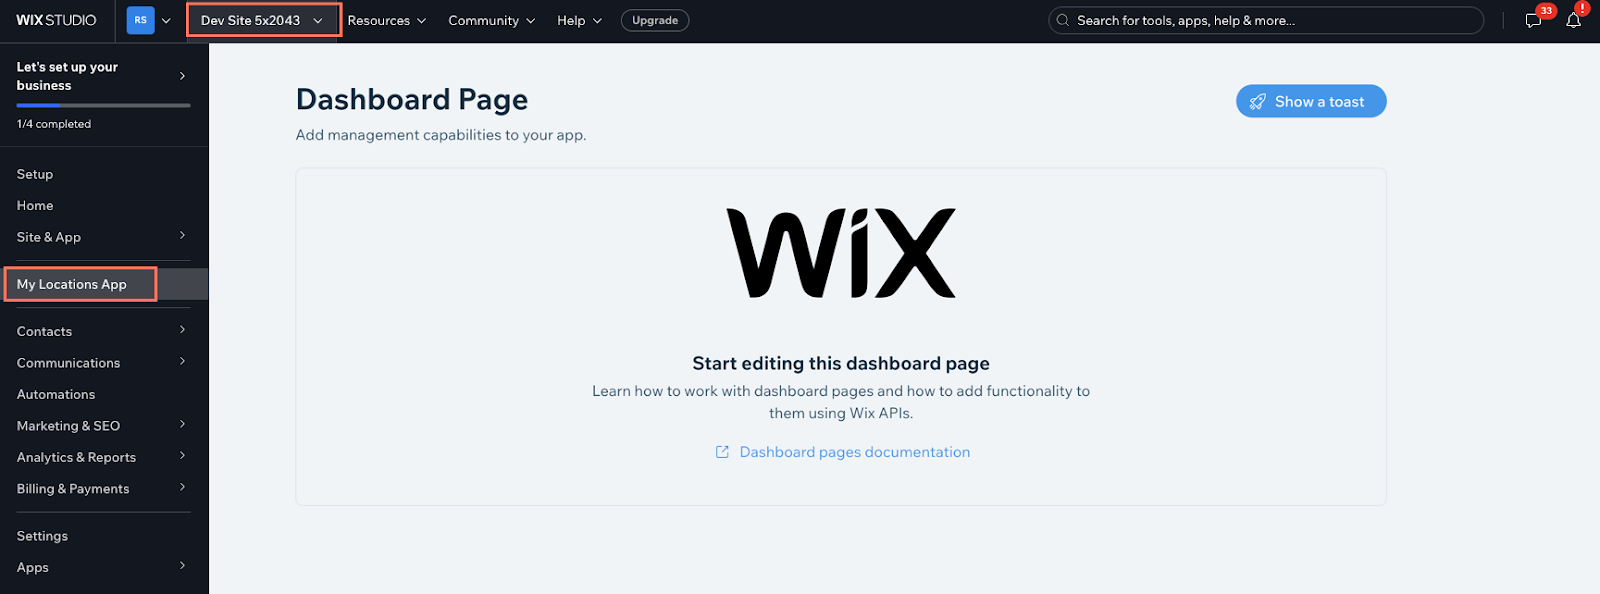
In the terminal menu, select Dashboard to open your development site’s dashboard.
-
In the dashboard sidebar, click Apps > Locations to see your newly created app’s dashboard page. We add the content of our app’s dashboard page in the next step.
Your app is now running on your development site. As you develop your app, any changes made to your app’s code are reflected in real time on your development site.
If your changes don’t show up, try refreshing the page, or closing and reopening the development site.
Step 4 | Develop the app
In this step, we show how we develop our app further by coding our dashboard page. We use the queryLocations() function in the Wix SDK’s Locations API to get a list of our site’s business locations. Then we use React code to display the locations on our dashboard page.
Add API permissions
To use queryLocations() in our app, we need to give our app permission requirements in the app dashboard. Once we do this, anyone installing the app will be prompted to grant the specified permissions.
Our app calls queryLocations() to read the site’s business locations, so it needs a read locations scope. The method’s reference page (linked above) lists the exact scope it requires in its Permission Scopes section, including the scope’s ID (SCOPE.DC-MULTILOCATION.READ-LOCATIONS).
To add the scope:
- Go to the Permissions tab in your app's dashboard.
- Click Add Permissions.
- Search for the scope. Several scopes can have similar names, so match the one whose ID matches the scope ID shown on the method's reference page.
- Check its checkbox under Choose Permission Scopes and click Save.
For more information on configuring permissions, see Configure permissions for your app.
Install packages
We use the following packages for coding and designing our app’s dashboard page:
@wix/business-tools: Business tools module for working with the Wix SDK Locations API.@wix/dashboard: Dashboard SDK for interacting with the site dashboard.@wix/design-system: The Wix Design System for designing our dashboard page using several design components.
The @wix/dashboard and @wix/design-system packages come pre-installed in the project that the CLI generated, so you don’t need to install them. However, you do need to install the @wix/business-tools package. To do so, open your terminal and run the following command:
Write the code
We'll now write code to create a dashboard page for our app. We want the dashboard page to display a list of all the business locations in our site, and a button for editing each location’s hours of operation.
-
Open your app’s folder in your IDE. Then open the
locations.tsxfile located insrc/extensions/dashboard/pages/locations/. -
Delete the existing code in the file.
-
Add the following import statements to your file:
Copy -
Next, use React and components from the Wix Design System to create a display table for the list of locations in the dashboard, or an empty state message with an option to add a location if there is no location data. The
useEffecthook fetches the location data using thequeryLocations()function and updates the component's state accordingly. If the data is still loading, it displays a loading spinner. You can see the complete code for this example below.
Full Example Code
You now have a fully developed app with a dashboard page for site owners to manage their business locations and hours of operation.
Step 5 | Test the app
In the previous step, we wrote code for displaying a site’s business locations in the dashboard. However, our development site doesn’t yet have any business location content for the app to display. We need to add business locations to our development site, and test our app to see whether the table with our business locations appears.
To add business locations to your site:
-
Run a local development server for your app using the
wix devcommand in your terminal. Your app’s dashboard page will now look like this: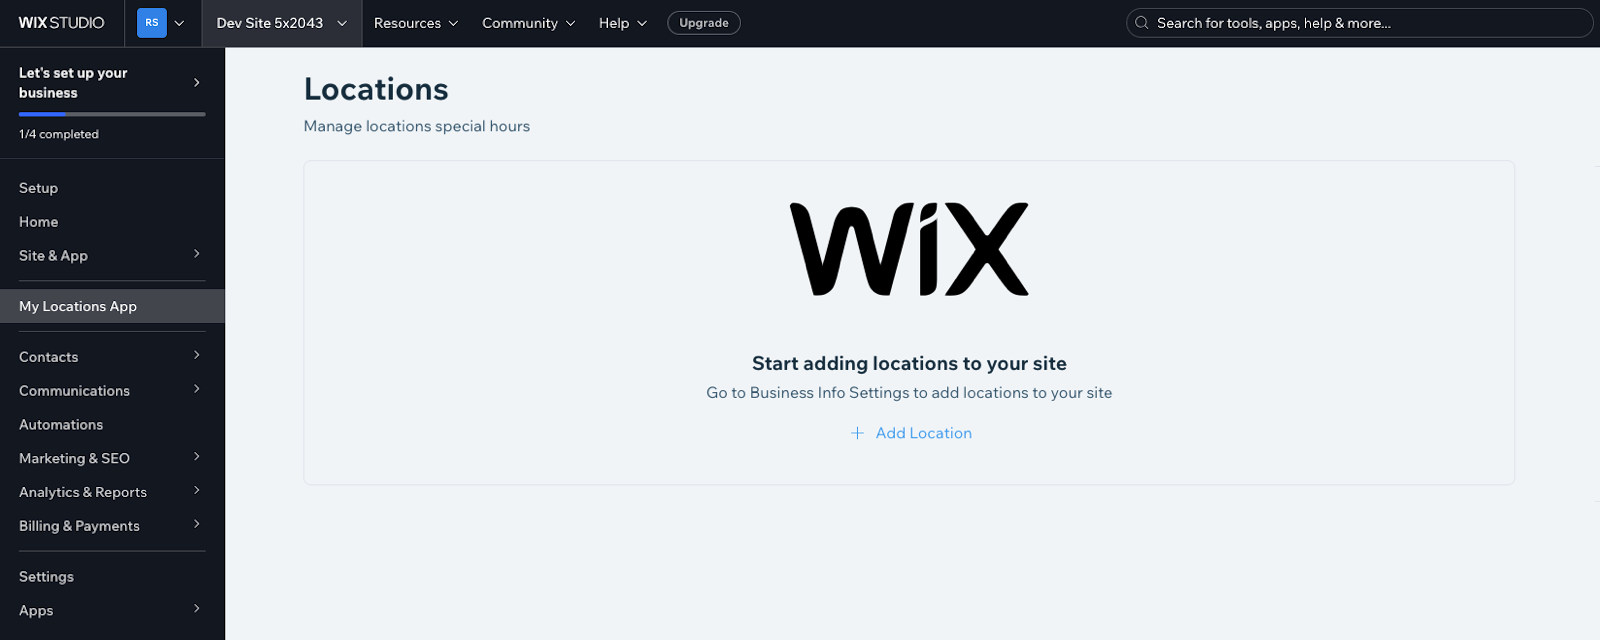
-
Click Add Location. This takes you to the Business Info Settings to add locations to your development site.
-
Add business locations to your development site.
-
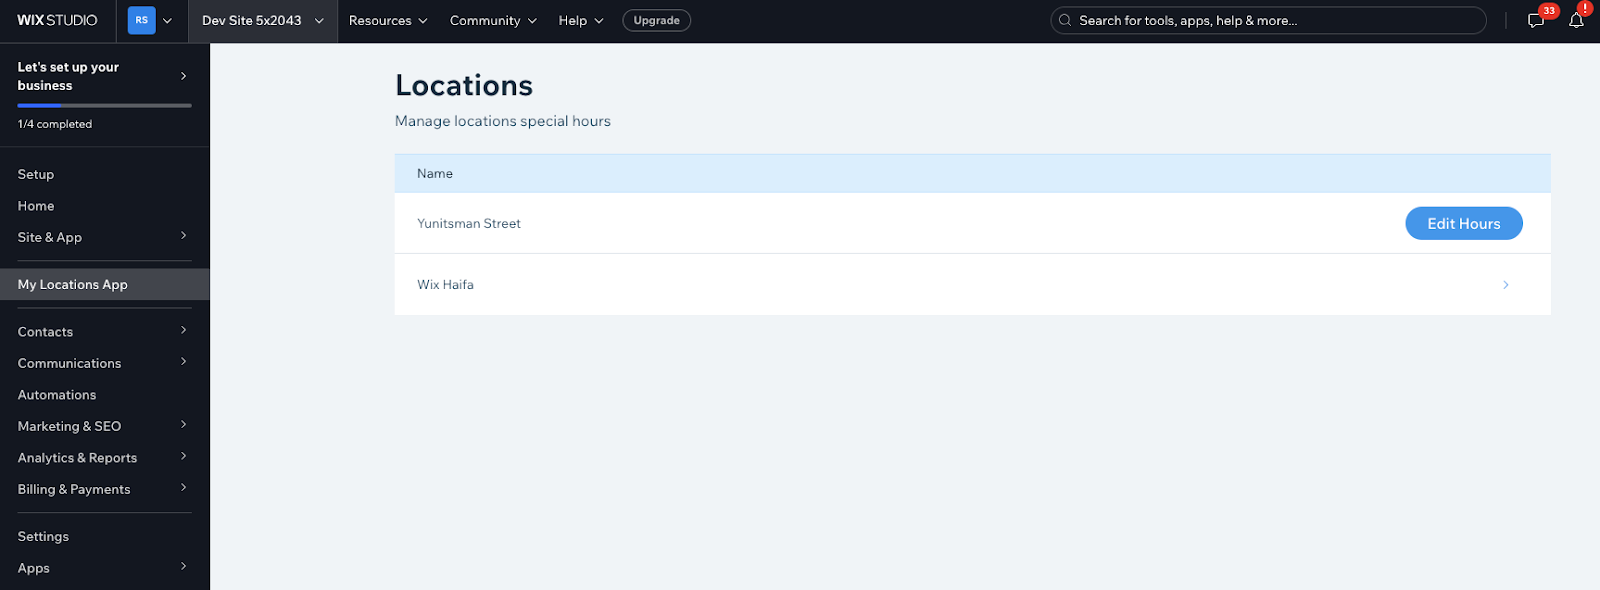
Navigate back to your app’s dashboard page in the left sidebar. The page should now display a table with a list of the business locations that you just added.
You now have a working app with a dashboard page that lists your site’s business locations, and a button for editing the hours of operation.
Step 6 | Build and deploy the app
After testing your app and seeing that it works as expected, you can create a preview of your app, build your app, release and publish your app.
Last updated: 13 July 2026