Configure Permissions for Your App
This article explains how to identify the required permissions and add them to your app configuration. For more information, see About Permissions.
Important: When your app authenticates on behalf of a Wix user or site member, it takes into account the roles specific to that user or member, which can influence the permissions granted to your app. Learn more about user roles and member roles.
Step 1 | Identify required permissions
To identify which permissions your app requires:
-
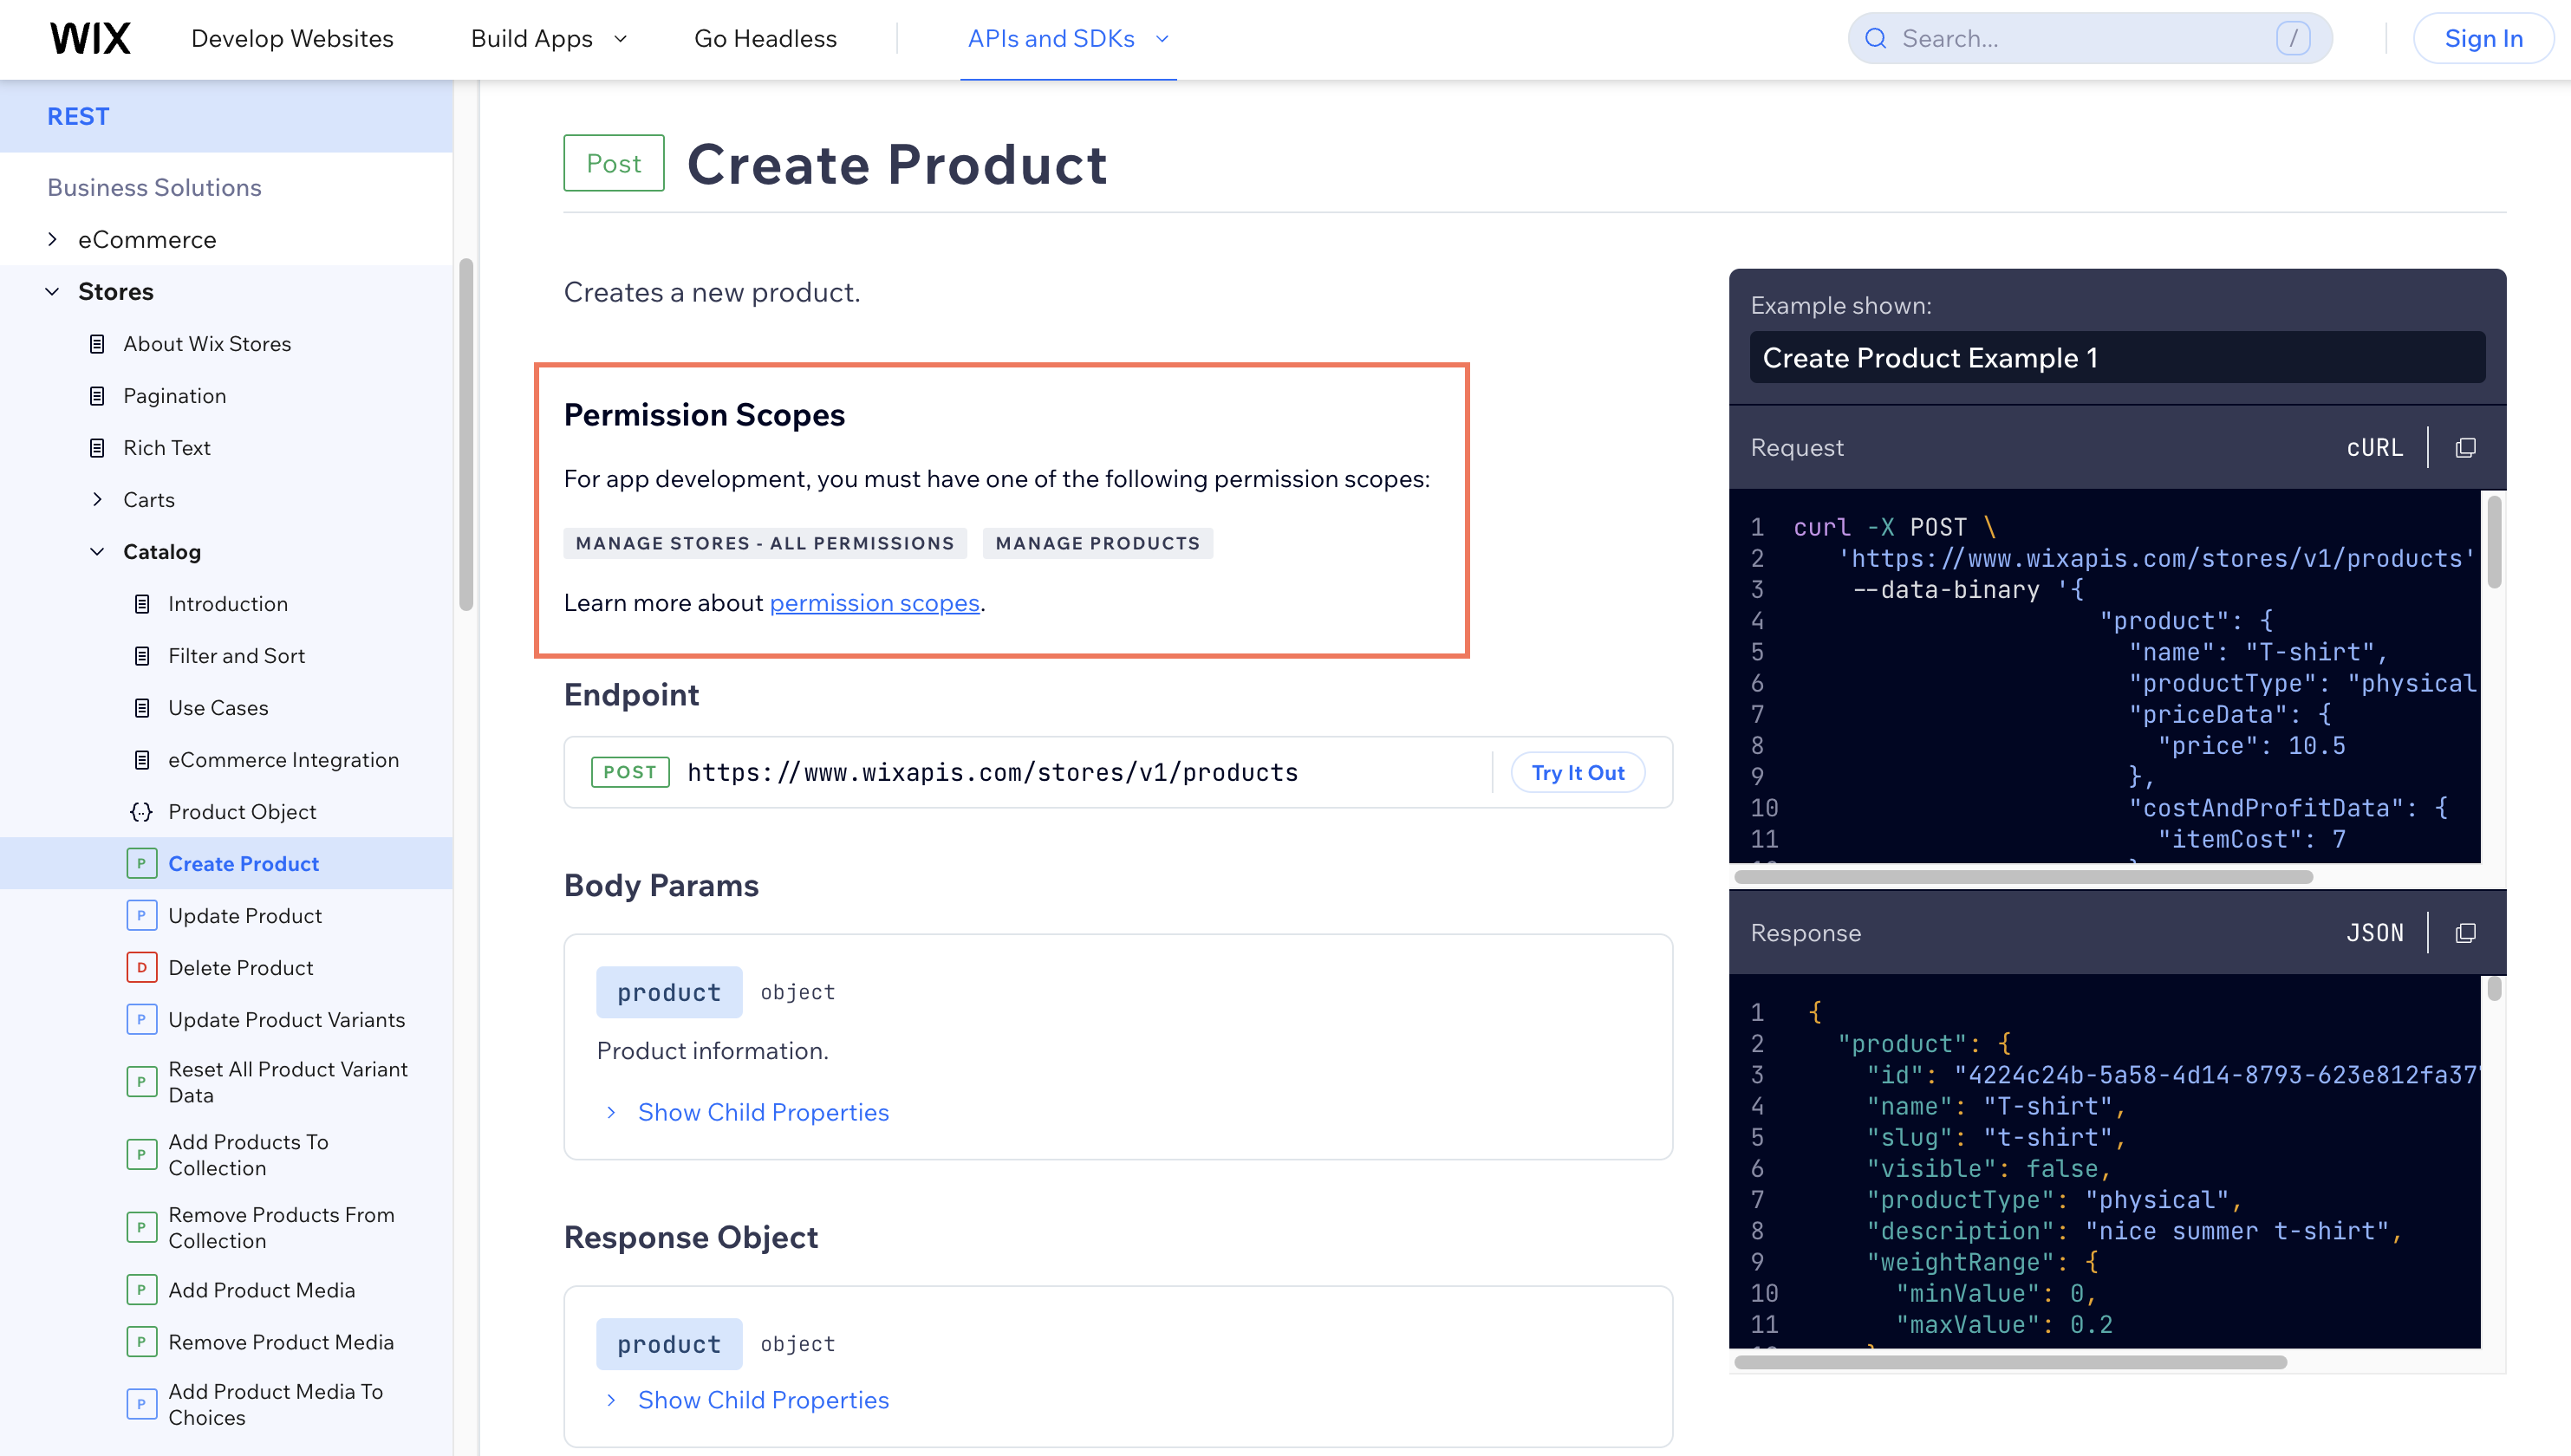
Go to the REST API, JavaScript SDK, or Velo (for Wix Blocks) reference.
-
Search for the endpoints or methods your app uses.
-
Find the supported permission scopes under Permission Scopes:
-
Select one of the permission scopes listed to include in your app. You can click on a scope to prompt the addition to your app, as described in the next section.
Warning: Only request the permissions your app requires. Apps that request unnecessary permissions aren't allowed on the app market.
Step 2 | Add permissions to your app
To add permissions to your app:
-
Go to Permissions in your app's dashboard.
-
Click Add Permissions.
-
Search or filter for the relevant scope.
-
Select the relevant scopes from the results.
Tip: Keep in mind that some high-level permission scopes, like Read Stores - All Read Permissions, encompass multiple other permission scopes, such as Read Products and Read Orders. Therefore, you don't need to add the lower scopes separately.
-
Click Save.
When a site owner installs your app, they're prompted to approve the specified permissions.
Note: After you save permission changes, they apply automatically to development sites. You don't need to build or release a new app version, but it may take a few minutes for the updated permissions to take effect.
Last updated: 5 July 2026