Adjust a Blocks App to Different Pricing Plans
Editor compatibility
Wix Blocks apps aren't supported in the Wix Harmony editor. Existing Blocks apps remain available for purchase on the Wix App Market for Wix Editor and Wix Studio sites. To learn more, see About Wix Harmony and Blocks.
When you publish your Blocks app in the Wix App Market, you can choose to provide different app behaviors for different pricing plans. For example, users who use a free version of your app may get several services, while those who pay for it, get more. This requires creating and managing a system that identifies the user, determines their pricing plan and impacts the app's behavior.
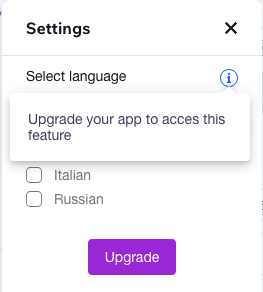
This is an example of how users see your pricing page:

What you need to adjust in Blocks
Before you begin adjusting your app to different pricing plans, make sure to define your business model in your app dashboard. This is the first and essential step.
Now, you need to adjust your app to handle these pricing plans with your own user interface and code. This includes:
- Creating a different UI for each plan
- Adding code to handle each plan
Also, optionally:
- Configuration adjustments
- Customizing panels
- Installation settings
- For each plan, you can also add a free trial.
- If you want to add in-app purchases (also known as one-time payments), you must add a dashboard page and add OAuth.
- If you already published your app, and now you want to test the app with your pricing plans, create a test coupon.
Here is an example Blocks app that uses pricing plans.
Step 1 | Create a UI for the different plans
Since your app needs to behave differently to users according to their different pricing plans, the first thing you should understand is what the different users see. You can do this through a multi-state box, which gives you different user interface with no code at all. Alternatively, you can delete and restore elements with the delete() and restore() methods.
Should I use a multi-state box or delete() and restore() ?
- If you want a completely different behavior in the different plans, it's best to choose a multi-state box.
- If most of the behavior is similar, and you want to modify just several specific elements - use delete() and restore().
Step 2 | Code
When your Blocks app is installed on a site, it generates a JSON Web Token (JWT) for that app instance. You can find information about the app's pricing in the billing field of the app instance. The billing field is available only if the isFree value is false. Get the app instance in a backend file and then call it from the frontend.
To get the app instance from panel or dashboard code, use the Velo getDecodedAppInstance function and not the SDK getAppInstance.
Backend
Add this code to a web.js file:
Frontend
Import the function in your frontend code:
See deprecated wix-application code example
Use wix-application if you need to get the pricing plan in the frontend:
Use wix-application-backend if you need to get the pricing plan in a backend file:
Step 3 | Handle plan cancellation
Your app logic should also handle the case where users canceled the plan after they upgraded. When handling this, think about the site builder and the site visitor who is the end user of their app.
If plan is canceled: site builder experience
If users cancel their plan at any point, you'll want to stop the app or some of its features from working. In this case:
- Display a notification in a central, visible place in the app, and prevent the app (or premium features) from working. Note the difference between a premium app, which does not work at all unless it's paid for, and a freemium app, where you should block only the premium features.
- Provide entry points to upgrade your app. This can be done in the widget's action bar, settings panel, or in the app Dashboard.
If plan is canceled: site visitor experience
Your direct user is the site builder who installed your app. However, you should also think about the user of your user, the site visitor.
If users cancel their plan at any point, lock the app (or its premium features) from working. If it's a premium only app, we recommend to collapse (delete) it, so it's not seen on the site. If you can't collapse it, present an indication, such as: "This app / feature is currently unavailable, contact the Wix user for details". This is also true for dashboard apps - collapse the app or present a proper message.
To get the app instance from panel or dashboard code, use the Velo getDecodedAppInstance function and not the SDK getAppInstance.
Here is a code example for collapsing the widget after the cancellation:
Backend
Add this code to a web.js file:
Frontend
Import the function in your frontend code:
See deprecated wix-application code example
Step 4 | Configuration
Now, you might want to make some changes in the Configuration tab in Blocks.
You can define certain elements of your widget, such as a flexbox that helped you layout the elements, as non-selectable. You can also change display names. Make sure to think about all your pricing plans when making these changes.
Learn more about configuring widget and element display names and behavior.
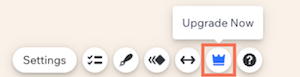
Once you define a pricing plan for your app, your widget automatically gets an Upgrade button in its action bar. Learn more about configuring action bars
Step 5 | Customize your panels
You can show or hide panel elements according to the app's billing, just as you did in the widget code. This is done in the code section of your panel in the Panels tab.
You can also add a button or link in your panel to upgrade your app. Learn more about entry points to upgrade your app.
Step 6 | App and widget installation settings
Your app installation settings allow you to control what widgets are seen in a site's Add Elements panel, and more options. Make sure to think about all your pricing plans when you go over your installation settings.
Learn more about app and widget installation settings.
Last updated: 29 June 2026