Step 5 | Implement a Self-Managed Catalog Service Plugin
In Step 2, we created a catalog database to store the poems a Wix user sells on their site. In order to connect that catalog to the eCommerce platform, we need to create a server to implement the Catalog service plugin.
The service plugin includes a single method called Get Catalog Items. Wix calls this method when a cart or checkout on the Wix user’s site is updated. In the call, it includes the IDs of any items in the cart, and in return it expects information from the catalog about each item.
Wix doesn’t know where the catalog database is located–it only knows the location of the service plugin endpoint. Therefore, the service plugin must retrieve the items from the catalog database and return them to Wix in the correct format. In our case, this means our service plugin needs to communicate with the Wix site to access the catalog database and return the required item details.
In this example app, we’ve placed the catalog database on a Wix site. But remember that in your own business solution, you can choose to locate the catalog database anywhere, including on your server or in an external database. You just need to change your server logic to fetch from that location.
There are several things our server code must do to fulfill a Get Catalog Items request:
- Verify and decode the incoming request sent as a JSON web token.
- Extract the app instance ID and requested item IDs from the decoded payload.
- Create a client to communicate with the Wix site that sent the request.
- Use the client to request information from the site catalog database about each item.
- Return all item information in a form that matches the Get Catalog Items response object.
We’ll write our server code in Express, so the first thing we need to do is set up Express and other necessary packages.
-
Install the following
npmpackages from Wix:Copy -
Install Express and set up an app. Use version 4.17.0. You can choose to use
express-generator, but it isn’t necessary for this example. -
Once your Express app is created, open the
app.jsfile and paste the following code:CopyMost of the above code is standard Express. However, we’ve added some extra lines that are specific to our business solution:
Lines 2-4. Import 3 libraries that we’ll need in our server code:
- Jose for JWT verification.
- Wix SDK to create a Wix client.
- Wix Data to work with collection data on a site.
Line 8. Set up the express.text() middleware function. This function parses the incoming request, including the encoded body, into a string that our verification function can handle.
Line 10. Create our
verify()function, which will accept a JWT token as a string and decode it. We’ll write the code for this in a moment.Line 12. A POST method that receives Get Catalog Items requests from Wix and returns the correct information from the catalog. We’ll write the code for this shortly.
Let’s start by writing the code for the verify() function.
Verify the JWT token
As with all service plugins at Wix, when a Wix site calls Get Catalog Items, it encodes the request body as a JWT. Therefore, in the service plugin we must decode the token in order to extract information like the app instance and catalog IDs. In this tutorial, we use the jose library for JWT verification.
-
In the
verify()function we created before, add atry-catchblock. Above thetryblock, add 2constvariablesalgandspki.The first variable defines the RSA algorithm we’re using. In the case of requests from Wix, this is RS256, so we’ll assign the variable this value as a string:
CopyThe second variable,
spki, is our public key. Each app in the Custom Apps list has a unique public key. To find this key, return to the App ID & keys modal in the app dashboard. Copy the public key from the modal.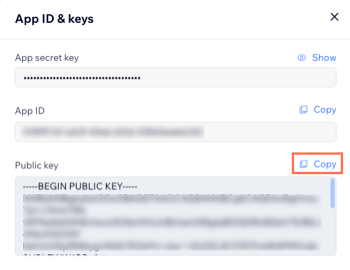
Paste the public key as the value for
spki. -
Let’s start adding code to the
tryblock. We first add some error checking code that ensures thejwtparameter is a string:CopyNext, we add the functions that actually do the decoding. The first function we add is importSPKI():
CopyWe pass the
spkiandalgvariables toimportSPKI()and store the result in a new variable calledpublicKey. We then pass this result to thejwtVerify()function, along with thejwtparameter and an JWTVerifyOptions object:CopySet the attributes in the
optionsparameter as shown. These options allow us to validate requests received from Wix. To set theaudiencevalue, copy your app ID from the app dashboard.Finally, we return the payload.
Copy -
Now we’ll add code to the
catchblock. You can add more complex error handling later, but for now we’ll simply throw an error with a message that the verification failed.Copy
The full code for the function should now look like this:
Implement Get Catalog Items
Now that we’ve set up our verify() function, we can implement the Get Catalog Items endpoint, so that Wix can make calls to our server to get information about catalog products.
-
Go to the POST method we created below the
verify()function:CopyNote a couple of important things here:
-
The path we route catalog requests to must be in snakecase. Make sure your path is identical to the one shown above.
-
We will need to make asynchronous calls inside our handler function, so mark it as
async.
-
-
Inside the handler function add a
try-catchblock. In thetryblock add the following lines of code:CopyLet’s break down what this code is doing:
Line 1. Isolate the request body, which is in JWT format, and store it in a variable
token.Line 2. Pass the token to
verify(). If the token is valid,verify()returns the request body as a decoded object, which we store in a JS object calledbody.Lines 3-4. Parse
bodyto extract 2 important pieces of information:-
The instance ID. This tells us which instance of our app made the request. We’ll use this shortly to query the site catalog.
-
The list of items that the Wix site is requesting information about. This tells us which items to retrieve information about from the catalog.
-
-
Because our server is self-managed, we need to create a client in order to make calls to a Wix site. We use the Wix SDK createClient() function to do this.
createClient()expects a configuration object with at least 2 attributes:-
modules: The Wix SDK modules your self-managed app uses. This typically matches the modules that you imported. -
Your app’s authentication strategy. In our example the app will make API calls, so we use the
AppStrategyauthentication strategy.
Add the following code to the try block:
CopyLine 2. Define the modules we use in this client. In this case, we only use the items module.
Lines 3-8. Define the
AppStrategyobject. This object requires your app ID, app secret, and public key from the app dashboard.The
AppStrategyobject also requires the ID of the app instance. This tells the app which site it’s communicating with. We take the ID we parsed from the decoded request body and pass it to theAppStrategyconstructor.This sets up our client and prepares us to make calls to the site collection.
-
-
Before adding the next piece of code, we need the ID of the Poems collection we created in Step 2. Return to the Blocks app and go to your collection in the CMS. Click Edit Settings to open the collection settings.
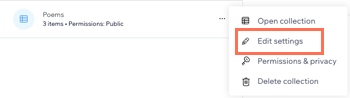
Beneath the collection name, copy the collection ID.
-
Return to the Express code. Beneath the createClient() method we added, add this code:
CopyBefore we review this code line by line, it’s important to understand its overall purpose. The code takes in the
requestedItemsarray we created containing catalog references for the requested items, and returns a new array of catalog items in the required format. To do so, it performs the following steps:- Extracts the catalog ID of each item in the
requestedItemsarray. - Queries the site catalog for that ID.
- Organizes the returned information from the site into an object that matches the Get Catalog Items response.
Let’s break down the code line by line:
Line 1. Wrap the Javascript
map()function in aPromise.all()statement that returns the array of objects only after the query has been resolved for all items.Lines 3-6. Using the Wix client we created, query the catalog database on the site. Paste your collection ID as the parameter.
Line 7. Store the query result.
Line 8. Extract the variant information from the requested item and place it in an object
optionsthat can be passed to the returned item.Lines 10-28. Set up the response object in the correct format.
Line 31. Returns the complete array of catalog references
catalogItemsto the caller. - Extracts the catalog ID of each item in the
-
To complete the Get Catalog Items endpoint, we’ll fill out the
catchblock. As withverify(), you can add more complex error handling later, but for now we’ll just return a 400 status with an error message:Copy -
Our server code is complete, but we need to complete one extra step to make sure it can communicate with the product catalog on the site.
In our code, we call the
query()method of the Wix Dataitemsmodule. Like all API methods at Wix, in order for our app to call this method, it must have the correct permissions. We can locate these permissions in the reference above the method declaration: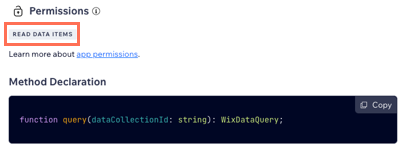
The specific permission we need to call
query()is READ DATA ITEMS. To add this permission to our app, return to the app dashboard and go to permissions. Click + Add Permissions.The easiest way to locate the permission you need to add is to search by name or ID. Search for “read data items”. Select the correct permission and click Save to add it to your app.
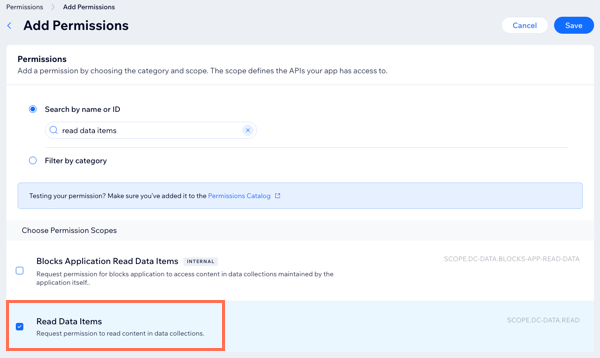
The permission should now appear in the permissions list:
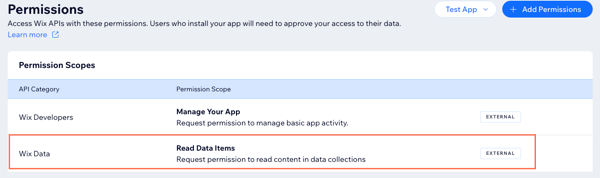
Now our app can communicate with the product catalog on a site.
Our service plugin code is now complete. Here’s the full code for app.js:
Deploy your code on your chosen server.
Create an Ecom Catalog in the app dashboard
Once we deploy our server code, we need to tell Wix where to send its requests. To do this, we’ll return to our app dashboard and create an Ecom Catalog extension:
-
In the app dashboard, go to the extensions page.
-
Click + Create Extension and search for Ecom Catalog. Click + Create.
-
In the JSON editor, add a key
deploymentUri. As its value, paste the deployment URI of your server. For example:Copy -
Click Save. The Ecom Catalog extension now appears on our app’s extension list:
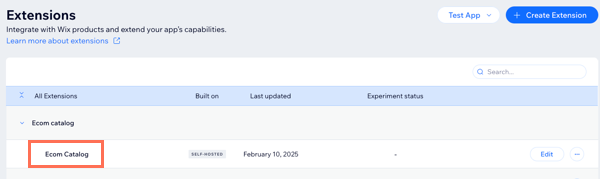
Our app is now complete and able to function on a site. In the last article, we'll build the app, install it on a site, and test the functionality we created throughout this tutorial.
Last updated: 14 July 2026