Step 3 | Create an Item Page in Blocks
An item page is part of the app’s frontend interface that customers interact with. It allows customers to select the items they want and directs them to the cart and checkout pages.
You must create at least one item page for your app that implements eCommerce functionality.
In this example, our item page will take the form of a widget that we can add to a site page. The widget will allow a customer to select a poem type from the site catalog, choose a variant of the poem, and set the poem length. We’ll edit the widget we created in the previous step to build a simple interface that provides this functionality.
-
Go to the App Interface page of the Blocks editor. In the column on the left side of the editor, click the More Actions
 button and rename your widget to “Item selector”.
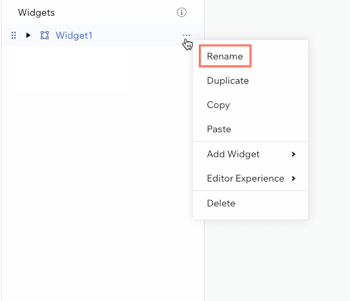
-
Add the following elements to the widget and set their element IDs according to this table:
First dropdown #selectPoemType Second dropdown #selectVariant Text input #numLines Button #addToCartButton You can change the element ID by selecting the element and then going to the Properties & Events panel.
-
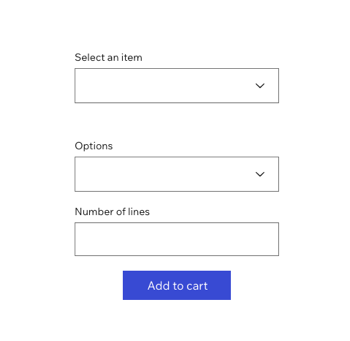
Select each element and click Settings to adjust the field title or displayed text. Your widget should look like this when you’re done:
-
Now we need to add functionality to the widget. First, we want the top dropdown element (
#selectPoemType) to display the titles of the poems in our collection. We can do this easily with a dataset.Start by selecting the dropdown. In the action bar, click the Connect to CMS
 icon. Because we haven’t created a dataset yet, Blocks prompts us to create one in the menu on the right:
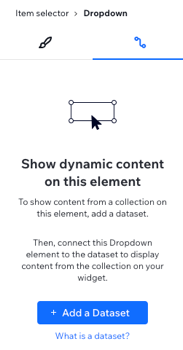
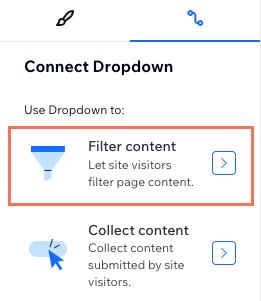
Click + Add a Dataset and select the Poems collection. Accept the default dataset name and click Create. The menu on the right displays 2 options for how the dropdown will be used; select the Filter content option.
Under Connections > Filter content by, select the Title field from the dropdown menu. Leave the condition as Is. The
#selectPoemTypedropdown is now connected to the Title field in the dataset collection, and will display all available poem titles when opened. You can preview this behavior by clicking Preview in the top right corner of the editor. -
We want the second dropdown (
#selectVariant) to display the possible variants of the selected poem type. This means that the options in the second dropdown depend on the value of the first. This behavior is too complicated for a dataset, so we’ll create it in the widget code.Open the code panel at the bottom of the editor. Delete the default code and start by adding the following:
CopyHere’s a quick explanation of the code we just added:
Lines 1-3: Import several modules that we need to make our widget functional. The most important to us right now is the
wixDatamodule, as we’ll use this to retrieve the correct options for the second dropdown.Lines 5-9: In the widget’s
onReady()function, hide all elements except for the first dropdown. Once the customer selects a poem type, we’ll display the remaining elements.Whenever a user makes a selection in the
#selectPoemTypedropdown, we want to update the second dropdown to display the variants for that poem type. To set this behavior, we use the onChange() event handler as shown below:CopyLet’s break down this code:
Lines 3-8. Query the collection for the new value of the first dropdown, and store the result. This requires the collection ID, which you can find by opening the CMS and going to the collection settings.
Line 10. Set the dropdown options for the second dropdown to the variants that correspond to the selected poem title. This is made easy by the fact that we created the Variants field in the collection as a Javascript array in the format necessary for dropdown elements.
Lines 11-13. Display the remaining elements.
The widget now displays the poem options stored in the collection to customers. Click Preview in the top right corner of the editor to test out this behavior and make sure everything works as expected.
-
Once the user has selected the poem they want, they should be able to add it to their cart and navigate to the cart page. To set this behavior in our widget, we’ll make use of the 2 eCommerce modules we imported at the top of our code.
The first thing we do is create a function
addToCurrentCart()which wraps the actual Wix eCom function. Beneath ouronChange()logic, add the following function:CopyInside the function, we call the addToCurrentCart() eCom method and pass it an object called
lineItems. This object contains a catalog reference and quantity for each item that the customer has requested.We want to call
addToCurrentCart()when a customer clicks the Add to cart button. Beneath the function we just wrote, add anonClick()handler like this:CopyLet’s break down the code in the
onClick()to understand it:Lines 3-6. Query the collection for the value of
#selectPoemTypeagain. The purpose of this query is to get the ID of the selected poem.Lines 8-9. Store the result of the query in
itemand parse it for the poem’s product ID, which we store initemId.Line 10. Get the selected variant from the second dropdown
#selectVariant.Lines 12-23. Call
addToCurrentCart()and pass it an object in the correct format. The nestedcatalogReferenceobject requires our app ID and the product ID of the poem.Recall that we can find the app ID in the home page of our app dashboard. For the poem’s ID, we pass the
itemIdvariable.We also pass an options object to define the variants. In our solution, variants are defined by whoever is receiving the poem, so we define a single attribute
audienceand give it the value we took from the#selectVariantdropdown.Finally, we take the number of lines requested by the customer and pass that as the quantity.
Lines 24-25. Call the frontend Wix eCommerce method
refreshCart()to update the cart with the latest product. Then callnavigateToCartPage()to send the customer to the cart page, where they’ll see a summary of their order.Note: You can’t preview the Wix eCommerce methods in the Blocks editor. To test the behavior of eCom methods, install your app on a test site.
This completes the design and code for the item page widget. In the next article, we’ll create the dashboard for the Wix user.
Next up: Step 4 | Create a Dashboard Page to Manage the Catalog
Last updated: 14 July 2026