Tutorial | Create an App in Wix Blocks
In this tutorial, you'll create an app with a simple site widget extension in Wix Blocks.
Before you begin
- Make sure you're logged into your Wix account, or create an account if you don't have one yet.
- If you haven't done so yet, move to the new Wix Studio workspace by joining Wix Studio.
- Make sure you have a Wix site that you can use for testing purposes. If you don’t have one yet, create a new site.
Step 1 | Open the Wix Studio workspace and create an app
You can access Wix Blocks through the Wix Studio workspace.
- Open the Custom Apps section of the Wix Studio workspace.
- Click Create New App.
- Click Build from scratch.
- Click Wix Blocks.
Your newly-created app opens in Wix Blocks.
Step 2 | Design and code a site widget
We'll now build an interactive site widget in Blocks.
-
To get started, select Blank canvas.
The Wix Blocks editor opens with a default widget. -
Let's start by adding a text element to the widget.
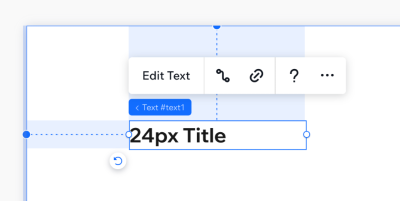
Click Add Elements at the top of the editor, and then click Quick Add > Title.
Your widget now looks something like this:
-
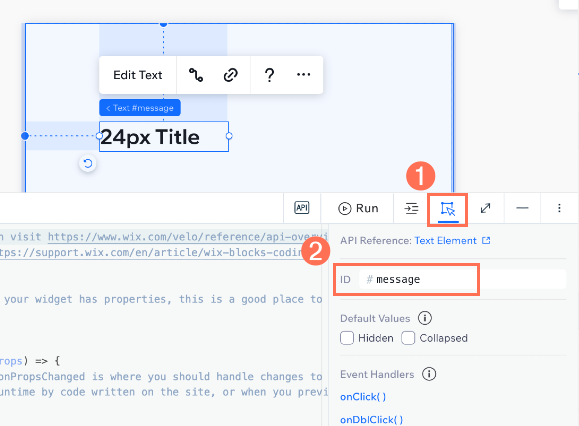
Since we'll be interacting with the elements using code, we need some way to identify them. We do that using element IDs. You can see an element's ID when you hover over it or select it. When an element is selected you can change its ID using the Properties & Events panel.
Change the text element's ID to bemessage.
-
To interact with an element in code, you first need to write code to select it. Now that our element has a unique identifier, selecting it with code is easy. We use the
$w()selector function to select an element by ID. We simply pass the element's ID, preceded by a hashtag (#). So, to select an element with the IDelementId, we write$w('#elementId').
Once an element is selected, we can use its properties and functions to interact with it. So, we can use the text element's text property to change the message like this:
$w('#message').text = 'Hello World';
Place this code in theonReadyevent handler that appears in the Code Panel by default. Code in theonReadyevent handler runs during the widget loading process when all the elements in the widget have finished loading. The code should look like this:Copy -
Next, let's run some code in response to a button on our widget being clicked.
First, we'll need to add a button to the widget.
Click Add Elements on the top of the editor, and then click Quick Add > Button.
Give it the IDbutton. -
We’ll change what the button says, just like we did for the text element. To change the text of a button, make sure to use the label property. The code to change the button's text should look like this together with the previous code:
Copy -
Finally, we'll add code that responds to the button being clicked. We again start by using the
$w()function to select the button. Then we use theonClick()function to define what happens when the button is clicked. In this case, let's change the contents of the text element when the button is clicked.
Place the following code below the existing code:CopySo, the complete code looks like this:
Copy -
Click Preview
 at the top of the editor to preview your widget.
When previewing the widget, click the button on the widget to see the text change.
Step 3 | Install your app on a site
We'll now install the app on a site to see how the widget behaves in the site editor.
- In the top-right corner, click Test.
When prompted to provide an app name, enter any name you like and then click Save & Continue. - Select the site that you'd like to test your app on.
The selected site opens in the editor. - Find your app under Custom Apps and click Install App.
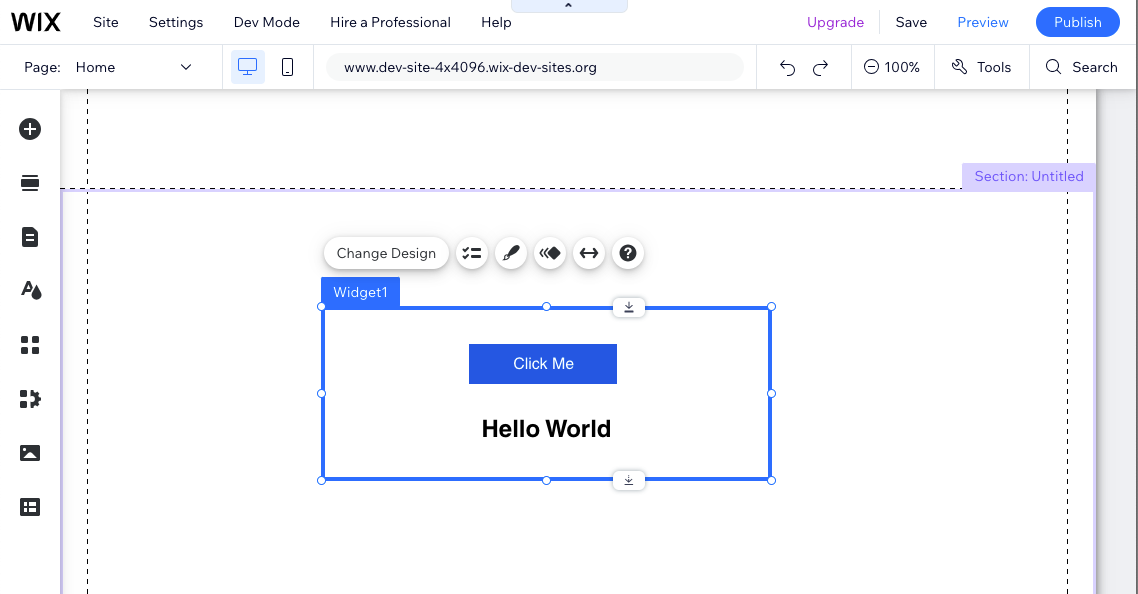
When the app is installed, the Add Elements panel opens, showing your widget. - Click the widget to add it to the current page.
The widget is now added to the site. You can drag it, resize it, and modify its design using the widget's action bar.
Next steps
You now have a fully working app that can be installed on Wix sites. Take some time to play around with the widget in Blocks and try to add more features to your app.
Use the following resources to continue building your app:
- Editor elements: Learn about the types of elements that you can add to your widget.
- Coding in Blocks: Learn how to add code to an individual widget, as well as code for the entire app.
- Editor experience: Learn how to control the way site creators interact with your widget in the editors.
- App templates: Explore templates that demonstrate how to build Blocks apps.
- Extension catalog: Learn about other extensions you can add to your app.
Last updated: 14 July 2026