Set Up a Wix Pricing Page
Wix pricing pages are pages hosted by Wix that showcase the key features of each pricing plan your app offers.
This guide shows you how to set up a Wix pricing page. Alternatively, if you want to use an external pricing page, you can set up an external pricing page.
The end result looks like this:
Before you begin, ensure you've added at least 1 recurring pricing plan in the app dashboard.
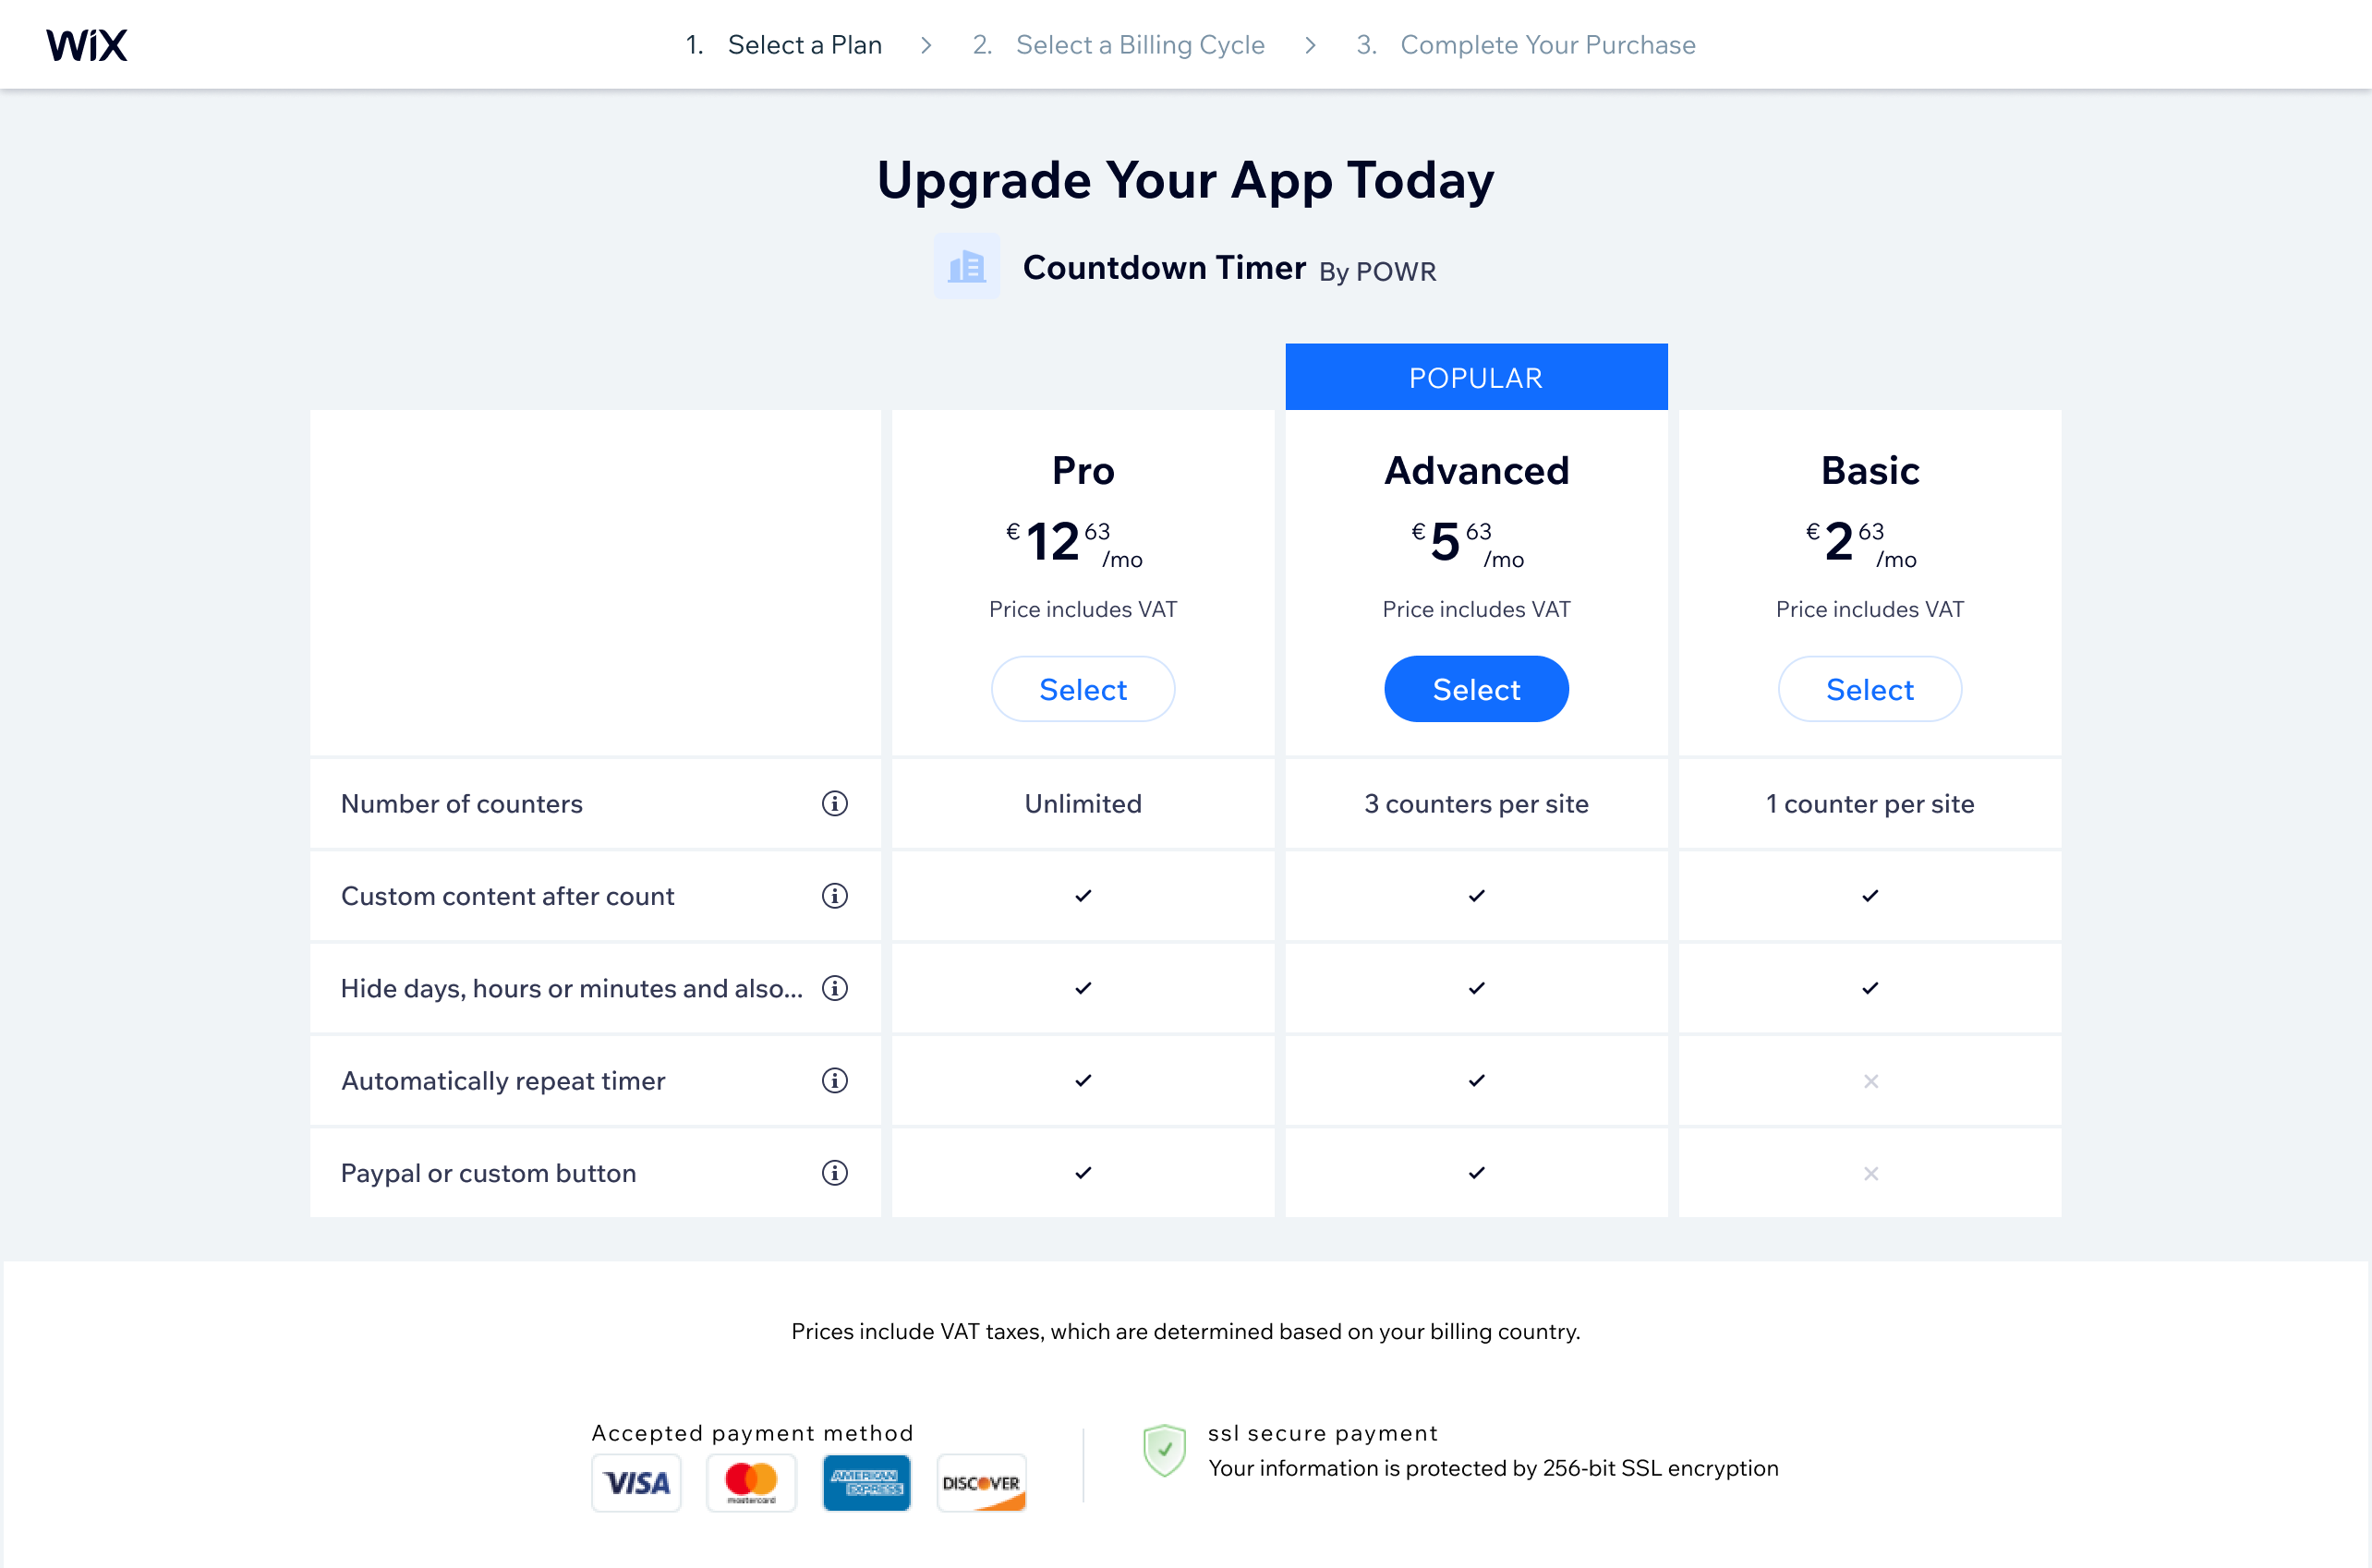
How the pricing page works
The pricing page appears when users are purchasing or upgrading to a paid plan. It consists of 2 main stages:
- Plan and cycle selection: Where users select both a subscription plan and billing cycle (monthly or yearly) in a single view. Shows up to 4 recurring plans with features in a benefits table. Users can toggle between monthly and yearly pricing for each plan. The user's current plan is disabled if upgrading.
- Checkout and success: Where users enter payment details, complete the subscription, and receive confirmation that their subscription is active.
Note: Free apps are installed directly without taking users through the pricing page.
Configure your page
- Go to Pricing Page in your app's dashboard.
- Select Wix pricing page, then click Customize Pricing Page. This option isn't available if you don't have any visible paid plans.
- Choose a Recommended plan from the dropdown. This plan is marked with a "POPULAR" badge on your pricing page.
- Click Add Feature.
- Feature Details: Add a title and description to specify what the feature includes and explain why it's useful.
- Comparison: Select the plan that the feature is relevant for and add custom text (optional). We recommend distributing features so that better features are reserved for more expensive plans.
- Click Done.
- To check how it looks, click Preview Pricing Page.
Link to your pricing page
Add upgrade buttons or CTAs in your app that link to the pricing page where users can upgrade. All Upgrade buttons and CTAs should link to your app's pricing page opened in a new tab. To do so, use the following URL, replacing <APP_ID> and <INSTANCE_ID> with their respective values:
Note: If your app is built with Wix Blocks, see Provide Entry Points to Upgrade a Blocks App.
See also
Last updated: 29 June 2026