Build and Deploy an App with the CLI
Deprecated
The Wix CLI for Apps is deprecated and no longer receives updates or new features. New projects should use the unified Wix CLI. Determine which CLI your project uses.
After developing and testing your Wix CLI app locally, you can take it to production. This article guides you through that process.
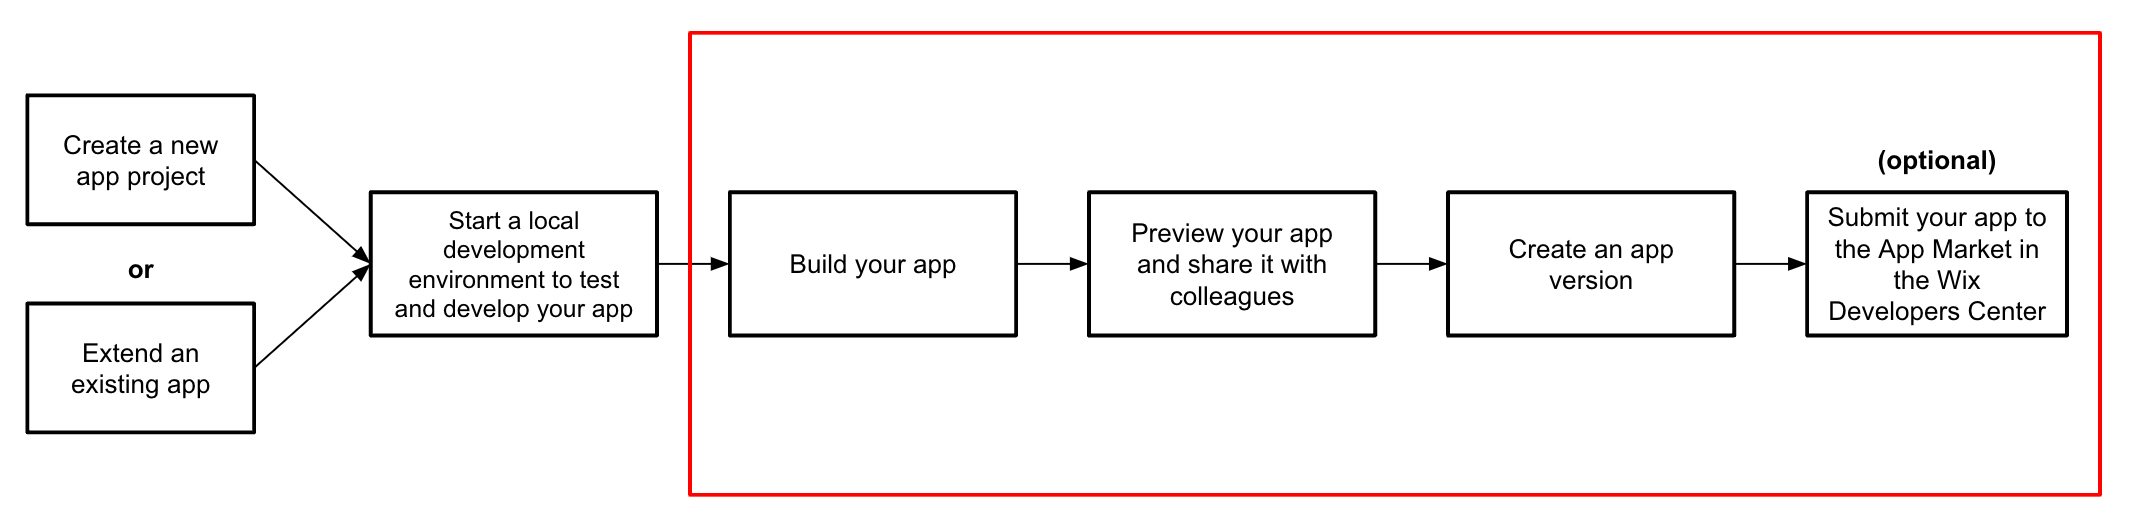
The following diagram shows the overall flow for creating a CLI app. The steps in the red rectangle are covered in this article.
Prerequisites
To follow this guide you need a Wix CLI App. For instructions on creating an app, see Quick Start.
Step 1 | Build the app
Run the following command to build the assets for your app:
Step 2 (Optional) | Create an app preview URL
An app preview URL is a URL you can share with team members. The link allows them to preview and test your app.
To push your app to Wix's servers for hosting and create an app preview URL, run the following command:
Step 3 | Release an app version
Now that you’ve built your app, it's time to create an app version.
An app version allows you to publish an app to the Wix App Market or install it on a site with a direct install URL.
The CLI guides you through the process of releasing a new app version. You can view your app versions in the app dashboard.
To push your app to Wix's servers for hosting and releasing an app version, run the following command and follow the prompts:
To learn more about app versions, see App Versions and Deployment.
Step 4 (Optional) | Publish your app
Once you have an app version, you can submit it for review and then publish it to the Wix App Market or have users install it on their sites with a direct install URL.
For more information on publishing your app, see About Market Listings.
Next steps
You now have a fully working app that can be installed on Wix sites.
Use the following resources to continue building your app:
Date last updated: 4 May 2026