Flow: Email Marketing Setup
This article outlines the end-to-end flow for setting up email marketing for a site and sending campaigns using the Wix Emails APIs. The flow covers verifying sender emails, creating sender details, building campaigns, and monitoring delivery results.
Before you begin
It's important to note the following before starting to code:
- To create an email campaign, a Wix user must either design a template from scratch or use one of the pre-made templates available in the Wix dashboard. This business flow assumes that the campaign is already created.
Email marketing setup flow
The following diagram shows the full email marketing setup flow.
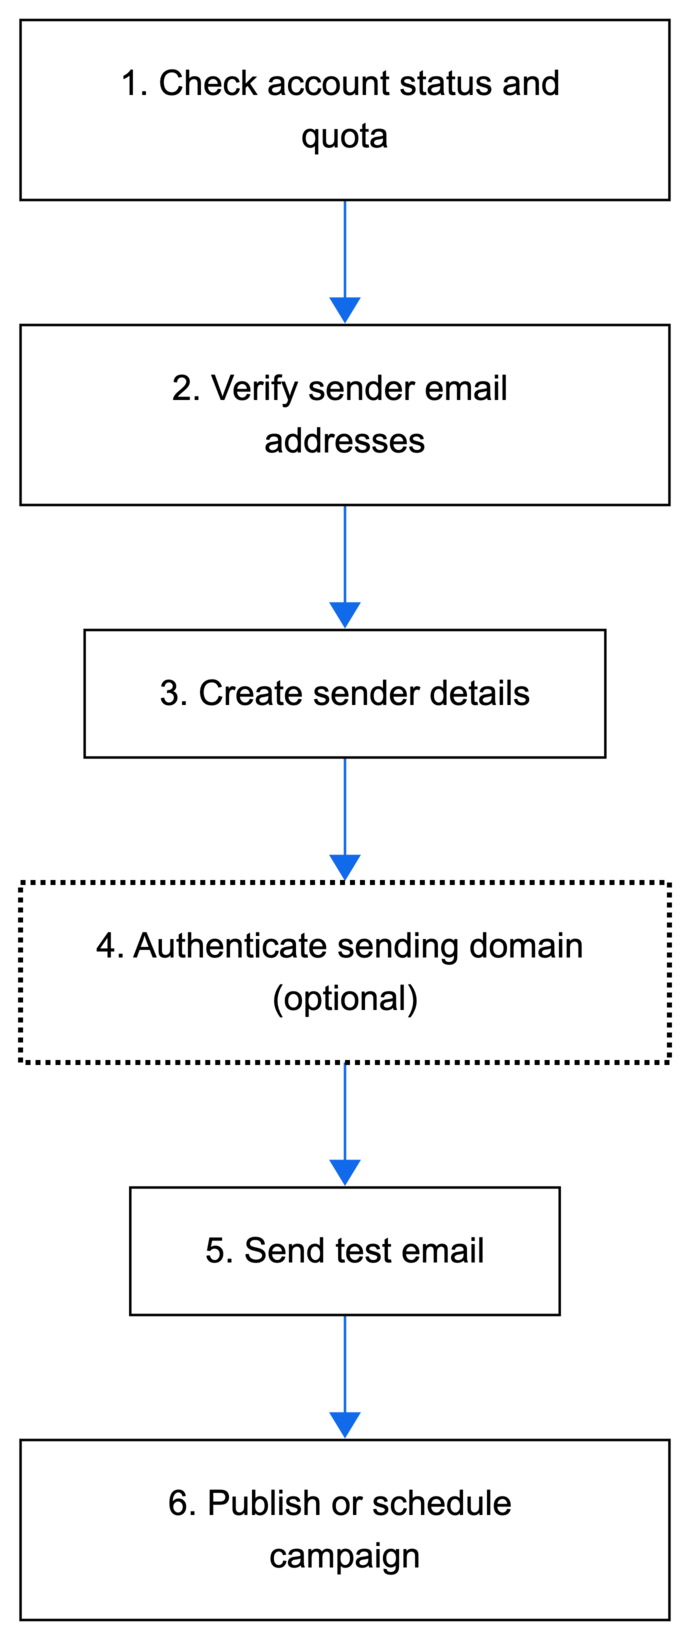
Step 1 | Check email marketing account status and quota
Confirm the account is active and has available sending quota before creating a campaign.
Action: Call Get Account Details to retrieve the account status and current quota.
Result: Confirms whether campaigns can be created and sent.
Step 2 | Verify sender email addresses
Verify the email addresses that will be used as the campaign's "from" and "reply to" addresses.
Action: Use the Sender Emails API to create and verify a sender email address, then complete the verification process for that email.
Result: The sender email is verified and can be used in sender details.
Step 3 | Create sender details
Create sender details by pairing a sender name with a verified email address.
Action: Call Create Sender Details with the sender name and verified email ID.
Result: A sender profile is created and can be assigned to campaigns.
Step 4 | Authenticate a sending domain (optional)
Authenticate a custom domain so campaign emails can use a branded "from" address and improve deliverability.
Action: Use the Sending Domains API to retrieve the domain, review the required DNS records, then authenticate the domain after DNS changes propagate.
Result: The domain gets the AUTHENTICATED status and can be used in sender details.
Step 5 | Test the campaign
Validate content with a test email.
Action: Call Send Test to send a test email.
Result: The campaign is tested.
Step 6 | Publish the campaign
Publish or schedule the campaign to a contact list.
Action: Call Publish Campaign to publish the campaign to an audience (or reschedule if needed).
Result: The campaign is sent or scheduled for distribution. The flow is complete.
Tip:
- Call Reuse Campaign to reuse existing campaigns when sending similar content.
See also
Last updated: 24 February 2026