Flow: Publish a blog post
This article outlines the end-to-end flow for creating and publishing a blog post using the Blog APIs, from creating a draft post through publishing it with categories and tags.
Note: On Wix sites, blog management can be handled through the Wix Blog.
Before you begin
It's important to note the following before starting to code:
- A blog has a maximum limit of 100,000 posts. The size limit of a single blog post is 400KB.
- A post can be assigned to a maximum of 10 categories.
- With Pricing Plans, exclusive blog content can only be accessed by readers with a subscription.
- With Wix Multilingual, a blog can be translated into multiple languages. The
translationIdis only returned in a post object if the Multilingual app is installed.
The following diagram shows the full Blog post publishing flow.
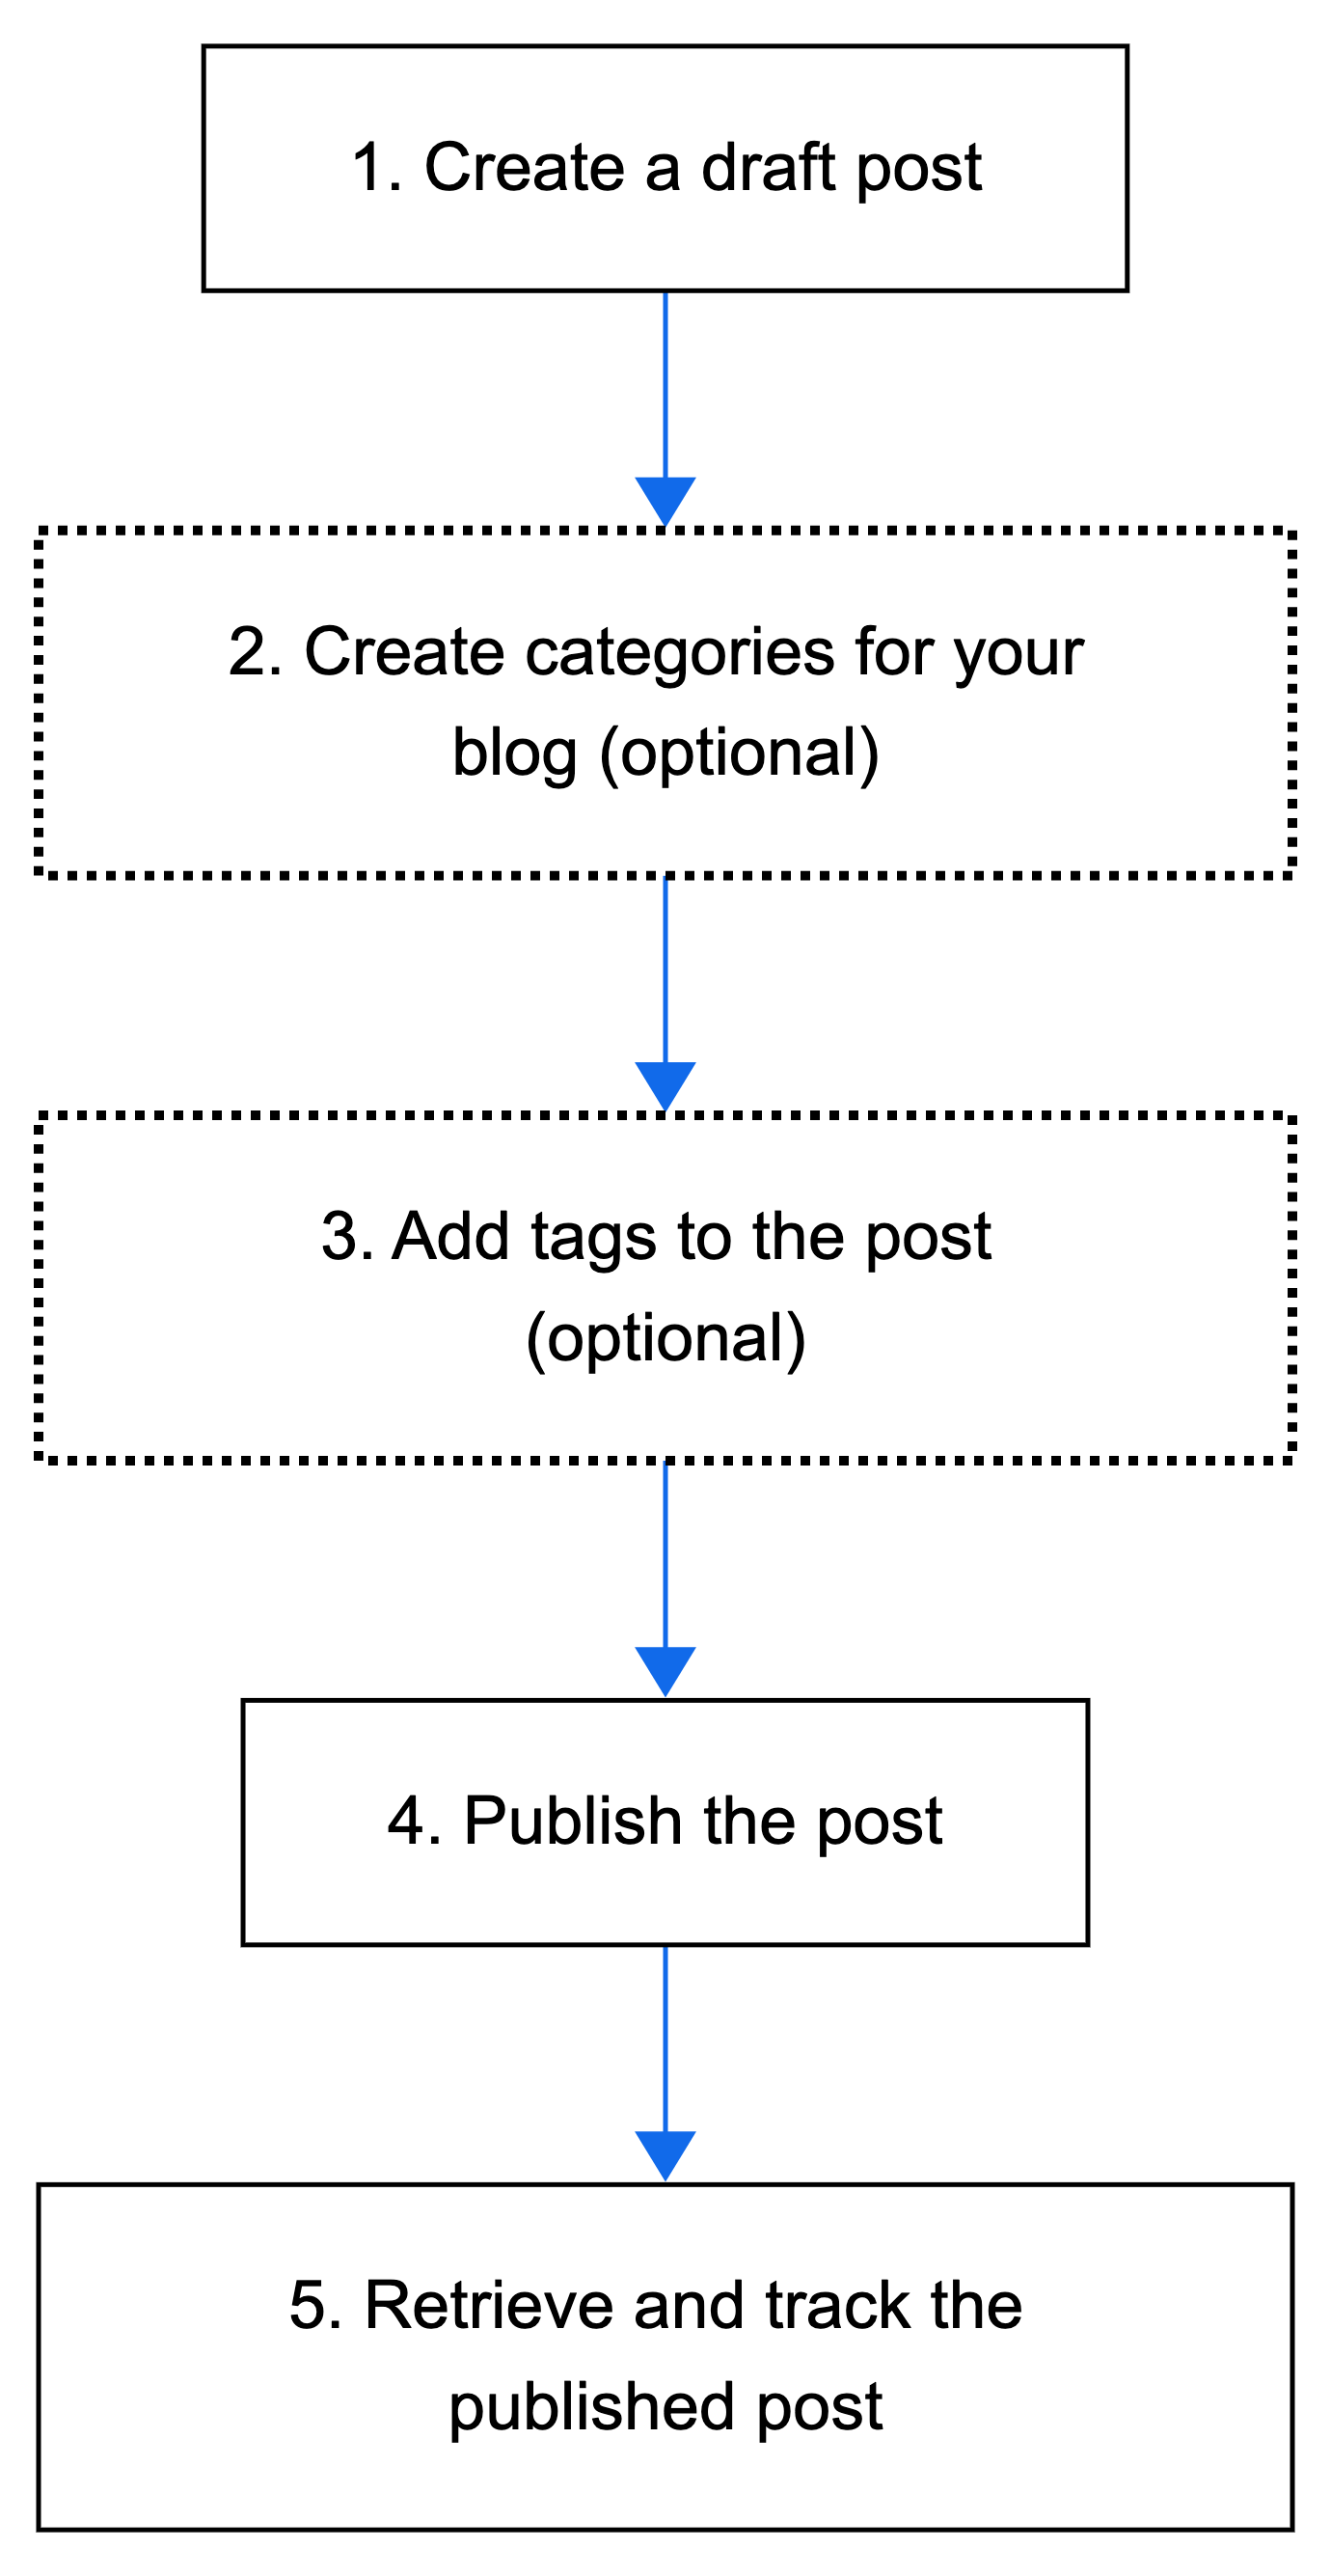
The following steps describe the complete flow for creating and publishing a blog post with categories and tags.
Step 1 | Create a draft post
Create a new blog post in draft status with the essential post details.
Action: Call Create Draft Post to create a new blog post in draft status. Include the post title, content, and other relevant details in the request body.
Tip:
Set post.featured to true to mark the post as featured and make it stand out on your blog.
Result: Creates a draft post with a unique ID.
Step 2 | Create categories for your blog (optional)
Create categories to help organize your blog posts. Categories allow you to group similar posts together and display different types of content on different pages.
Action: Call Create Category to create categories for organizing blog posts. Call Update Draft Post to assign the categories in the draftPost.categoryIds array.
Step 3 | Add tags to the post (optional)
Add tags to provide additional ways to filter and organize your blog content.
Action: Call Create Tag to create a tag. Call Update Draft Post and include tag labels in the draftPost.tagIds array.
Result: Adds tags to the post.
Step 4 | Publish the post
When ready, publish the post to make it available on your blog.
Action: Call Publish Draft Post to make the post live.
Result: Publishes the post. It's now visible to site visitors based on your blog's settings and any subscription restrictions.
Step 5 | Retrieve and track the published post
After publishing, you can retrieve the post to verify it's live or track its performance metrics.
Action: Call Get Post to retrieve the published post details, or call Get Post Metrics to track engagement metrics such as views, likes, and comments.
Result: Retrieves the published post or its performance metrics. The flow is complete.
See also
Last updated: 12 January 2026