Wix eCommerce (Checkout & Orders): Thank You Page
The following slots and APIs are available when building a site plugin for the Thank you page.
Important: Some plugins may not support automatic addition upon installation, even with autoAddToSite enabled. In that case, you must:
- Create a dashboard page to manage your site plugin that calls Add Site Plugin to let Wix users add the plugin to a Thank you page slot.
- Release at least 1 version of your app so the site plugin extension is registered with Wix for
addSitePlugin()to work properly.
Slots
The following image shows slots in the Thank you page, into which Wix users can add plugins.
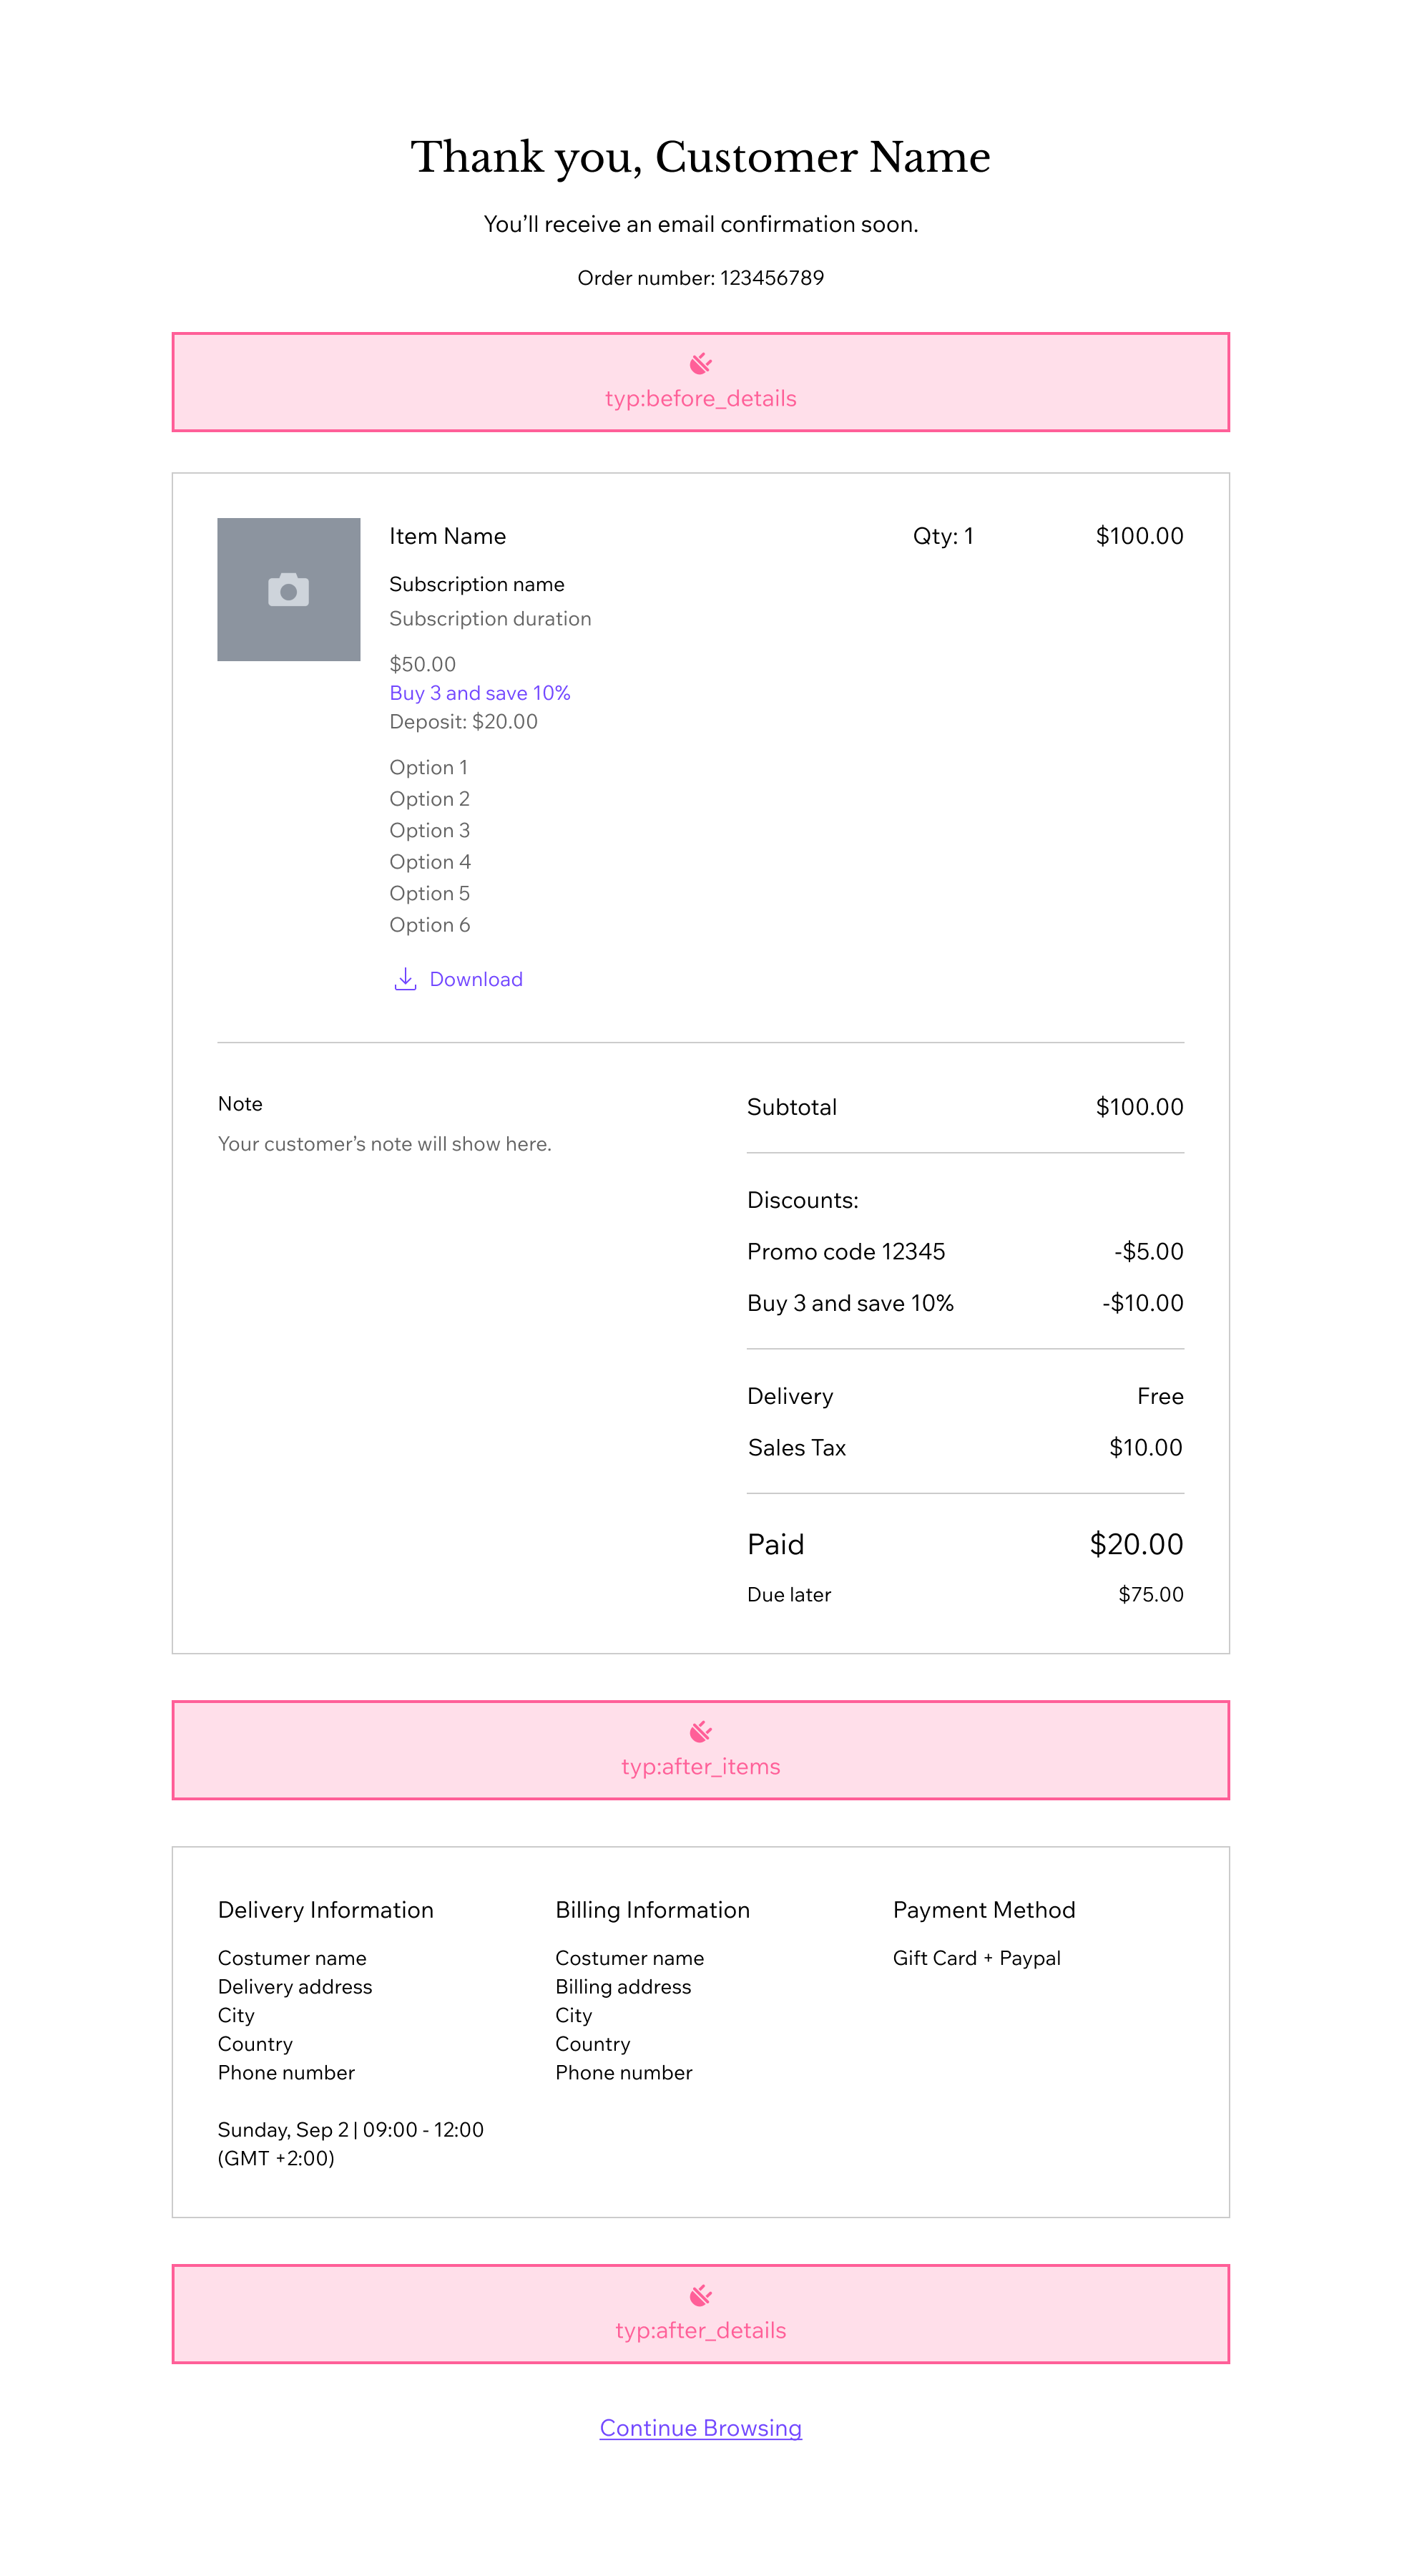
The slots are represented by the following placement object:
Provide the following values for each property:
| Key | Value |
|---|---|
appDefinitionId | "1380b703-ce81-ff05-f115-39571d94dfcd" |
widgetId | "1380bbb4-8df0-fd38-a235-88821cf3f8a4" |
slotId | ID of the slot you want as displayed in the image above. Supported values:
|
For example, for your widget to appear between the order summary and the shipping, billing, and payment information, use the following object in your configuration:
Thank you page plugin API
The Thank you page passes props to your plugin. Use them to call related Wix backend APIs. The plugin exposes the following props:
| Name | Type | Description |
|---|---|---|
orderId | String | Order ID. |
Code example
The following example implements a CLI Site Plugin and accesses the orderId prop.
Related Wix backend APIs
Thank you page plugins integrate with the Wix eCommerce Orders APIs, as well as other backend APIs.
In your site plugin or in your app's server code, you can perform actions or implement logic that's dependent on the current order or related catalog data.
The following Wix APIs may be useful:
Design guidelines
When you create a Thank you page plugin, we recommend the following content and layout guidelines.
Content guidelines
- The Thank you page is part of the post-purchase confirmation flow. Keep plugin content concise and secondary to the order confirmation details.
- Avoid duplicating the page's built-in order summary, totals, shipping, billing, or payment sections unless your plugin adds distinct value.
Layout guidelines
- The page layout provides
32pxspacing between sections and plugins. Don't add large outer margins around your plugin. - All slot placeholders are designed at
70pxheight. - Design for compact content and responsive behavior on smaller screens.
- Use the Thank you page design spec (Figma) for reference styles and layout.
Last updated: 29 April 2026