Flow: RSVP Event Setup
This article outlines the end-to-end flow for RSVP events using the Events V3 and RSVP V2 APIs, from initial event configuration through guest registration and RSVP creation.
RSVP events are free events where guests confirm their attendance without purchasing tickets. For events that require payment and ticket purchases, see the Ticketing Event Setup flow.
Note: On Wix sites, RSVP creation can be managed by the Wix Events & Tickets app.
Before you begin
It's important to note the following before starting to code:
- The RSVP options can be set to "Yes only" or "Yes and No."
- Limiting the number of guests is optional. Once the guest list is full, registration closes unless the waitlist feature is enabled.
RSVP event setup flow
The following diagram shows the full RSVP event setup flow.
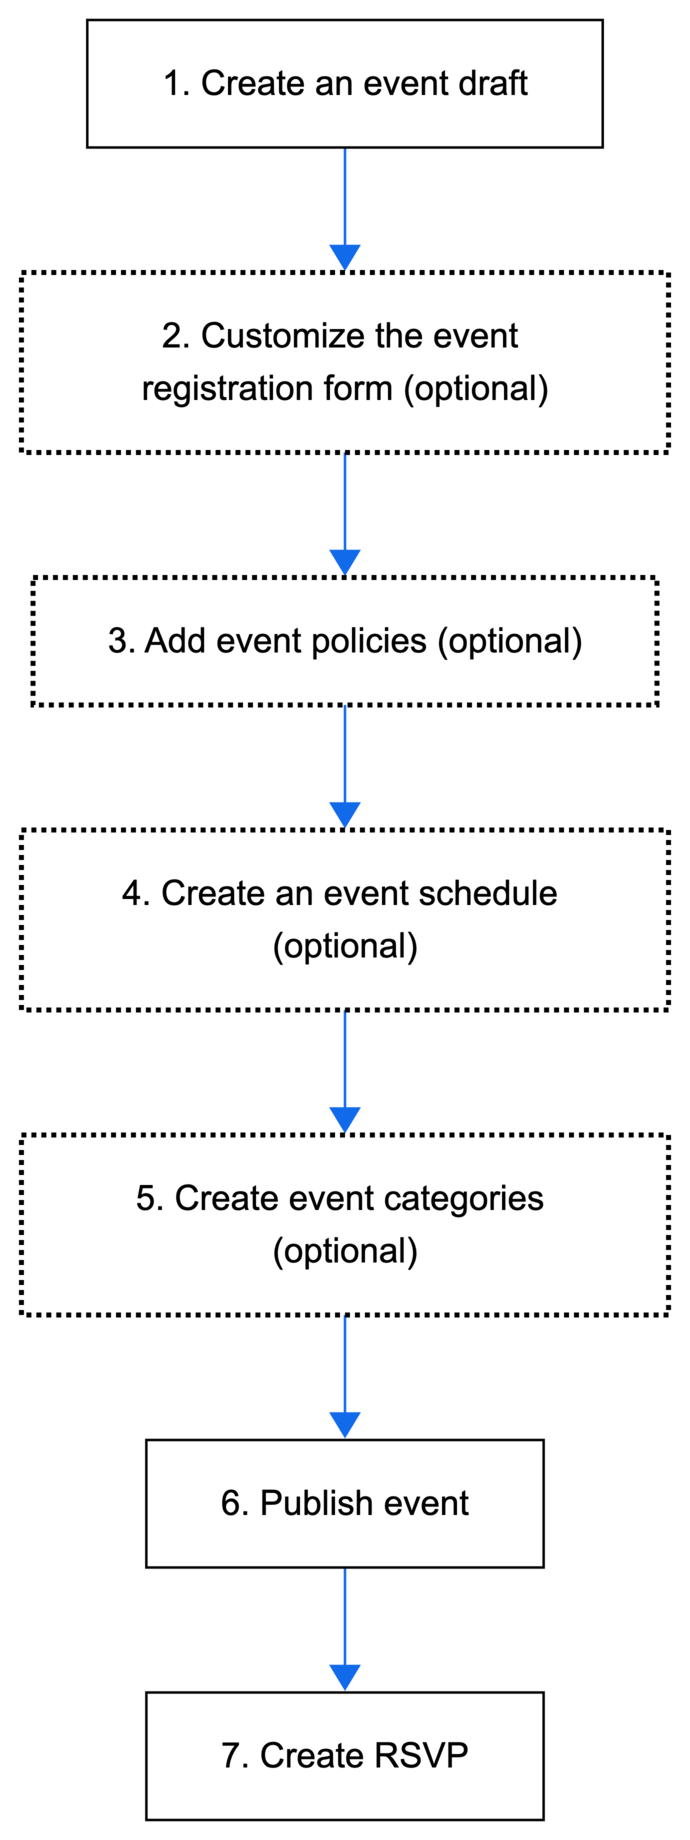
The following steps describe the complete setup flow for configuring an RSVP event from creating a draft event through receiving an RSVP.
Step 1 | Create an event draft
Begin by adding the essential RSVP event details and saving the event as a draft.
Action: Call Create Event and set initialType to RSVP. Enter RSVP-specific event details into the registration.rsvp object.
Tip:
- To save time when holding the same type of event repeatedly, create a recurring event.
- If you want to duplicate an existing draft, call Clone Event to create a new event with the same settings and details.
Result: Creates an event with unique ID in a form of a draft.
Step 2 | Customize the event registration form (optional)
When guests join an event, they complete a registration form to provide essential details. You can customize the form to gather preferences, handle special requests, or allow guests to bring additional attendees. First name, last name, and email are required fields on the registration form. It's not possible to remove them.
Action: Use the Form API to update the registration form.
Result: Customizes an event registration form.
Step 3 | Add event policies (optional)
You can add a policy checkbox that guests see when they complete their registration form. Guests must agree to the policies to register for an event.
Action: Call Create Policy.
Result: Creates a policy linked to a specific event.
Step 4 | Create an event schedule (optional)
Let guests know what's happening at an event by creating an event schedule.
Action: Call Update Event and set event.agendaSettings.enabled to true. Call Add Schedule Item.
Result: Adds a schedule for the event.
Step 5 | Create event categories (optional)
Create categories for your events to keep them organized. This also allows you to display different types of events on different site pages.
Action: Call Create Category, or create multiple categories with Bulk Create Category. Call Assign Events to assign the event to a category.
Result: Creates a category for events.
Step 6 | Publish event
When ready, publish the event.
Action: Call Publish Draft Event.
Result: Publishes an event. It's now available to be displayed on a site.
Step 8 | Create RSVP
Create an RSVP when a guest submits a registration form.
Action: Call Create RSVP and pass the saved regsitration form values.
Result: Creates an RSVP. The flow is complete.
Results
After implementing this flow, guests can RSVP to an event.
See also
Last updated: 12 January 2026