Displaying Action Quotas
As an action provider, you can enforce limits on the number of times a Wix user uses an action. For example, you can limit the number of messages a user can send per billing cycle.
You can enforce different quotas on specific features of the app, depending on the user. For example, your app might have a basic plan that allows a Wix user to send 500 emails a month, and a premium plan that lets a Wix user send unlimited emails.
Terminology
- Quota: A limit on the number of times a Wix user can perform an action.
- Plan: Allows you to set different quotas for different users.
Creating and enforcing quotas
You are responsible for enforcing quotas for features used by your actions. If the features provided by your service have quotas you can implement the Get Quota Info method so that Wix can display your quotas in the user's site dashboard.
Wix displays the quotas in the Manage your automations quotas modal. This modal opens when Wix users click the Manage Your Quotas button on the Automations page in the dashboard.
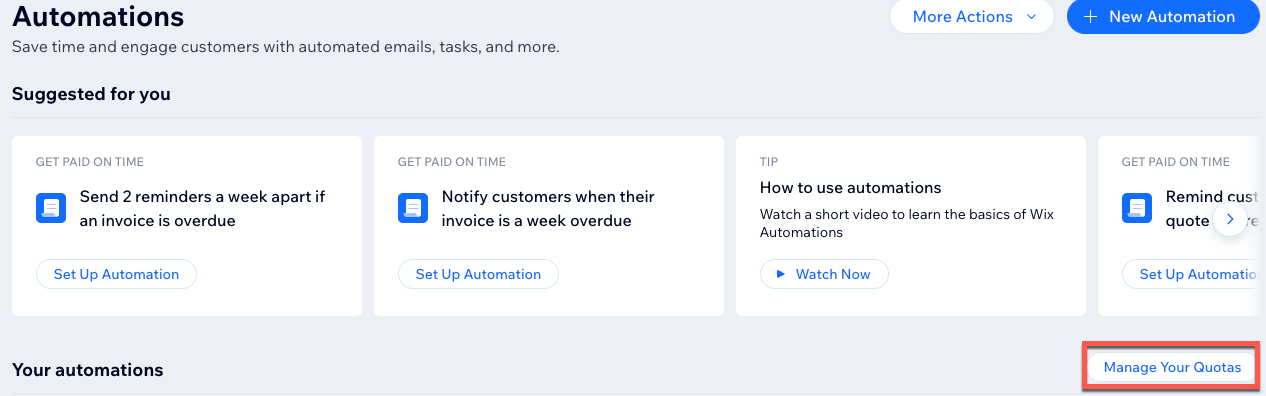
The modal lists the quotas for all the features used by the site's automations. The list is organized by the apps providing the features.
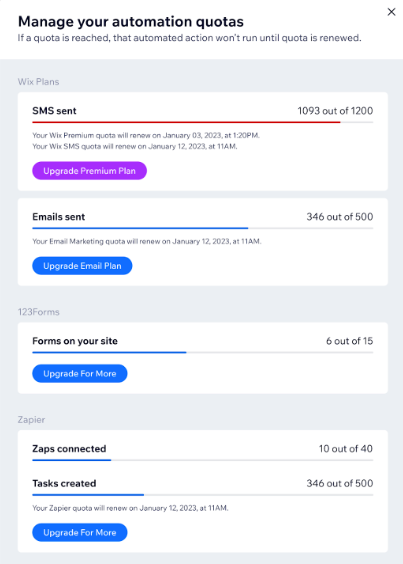
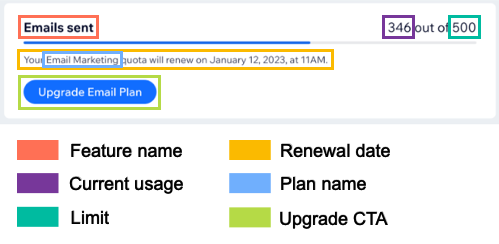
You can define the different elements of each quota display in the responses from your Get Quota Info method. In general, each quota display includes a plan, and the plan features associated with it. The current usage and limit for each feature is displayed.
One plan with one feature
To display one plan with a single feature quota, include the plan and quota data in the same quotaInfo object in your method’s response.
Sample response body:
The resulting quota display looks like this:

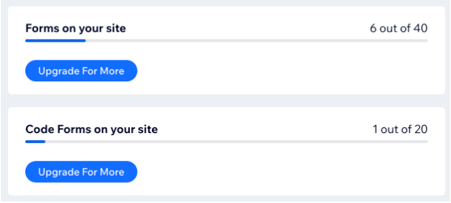
One plan with two features
To display one plan with a single feature quota, include the plan and quota data in the same quotaInfo object in your method’s response.
Sample response body:
The resulting quota display should look something like this:
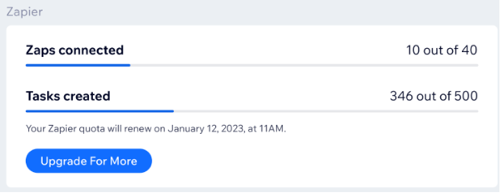
Two plans with different features
To display two different plans with different features that are both being used by your action service, include two quotaInfo objects in your response body.
Sample response body:
The resulting quota display looks like this:
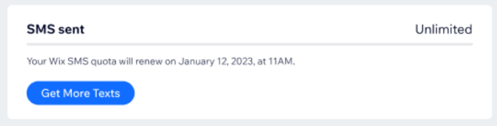
Unlimited plans
If your service supports a plan where features are unlimited, you can still display the Wix user’s current usage. To do this, provide a quotaInfo object with the relevant plan details. Include the feature’s name and current usage, but not a usage limit.
Sample response body:
The resulting quota display should look like this:
User hasn't purchased a plan
If your service enforces a quota on a feature that a Wix user hasn’t paid for, you can display this in the dashboard. This lets the user know that your action isn’t running when their automation is triggered. To display this, set both the current usage and limit for the feature to 0 in the relevant quotaInfo object in your response body.
Sample response body:
Quota descriptions
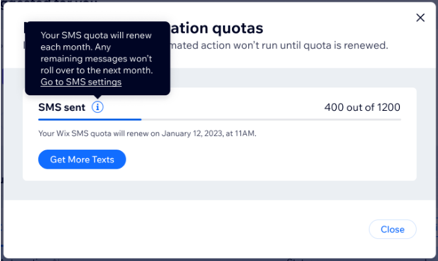
You can define a tooltip that provides more details about a feature quota. To display the tooltip, add an additionalInfo object together with the feature details.
Sample response body:
You should now see a message when you hover over the tooltip icon: